

Last updated: October 21, 2026
Quick Answer: How to blend repaired sod into the rest of the lawn usually takes one careful trim, a thin topdressing, and one matching mow. The goal is a flush repair that reads as one lawn, not a separate patch.
Key Takeaways
- Sharp tools and screened topdressing help the repair disappear.
- Order matters more than force or heavy soil.
- Feather the edge; do not build a ridge.
- Keep mowing height, blade sharpness, and fertilizer use consistent.
A repaired sod area blends in when the edge is trimmed cleanly, the height matches the surrounding turf, and the surface is finished with a light topdressing instead of a heavy mound. This guide covers how to blend repaired sod into the rest of the lawn without changing the repair itself. The point is not to camouflage the patch with tricks; it is to make the transition look like one lawn, not a square of new grass sitting on top of older grass.
What you need before you start
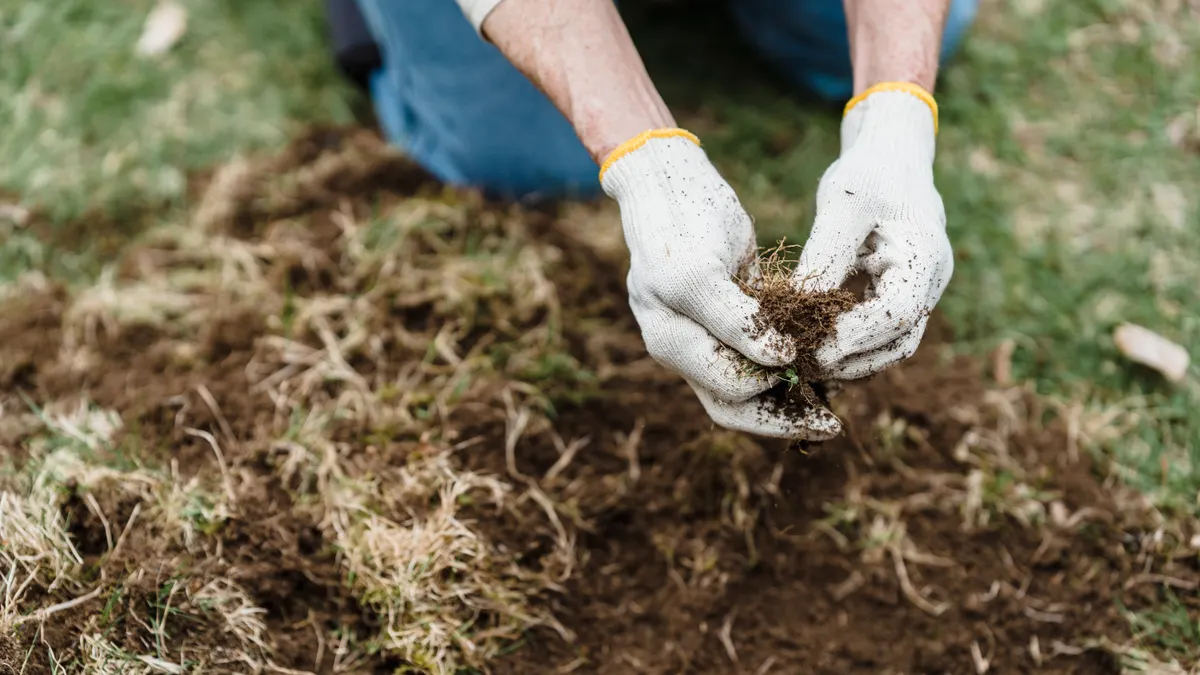
You need a sharp rake, a lawn mower, a flat-edged spade or sod cutter, and a screened topdressing soil that matches your lawn type. A 2- to 4-foot straightedge helps if you are checking height, and a hand trowel or stiff broom helps with cleanup. Wait until the repaired sod area is firm enough to walk on without shifting before you start finish work.
Three things matter most: edge shape, surface height, and blade height after mowing. Most bad blends come from trying to solve a visual problem with too much soil or too much cutting. The repair should sit flush with the surrounding lawn, not proud of it, and it should not be buried under a thick layer of topdressing.
This is the moment to think about appearance only. It is not the place to solve missing roots, dead turf, or gaps between pieces. Fix structural problems on the repair page first, then come back to the finish work. For broader lawn care, see lawn care basics and soil preparation.
How do you blend repaired sod into the surrounding lawn?
Blend repaired sod into the surrounding lawn by trimming the perimeter, leveling the surface, lightly topdressing the transition, and mowing across the area with the mower set to match the rest of the lawn. The process is simple; the sequence is not.
-
Trim the repaired edge to a clean line.
Use a sod cutter or a sharp spade to square off ragged edges and remove any overhanging strips. A clean edge can help the patch read as one lawn, but if the cut looks uneven or the area is large, consult a professional. According to University of Massachusetts Extension, clean, even edging helps turf establish and reduces visual disruption. Done well, the border looks deliberate instead of torn. -
Check the height against the rest of the lawn.
Set a straightedge across the repair and the neighboring turf. The repaired sod should sit level with the lawn, or just a hair low, not above it. A ridge you can feel with your hand usually shows from standing height too. The target is a smooth plane, not a visible lip. -
Remove high spots before adding anything.
When the repair is proud, lift the edge slightly and remove excess soil beneath it rather than burying the whole area. A high patch catches mower blades and looks out of place after the next rain. Once this is corrected, your shoe should move across the transition without a toe-catching bump. -
Brush in a thin layer of topdressing soil.
Spread screened topdressing soil only where the sod meets the old lawn and only in a thin veil, usually just enough to fill tiny hollows. Rake or broom it so grass blades stay exposed. If the soil disappears into the canopy instead of covering it, you have enough. If blades are buried, you have too much. -
Match the blade height to the surrounding turf.
Set the lawn mower to the same cutting height already used on the rest of the lawn, then take only the top growth off the patch and the adjacent grass. Mowing both areas together is what makes the color and texture read as one surface. A patch cut too short will flash pale; a patch left too tall will flare darker and coarser. -
Mow in a direction that crosses the repair.
Make at least one pass perpendicular to the patch edge, not only along it. Cross-cutting softens the outline because the tire tracks and cut pattern run through the transition instead of around it. When it works, the eye stops reading the repair as a separate shape. -
Water lightly if the topdressing settled dry.
Use a light watering to settle the topdressing soil and remove loose dust, but do not wash soil out of place. You want the surface to knit, not slump. After watering, the transition should look slightly tighter and less powdery, not muddy.
Small repairs can fit into one short session. Large ones need more patience. Step back after each pass and check the patch in different light. Morning and late-afternoon sun reveal edges that midday light hides.
How to make the edges disappear without burying the patch
You make the edges disappear by tapering them, not by piling soil against them. The most visible flaw after a sod repair is a hard ring where the old lawn ends and the new piece begins. That ring usually comes from one of two mistakes: a blunt cut or a thick topdressing ridge.
Start with the edge itself. If the repaired sod was cut with a sod cutter, the line may be crisp but obvious. If it was cut with a spade, the line may be uneven but soft. Either way, the goal is to create a transition zone about 2 to 4 inches wide where the grass height and soil height gradually meet. That zone does the visual work. A straight, vertical edge tends to show after every mow.
Use a rake to pull a very small amount of topdressing soil from the higher side toward the lower side. The layer should be thin enough that grass blades still poke through. If you can write your initials in the soil, it is too deep. A light dusting hides micro-steps without creating a new mound.
This is also the time to remove stray clods, roots, and clipped blades. Debris throws shadows, and shadows make a patch stand out. A stiff broom or hand rake works better than a deep leaf rake because it smooths without lifting the sod. If the repair is near a walkway or curb, feather the edge into the hard surface with the same light soil, then sweep the boundary clean so the line looks intentional.
A common mistake is to topdress the whole patch equally because it feels safer. That usually makes the center look buried and the edges look worse. Another mistake is to leave the edge sharp because the turf “will fill in.” It may fill in later, but for now you are trying to erase the repair visually, not announce it.
If you want to compare this finish work with the broader care sequence, the hub on sod aftercare, maintenance, and troubleshooting is the right place to go after this page.
Matching color and texture so the repair does not flash
You match color and texture by mowing at the same height, keeping the blades sharp, and avoiding overfertilizing the patch. Newer sod often reflects light differently from older turf, so the human eye notices it fast. The fix is usually more about consistency than disguise.
A dull mower blade tears grass tips, and torn tips can look gray or straw-colored for days. A sharp blade leaves a cleaner cut, which matters most on a repaired sod area because the eye already wants to separate it from the rest of the lawn. If the rest of the lawn has a fine texture and the patch was laid from a slightly different cultivar or cut pattern, the difference may still show for a while. That is normal.
Color mismatch is often strongest right after repair because the new pieces still hold more moisture than the surrounding lawn. Darker patches should not be forced toward the old lawn’s color with heavy water or extra fertilizer. That can create an even more obvious difference in growth rate. Keep the entire lawn on the same routine, then let the patch age into the rest of the turf over time.
One helpful trick is to mow the area when the grass is dry enough to cut cleanly but not stressed. Wet turf makes clippings cling to the repair and leaves it patchy. Drought stress can make the repaired section show tire marks or pale tips more readily. A dry, mild day often works well, but avoid making the weather the main decision if the turf is stressed. Grass under pressure gets weird fast.
Avoid the temptation to dress the repair with decorative ground cover or colored mulch if the goal is to blend it into a lawn. That turns a turf repair into a landscape feature. If the job is to disappear, the finish should look like turf, soil, and blade cut, nothing else. For more on keeping growth even, see lawn mowing tips and fertilizer guide.
Mowing transitions: the last step that ties it together
Mowing the transition is what turns a decent repair into one that reads as part of the lawn. The mower is not just trimming grass here; it is leveling the visual field. If the repaired sod still shows a line after the finish work, the mower pass is usually the final fix.
Set the mower to the same cutting height used across the rest of the yard and use a single, deliberate pass over the repair and the surrounding 12 to 18 inches of lawn. That wider pass matters because it blends the cut pattern across the seam. If you only mow the patch itself, the border can still look boxed in.
Do not scalp the repair to make it “catch up.” Cutting too low exposes soil, slows recovery in appearance, and makes the patched section look lighter than the established lawn. A slightly taller cut is easier to blend than a stressed, shaved one. If the mower has a mulching setting, use it only if it leaves a clean finish and does not dump clumps over the repair.
After the first mow, look at the area from three angles: straight on, from the side, and from a window or porch if you have one. Repairs often vanish from one angle and announce themselves from another. What you want to see is no hard edge, no ridge, and no change in mowing pattern that isolates the patch.
If the line still shows, do not keep mowing it shorter. Instead, wait for the next growth cycle and repeat a light topdressing and a full-width mow. The repair usually becomes less visible as the surrounding turf grows into the transition and the color evens out. For timing, University of California Agriculture and Natural Resources notes that turf recovery depends heavily on active growth and even maintenance.
Common mistakes that make a repaired sod area stand out
The biggest mistake is leaving the repair proud of the lawn by even a small amount. A raised patch catches light and mower wheels, which makes it obvious every time someone crosses the yard. The fix is to lower the base or trim the high edge before you try to hide anything.
A second mistake is using too much topdressing soil. Heavy topdressing can smother grass blades, dull color, and create a broad, artificial-looking halo. Use enough to fill tiny lows and soften the border, not enough to change the grade of the lawn. If the repair looks “finished” from 20 feet away because it is buried in soil, it is usually overdone.
A third mistake is mowing at a different height than the rest of the lawn. Even a 1/2-inch difference can change how the light hits the turf. The patch then looks thicker, thinner, brighter, or darker than the rest of the yard. Match the mower setting first, then judge the repair.
A fourth mistake is letting clippings sit on the transition. Wet grass clumps dry into pale mats and make the edge stand out for days. If clippings pile up, rake them off with a light hand or make another pass with the mower. Clean blades and a clean surface do more for blending than any cosmetic trick.
Finally, do not try to force an instant result. A repaired sod area often needs a few mowings before it stops looking new. That is a visual trade-off, not a failure. If the edge is level, the topdressing is thin, and the mow height matches, the repair will usually soften on its own.
How do you make a sod patch less visible?
Flatten the transition. Match the mowing height. Use only a thin layer of topdressing soil. The patch should sit flush with the lawn and be mowed with the same setting as the surrounding turf. Clean edges and sharp mower blades help the repair read as one continuous surface instead of a separate square.
Should repaired sod be cut to match the lawn edge?
Yes, repaired sod should usually be trimmed to match the lawn edge rather than left with a ragged outline. A sod cutter or sharp spade creates a cleaner boundary, which makes the finish work easier. A neat edge also helps the transition blend under a mower blade instead of showing as a torn border.
How long until patch repairs blend in?
Patch repairs usually look less obvious after a few mowings, but the exact timing depends on growth, light, and how well the edge was finished. A level repair with matching height and light topdressing blends faster than one with a ridge or color contrast. The key is consistency across the repair and the surrounding lawn, not a quick cosmetic fix.
Drafted with AI; not yet reviewed by a person.