Blog

  • Warm-Season vs Cool-Season Sod: Which One Fits Your Region?

    Warm-Season vs Cool-Season Sod: Which One Fits Your Region?

    Last updated: September 10, 2026

    Key Takeaways

    • Here is the practical difference: in places with long stretches above about 85°F and mild winters, warm-season sod usually makes more sense.
    • For USDA Zones 7 through 10, warm-season sod is usually the first place I would look.
    • Warm-season grasses are made for summer performance.
    • Put a warm-season grass into a cold region, and it may spend too much of the year dormant or damaged.

    Warm-season vs cool-season sod is the question to ask first; the hot-summer answer is warm-season sod, while cool-season sod fits better where winters stay long and cold. I keep seeing the same mistake: people pick grass from a catalog photo instead of from what their climate will allow it to do for 8 or 9 months of the year. Pretty expensive guesswork.

    I write about turf selection, installation, and lawn establishment across USDA climate zones, and temperature is still the biggest filter: when the grass grows hardest, when it slows down, and how much weather stress it can take.

    Want the blunt version? Choose the grass type that matches your region first, then narrow by sun, shade, and how much maintenance you can tolerate.

    The real difference is growth timing, not just color
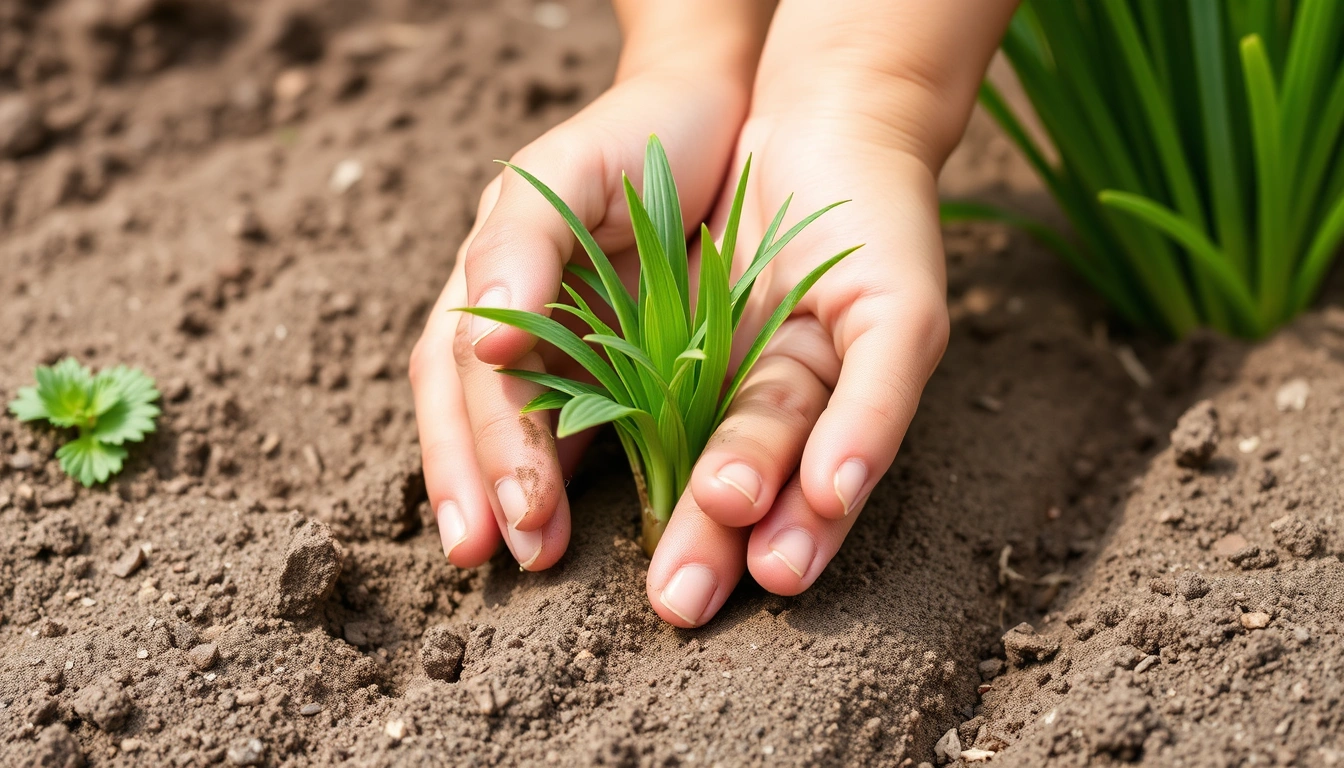
    Warm-season vs cool-season sod: which is right for your region?

    Warm-season vs cool-season sod comes down to growth timing, not just color. Warm-season sod wins in hot regions because it grows when soil temperatures are high and goes dormant when cold arrives. Cool-season sod wins in cooler regions because it stays active through spring and fall and can handle winter better. Blade texture and green shade matter less than that timing.

    Warm-season grasses are made for summer performance. Common sod types include bermudagrass, zoysiagrass, St. Augustinegrass, and centipedegrass. They usually green up later in spring and shut down earlier in fall. In many places, that means a brown dormant lawn for part of the year. Not a failure. Just the plant doing what it does.

    By contrast, cool-season grasses such as Kentucky bluegrass, perennial ryegrass, tall fescue, and fine fescue do the opposite. They stay more active in cool weather, often look best in spring and fall, and can stumble when heat and drought pile up. In the transition zone, where summers are too hot for classic cool-season lawns and winters are too cold for many warm-season choices, the whole thing gets messy fast.

    Here is the practical difference: if your area sees long stretches above about 85°F and mild winters, warm-season sod usually makes more sense. If your lawn has real winters and frequent freezing, cool-season sod is the safer long-term bet. The National Turfgrass Evaluation Program and university extension recommendations consistently reflect that split by region, not by taste.

    A generic article gets this wrong by pretending all sod is interchangeable if you water enough. Water helps, sure. But it does not turn one grass into another. A warm-season grass in a cold region may spend too much of the year dormant or damaged. A cool-season grass in a hot, humid region may need constant help just to survive July and August.

    Which sod fits your region?

    Warm-season vs cool-season sod is usually decided by region first. Warm-season sod is the correct choice for the South, Gulf Coast, lower Sun Belt, and much of the arid Southwest; cool-season sod is the better match for the Northeast, Upper Midwest, Pacific Northwest, and other areas with sustained cool weather. That regional split is the cleanest way to decide before you ever look at cultivar names.

    For USDA Zones 7 through 10, warm-season sod is usually the first place I would look. That includes much of Texas, Florida, Louisiana, Georgia, the Carolinas, southern California, and similar climates. Bermudagrass and zoysiagrass are common choices where summer heat is a bigger problem than winter cold. St. Augustinegrass is often used in warm, humid coastal areas where shade tolerance matters more.

    For Zones 3 through 6, cool-season sod is generally the better answer. Tall fescue is a common workhorse because it handles a wider range of conditions than Kentucky bluegrass alone, and it is often a better fit for home lawns with mixed sun and some summer stress. Kentucky bluegrass can look excellent where summers are moderate and irrigation is reliable, but it usually wants more input than tall fescue. Fine fescues fit shadier, cooler spots.

    The middle belt, especially Zones 6 and 7, is where people get into trouble. That is the transition zone, and no grass there is perfect. Warm-season sod can be damaged by harsh winters or late frosts. Cool-season sod can thin out in heat and drought. In that zone, I would choose based on which stress is worse in your yard: summer heat or winter cold. If summer is the real problem, lean warm-season. If winter is the bigger threat, lean cool-season.

    Do not ignore microclimate. A south-facing slope, reflected heat from pavement, or a yard with full sun all day behaves warmer than the zip code suggests. A shady yard under mature trees behaves cooler. Those details can matter as much as the state line.

    How do I know if my yard is too hot or too cold for one type?
    Warm-season vs cool-season sod: which is right for your region?

    Your lawn is too hot for most cool-season sod if it gets long stretches of afternoon sun, reflected heat from walls or driveways, and summer drought pressure. It is too cold for many warm-season sods if winter injury, frost, or long dormancy are routine. That is the simplest field test.

    If your yard bakes from noon to sunset and your summer highs stay in the 90s °F for weeks, cool-season sod will ask for a lot: irrigation, careful mowing, and patience when it thins. Tall fescue is the most forgiving cool-season option in many of those settings, but it still has limits. Kentucky bluegrass usually wants even more favorable conditions. Brutal, really.

    When hard freezes and frozen soil show up for weeks every winter, warm-season sod gets risky unless you are in a milder edge zone. Bermuda can be surprisingly resilient in the right climate, but it still goes dormant and can suffer winter injury farther north. Zoysia tolerates more cold than bermuda, but establishment is slower. St. Augustine is not the answer where winter cold is a real annual event.

    Shade is another major filter. Cool-season grasses, especially fine fescues and some tall fescues, usually do better in moderate shade than most warm-season lawns. St. Augustinegrass is the warm-season exception people often consider for shade, but even it needs enough sun to stay dense. Heavy shade is often a sign to stop choosing between sod types and start thinking about a groundcover, mulch, or tree pruning.

    This is also where irrigation reality matters. If your yard depends on a strict watering schedule to keep one grass alive in a climate that does not suit it, that is not a good fit. The right sod should fit your region with normal care, not a rescue plan.

    The honest side-by-side

    Warm-season vs cool-season sod breaks down clearly: warm-season sod wins on summer heat tolerance and drought efficiency in hot climates; cool-season sod wins on cold-weather performance and spring/fall color in cooler regions. The best choice depends on which stress your lawn faces most often.

    Criteria Warm-Season Sod Cool-Season Sod Winner for [condition]
    Summer heat tolerance Usually stronger in prolonged heat Often declines when temperatures stay high Hot-summer regions: warm-season
    Winter color and activity Often goes dormant and turns brown Stays active longer in cool weather Cold regions: cool-season
    Cold tolerance Varies by species; many are limited by frost Generally better for freezing winters Freezing winters: cool-season
    Drought efficiency in hot climates Often better once established Usually needs more support in heat Dry, hot summers: warm-season
    Shade tolerance Limited, with some exceptions Usually better, especially fine fescues Tree shade: cool-season
    Spring green-up Later, when soil warms Earlier, when temperatures rise Early spring color: cool-season
    Establishment speed Often quick in warm weather, species-dependent Can establish well in cool weather, also species-dependent Depends on planting window
    Transition-zone reliability Can struggle in severe winters Can struggle in severe summers Depends on your worst season
    Maintenance style Lower summer mowing in some species, but dormant season brown is normal More year-round color, but often more summer support Low winter concern: warm-season; low summer concern: cool-season

    The table makes one thing plain: there is no universal winner. Only the better match for your climate and your tolerance for seasonal browning.

    Warm-season sod: who should actually choose it?

    Warm-season sod wins for people in hot climates who want a lawn that thrives when the thermometer climbs. If your region spends a lot of the year in serious heat, this is usually the smarter long-term choice.

    I would point most homeowners toward warm-season sod if they live in zones where summer heat is relentless, irrigation is limited, and the lawn gets full sun. Bermudagrass is the classic sun-and-heat specialist. Zoysiagrass is often chosen for a denser, more refined look, though it can establish slowly. St. Augustinegrass is often the better warm-season option for warmer coastal yards with some shade. Centipedegrass appeals to homeowners who want lower fertility demands, but it is not a fix for every yard.

    Seasonal fit is the strength here. Warm-season grasses are made to be active when the soil is warm, so they usually recover from summer stress better than cool-season lawns. In many hot regions, that means less fighting and more consistency across the months that matter most. University extension publications from southern states repeatedly steer homeowners in this direction for exactly that reason. The U.S. Environmental Protection Agency also notes that landscape water use is a major part of outdoor demand, which makes climate-matched turf especially relevant in hotter areas.

    The downside is equally clear: winter dormancy. A warm-season lawn can look dead for several months, even when it is alive underneath. That brown stretch is not a great fit for people who want year-round green. Some species also dislike shade, and several need careful mowing or can spread aggressively into beds. Bermuda, in particular, is not a good choice if you want a tidy, low-edging lawn that stays put.

    Warm-season sod is not the right answer for cold, shaded, or short-season regions. If your yard gets freezing winters and limited summer heat, I would not choose it just to avoid a little fall color loss.

    Cool-season sod: when it is the better buy

    Cool-season sod wins where winters are real and summer heat is manageable or brief. Want a lawn that starts growing early in spring, holds color longer into fall, and stands up to freezing temperatures? Then this is the direction I would take.

    Tall fescue is the first cool-season grass I would consider for many home lawns because it gives a useful blend of heat tolerance, drought tolerance, and durability. It is not perfect, but it is often the least fussy answer for the broad middle of the country and for yards that do not have pristine irrigation. Kentucky bluegrass has a finer look and can spread to heal minor damage, but it usually asks for more water and more favorable weather. Perennial ryegrass germinates quickly and can be part of a blend, though it is not always the most durable solo choice. Fine fescues are useful in shade and lower-input settings. The University of Minnesota Extension and Penn State Extension both recommend grass selection based on site conditions, especially sun, shade, and heat exposure.

    The advantage shows up in shoulder seasons. Cool-season sod often looks best in spring and fall, when warm-season turf is either waking up or winding down. In colder climates, that longer green window matters. It also gives you a better chance of surviving winter without the annual brown-down that warm-season lawns accept as normal.

    Heat is the weakness. In hot, humid, or drought-prone climates, cool-season sod can thin, scorch, or invite disease pressure if care slips. Some varieties also need more regular mowing and irrigation to stay at their best. If you live where July and August routinely punish lawns, cool-season sod can become a maintenance project instead of a solution.

    I would not choose cool-season sod for a full-sun yard in a truly hot region unless you are prepared for water use and summer decline. That is a poor trade for many homeowners.

    Exception scenarios where I would flip the verdict

    Warm-season sod wins most often in warm regions, but I would flip that call in four situations. First, if your yard is heavily shaded, cool-season sod usually has the edge, especially fine fescue or a shade-tolerant tall fescue blend. Second, if you live in the transition zone and your biggest enemy is winter cold, not summer heat, I would lean cool-season. Third, if you want green coverage in shoulder seasons and can irrigate through summer, cool-season sod gives better year-round appearance. Fourth, if you have a very specific warm-season use case like an athletic field in full sun with strong summer stress, bermudagrass may outperform almost anything else.

    There are also cases where neither type is the right answer. Deep shade, poor drainage, salty coastal exposure, and high-traffic play areas can all break the usual warm-versus-cool decision. Sometimes the correct answer is a different groundcover, a drainage fix, or a mixed landscape design rather than a different grass species. For drainage problems, start by looking at the lawn as a site issue, not just a turf choice.

    That is the part generic articles usually skip: sod choice is not just about surviving. It is about surviving without constant correction.
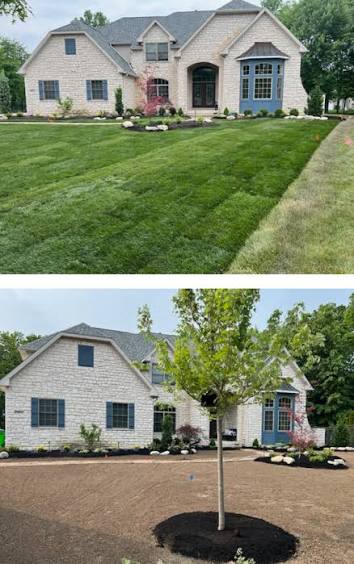
    My verdict: choose based on your worst season, not your

  • Sod vs Seed: Which Is Cheaper for a New Lawn?

    Sod vs Seed: Which Is Cheaper for a New Lawn?

    Last updated: September 10, 2026

    Key Takeaways

    • What happens if seams dry out or gaps appear within the first 2 weeks?
    • What watering schedule do you expect for the first 14 to 21 days?
    • Sod wins when you are paying for certainty and speed, not just grass.
    • The strength of sod is not mysterious.

    Table of contents

    Sod vs seed: which is cheaper for a new lawn?

    For most new lawns, sod vs seed: which is cheaper new lawn? Seed usually costs less at the start. Sod only becomes the better deal if you need the yard finished fast or the site is tough to establish. I write about outdoor service work and lawn installation costs regularly, and the same pattern keeps showing up: material price is only one slice of the bill, yet it is the slice that changes the decision fastest. Honestly, that’s where people get tripped up.

    The short answer: sod vs seed for a new lawn

    Seed wins on price for almost every average yard. Starting from bare soil? Provided you can wait for germination, it usually takes far less money to buy grass seed, spread it, and protect it while it establishes. Sod costs more because you are paying for mature grass, harvest, transport, installation labor, and often extra prep to make the surface smooth enough for rolls or slabs. According to the University of California Agriculture and Natural Resources, the up-front cost of turfgrass sod is generally higher than seeded turf because sod includes production and harvesting costs.

    That does not make seed the automatic winner. It just means seed is the cheaper pick when your yard can tolerate a slower start. Sod makes more sense when the space will be used right away, erosion is a real threat, or the season makes seed failure more likely.

    A generic answer leaves out the part that matters most: installation cost depends heavily on square footage, soil prep, irrigation, slope, and how much grading the contractor has to do. Small and flat? In good soil? That can be a straightforward seed job. But a sloped front yard with clay soil, poor drainage, or compacted subsoil can push either option higher; sod usually climbs faster because you are paying for immediate cover and tighter labor. The U.S. Environmental Protection Agency notes that runoff control and site conditions can change landscape costs and performance quickly, which is why a quote needs to match the yard. That math stops working fast if the assumptions are wrong.

    If your main question is “which is cheaper to get in the ground this month?”, the answer is seed.

    What sod really buys you

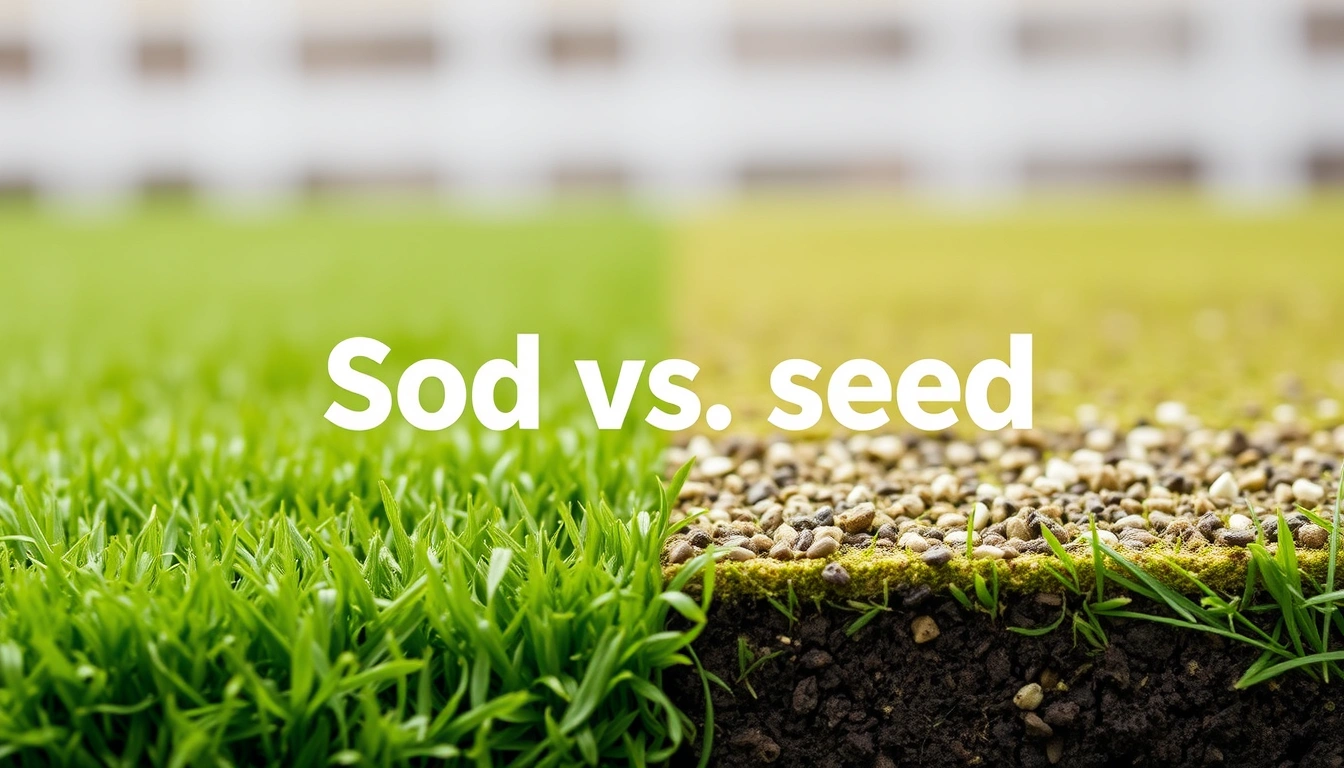
    Sod vs seed: which is cheaper for a new lawn?

    Sod wins when you are paying for certainty and speed, not just grass. Yes, the price is higher — but the trade-off is clear. You get an instant green surface, earlier curb appeal, and far less exposed soil. That matters on new construction lots, front yards visible from the street, and places where rain can wash seed away.

    The strength of sod is not mysterious. It is pre-grown turf, so the lawn starts at a mature stage instead of a germination stage. In practice, the “wait time” is measured in days for installation and weeks for rooting, not in weeks for sprouting and months for fill-in. On jobs where access matters, sod also gives the contractor a more predictable finish because the lawn is already uniform in density. Clean and tidy. No guesswork.

    The weak spot is just as plain: sod is expensive to buy and install, and it can fail if the soil underneath is not prepared well. I would not choose sod if the site has uneven grading, hidden compaction, or irrigation problems you have not solved yet. Sod laid over bad soil can look good for a few weeks and then thin out, dry out, or separate at the seams. That turns a high-cost choice into a repair bill you didn’t plan on.

    Sod also needs a tighter installation window. If the rolls sit too long in heat, they suffer. If the crew installs them poorly, gaps and seams show fast. For that reason, sod is the better call for owners who need a finished lawn now and are willing to pay for a more controlled process. The University of Minnesota Extension advises getting sod on the ground quickly and keeping the soil moist during establishment.

    Where seed saves the most money

    Seed wins for homeowners who can wait, water properly, and accept a less immediate result. The cost edge is simple: you are buying a fraction of the living material that sod requires, and the labor is usually lighter. A seeding job can often be done after basic soil prep, topdressing if needed, and a careful spread-and-rake process. No drama.

    The downside is risk. Seed needs time, moisture, and decent weather. Too hot, too dry, too windy, or too rainy? Establishment slows or fails. Birds can eat it. Runoff can move it. Foot traffic can crush it. Until the grass thickens, the yard can look patchy, which matters if you are trying to sell a house or keep kids and pets off the area.

    Seed is not the best answer for every grass type. In cool-season regions, seed often gives you more variety and a lower initial cost. In warm-season areas, some homeowners prefer sod because establishment windows can be tighter and summer stress can be brutal on young seed. That does not make seed wrong; it just means the calendar matters. Penn State Extension notes that grass species choice and planting season both affect establishment success.

    If you are trying to keep the budget lean, seed is the clear choice when:
    – you have a flat or gently sloped yard,
    – you can wait through the establishment period,
    – you can water consistently for several weeks,
    – and you are not under pressure for instant curb appeal.

    If any one of those is missing, the “cheaper” option can become the more expensive one after rework.

    Sod vs seed side by side

    Seed is cheaper on upfront cost, but sod is cheaper on lost time. That’s the trade most people miss.

    Criteria Sod Seed Winner for [condition]
    Upfront material cost Higher Lower Seed for tight budgets
    Labor complexity More intensive; must be laid fast and evenly Usually simpler spreading and covering Seed for DIY or basic installs
    Time to usable lawn Near-immediate surface, with rooting still needed Weeks to germinate, longer to thicken Sod for fast occupancy
    Erosion control Better because soil is covered right away Weaker until grass establishes Sod for slopes or runoff-prone yards
    Failure risk from weather Lower once installed, but still sensitive to heat and poor prep Higher during germination and early growth Sod in harsh weather windows
    Need for irrigation discipline High during rooting Very high during germination Neither if you cannot water regularly
    Patch repair cost Can be expensive because matching rolls is harder Usually cheaper to reseed spots Seed for long-term patchability
    Best use case Front yards, new builds, quick sell situations Large backyards, budget projects, planned planting windows Depends on timeline

    The table tells the real story: seed wins on dollars, sod wins on speed and surface control. If your contractor is quoting both, ask them to break out prep, delivery, and watering expectations separately. A quote that lumps everything into one line can hide the fact that a “cheap” seed job still needs grading, straw, compost, or irrigation work.

    What a sod quote should include — and what to ask before you sign

    Sod is the better choice only if the quote is honest about the whole job, not just the rolls of grass. I would expect a contractor to spell out square footage, soil prep, delivery timing, irrigation needs, and whether old turf or debris removal is included. Without that, the low number means very little.

    A good sod bid usually covers:
    – removal of weeds or old grass,
    – grading and leveling,
    – soil amendment if needed,
    – delivery coordination,
    – installation,
    – and first watering guidance.

    Ask direct questions:
    1. Is the quote for material only or installed cost?
    2. Does it include topsoil or compost, or just the turf itself?
    3. How many days from delivery to install?
    4. What is excluded if the soil is compacted or needs regrading?
    5. What happens if seams dry out or gaps appear within the first 2 weeks?

    A bad sod job has easy-to-spot signs: seams opening, corners lifting, uneven edges, puddling in low spots, or grass turning dull because the roots never made contact with the soil below. That is not just cosmetic. Usually, it means the installer rushed prep or skipped leveling.

    Sod is worth the extra cost when you want the yard to function immediately and you can pay for a contractor to do the job tightly. It is not the right answer for a neglected lot with unknown drainage, because the purchase price does not fix bad ground.

    What a seed quote should include — and where cheap turns costly

    Seed is the more affordable route, but only if the contractor is actually doing the establishment work. A bare-bones seed price can leave out the parts that make the lawn survive: soil prep, starter fertilizer if appropriate for the grass type, mulch or straw cover, and follow-up guidance for watering.

    A sensible seed proposal should mention:
    – the grass species or blend,
    – seed rate by square footage,
    – soil prep and any grading,
    – erosion control on slopes,
    – and what the aftercare looks like for the first 3 to 6 weeks.

    The biggest mistake with seed is treating it like a throw-and-go material. Seed needs a clean seedbed and consistent moisture. If the site is windy, uneven, or full of runoff channels, seed often disappears into the wrong places. If the contractor is unsure how to control those conditions, consult a local lawn professional before you sign. Then the owner pays twice: once for the original seeding, and again for patching or reseeding.

    Seed is cheap in the cart and expensive when the site is wrong. I would not choose seed for a steep bank, a drainage problem, or a yard that will be crossed by contractors, pets, or kids every day during the first month. Those are the cases where a few saved dollars can turn into repeated bare spots.

    The upside is flexibility. If part of the lawn fails, reseeding a section is usually less painful than replacing sod panels. That makes seed the better long-term budget choice for larger properties where some unevenness is acceptable. University extension guidance from NC State and Michigan State both emphasize that reseeding is often the lower-cost repair path when the base soil is already workable.

    When the answer flips

    The cheaper option is not always the one with the lower invoice. Here are the cases where I would change the recommendation.

    1. You need the property to look finished immediately.
      Sod wins. If a sale, rental turnover, or curb-facing front yard is at stake, the visual payoff can justify the higher cost.

    2. Your yard has slope or runoff.
      Sod often wins because it holds the soil in place faster. Seed can wash away before it takes.

    3. You cannot water reliably for several weeks.
      Neither is good, but sod is usually the less risky choice if the window is short and the crew can establish it before heat stress peaks.

    4. The lawn area is large and budget is tight.
      Seed wins. On bigger lots, the cost gap can grow enough that sod may be hard to justify unless only a small visible area needs the premium treatment, and a contractor can show the math.

    Which one should you call for?

    Choose seed if your yard is large, your budget is limited, and you can wait through the establishment period while watering carefully. Choose sod if you need a lawn that looks presentable now, want better erosion control, or are dealing with a front yard where appearance matters from day one. Neither if your soil is badly compacted, the site drains poorly, or you do not have a watering plan for the first several weeks.

    That is the cleanest decision I can give you. For a new lawn, sod vs seed: which is cheaper new lawn? seed is usually cheaper. For a lawn that has to behave like a finished lawn right away, sod often earns its higher price.

    What to ask a contractor before you compare bids

    Seed and sod quotes only make sense if they are built on the same assumptions. I would ask every contractor the same few questions so you can compare apples to apples.

    • What square footage are you pricing?
    • Does the bid include grading and debris removal?
    • What grass type are you recommending, and why?
    • How long will the job take from prep to finish?
    • What watering schedule do you expect for the first 14 to 21 days?
    • What does your quote leave out?

    If one contractor quotes a low seed price and another quotes a higher sod price, do not compare only the totals. Compare the scope. A seed job that excludes prep is not the same product as a sod job that includes leveling and delivery.

    Also ask what a failure looks like. A straightforward contractor should be willing to explain when seed is struggling, when sod seams are failing, and what would require a return visit. If the answer is vague, that is a warning sign.

    FAQ

    Is sod always more expensive than seed?

    Sod is usually more expensive upfront in normal new-lawn installs, because you are buying mature turf and faster results. Seed can cost more when the site needs heavy prep, repeated reseeding, or erosion control that drives the labor up.

    How long does a seed lawn take to fill in?

    That depends on grass type and weather, but seed takes longer than sod by a wide margin. Expect weeks for germination and longer for the lawn to look dense. Cool-season grasses and warm-season grasses establish on different schedules.

    Can I install sod myself to save money?

    You can, but the savings are limited if the yard needs grading, soil correction, or careful scheduling. Sod is labor-sensitive because it has to go down quickly and evenly.

    What is the cheapest way to get a usable lawn?

    Seed is usually the cheapest route if you can wait and maintain it properly. If you need instant coverage, you are paying for sod or for a fast alternative like hydroseeding, depending on the site and the contractor’s scope.

  • Sod Installation Cost: What You Should Expect to Pay by Square Foot, Pallet, and Labor

    Sod Installation Cost: What You Should Expect to Pay by Square Foot, Pallet, and Labor

    Last updated: September 10, 2026

    Key Takeaways

    • A 300-square-foot patch job may carry the same mobilization cost as a larger yard.
    • A 300-square-foot or 500-square-foot job often does not need pallet logistics unless access is unusually difficult.
    • In hot, dry regions, the first 7 to 14 days after installation are critical because sod dries quickly on the edges.
    • Watering instructions are not always a line item, but they affect whether the yard survives the first 2 weeks.

    A budget for a sod installation cost calculator by square foot, pallet, labor usually comes down to three buckets: sod by the square foot, delivery or pallet handling, and labor for prep plus installation. Plain and simple. I write about home service pricing and contractor comparisons, and I would split those lines out first, because that is where surprise charges tend to hide.

    What a real sod estimate should include

    Sod installation cost calculator by square foot, pallet, and labor

    “sod installed for X dollars” sounds tidy. It is not enough. A useful estimate needs to break out materials, prep, and labor; otherwise, you are the one carrying the unknowns.

    For a typical residential job, I would expect a quote to specify:

    • Sod type and coverage method: square feet covered, plus whether the contractor is charging by the piece, by the pallet, or by the job.
    • Site prep: old grass removal, grading, topsoil, compost, rock removal, and soil testing if needed.
    • Delivery and handling: pallet delivery, forklift access, hand-carry charges, or tight-access surcharges.
    • Installation labor: laying, cutting edges, rolling, and cleanup.
    • Watering instructions: not a line item in every quote, but it affects whether the yard survives the first 2 weeks.
    • Warranty terms: many local installers limit coverage to workmanship, not grass death from neglect or irrigation failure.

    One lump sum? Yellow flag. Maybe habit, maybe strategy. Either way, it makes comparison shopping harder on purpose or by accident. If needed, ask a local landscape professional or extension office to help you read the scope; that is usually better than guessing. Not every vague bid is a bad company. Still, it is harder to know whether one quote includes grading, debris removal, or haul-off while another leaves those out.

    A better estimate lets you recalculate the total if the project grows from, say, 600 square feet to 850 square feet. And that matters. Small jobs often cost more per square foot than larger ones. Truck roll. Crew minimum. Delivery fee. None of that shrinks just because the lawn is smaller.

    How do I calculate sod cost by square foot?

    Multiply the price per square foot by the area, then add labor and prep. That sounds basic because it is basic. But it is also the cleanest way to compare quotes that are packaged differently.

    Here is the simple formula:

    Total cost = sod material + prep work + labor + delivery/handling + disposal

    Ask what sits inside the square-foot number before you trust it. In some markets, it covers only the turf itself. In others, installation is included but old-lawn removal or soil grading is not. Those details are not tiny; they can move the bill more than the sod itself.

    A practical way to use the formula:

    1. Measure the area in square feet.
    2. Ask for the material rate per square foot.
    3. Ask whether prep is separate.
    4. Ask whether labor is priced per square foot, per pallet, or as a flat install fee.
    5. Add the contractor’s disposal and delivery charges.

    Per-square-foot installed pricing is often the easiest comparison point. But check the exclusions. A quote that skips prep can look cheaper on paper and sting later once grading, soil amendment, or debris removal gets added. Sneaky little gap. That is where the math starts wobbling.

    The main weakness of square-foot pricing is hidden minimum charges. A 300-square-foot patch job may carry the same mobilization cost as a larger yard. So a bargain per-foot rate can be a trap on small jobs. In those cases, I would compare the total invoice, not the per-foot headline.

    What is a pallet of sod really costing me?

    Sod installation cost calculator by square foot, pallet, and labor

    A pallet matters once you are buying enough sod to cover a meaningful area, because many growers and suppliers sell turf by the pallet rather than by the loose piece. The exact square footage per pallet varies by sod type and supplier, so ask for both the pallet count and the coverage per pallet before you compare quotes.

    A pallet helps with budgeting because it turns the order into a physical count. If a supplier says the yard needs 12 pallets and your installer charges a handling fee per pallet, the labor line is right there in front of you. Cleaner. Less fog. That is better than decoding a vague “materials included” claim.

    A pallet-based quote usually works best when:

    • The yard is large enough that pallet math is simpler than patch-by-patch pricing.
    • The installer is already coordinating delivery and placement.
    • You need help estimating waste from cuts around beds, curves, and walks.

    There is a catch. Pallet pricing can make comparing one grass variety against another harder if the coverage per pallet differs. One pallet may cover a different area than another, so the raw pallet price can mislead you. I would never compare only pallet totals without converting to square foot coverage.

    Another drawback is access. If the pallets need to be dropped far from the lawn, hand-carry labor can rise fast. A driveway, gate width, slope, and soft ground all affect whether a forklift or a crew can get the pallets where they need to be. Miss that detail, and the estimate is built on sand.

    How much should I budget for labor?

    Labor often decides whether a sod job feels fair or overpriced. For straightforward installation, labor is usually easier to judge than materials because you can see what the crew has to do: remove old growth, level the grade, set the sod tightly, trim edges, and roll it in.

    The labor cost depends on four things that change the quote more than most homeowners expect:

    • Prep level: ripping out old turf costs more than laying sod onto a bare, prepared bed.
    • Yard shape: curves, tree rings, slopes, and narrow side yards take longer.
    • Soil condition: compacted clay, rocky soil, and poor drainage add work.
    • Access: if the crew cannot get close to the work area, hand labor rises.

    A fast quote that ignores those factors is not a serious quote. Two lawns with the same square footage can take very different amounts of labor. One may be a flat rectangle with easy access; the other may have root issues, old irrigation heads, and a grade that needs correction before sod goes down.

    Labor is where a bad job often starts. If the price is low because the crew is skipping prep, the lawn can settle unevenly, dry out at the seams, or develop dead strips along low spots. A sloppy install is not just cosmetic. Poor grading can trap water, and seams that are not tight can dry and shrink.

    I would pay more for a contractor who explains the labor steps clearly than for one who gives me the lowest install number and leaves prep vague. Not always the cheapest choice, to be fair. But the labor line tells you whether the contractor is selling turf placement or a finished lawn.

    Sod installation cost calculator by square foot, pallet, and labor: a comparison I would actually use

    For small to mid-sized jobs, I would use the square-foot method because it gives the cleanest apples-to-apples comparison. On a larger lawn, I would lean toward pallet-based pricing if the supplier and installer are coordinating delivery and the turf coverage per pallet is clearly stated. Labor pricing becomes the tie-breaker; it shows whether the quote includes real site work or just laying grass.

    For a practical sod installation cost calculator by square foot, pallet, labor, the key is to force each bid into the same frame before you compare it.

    Criteria Square foot pricing Pallet pricing Winner for [condition]
    Easiest to compare quotes Best when every bidder lists installed price per square foot Harder unless each pallet covers the same area Square foot for mixed bids
    Best for small jobs Clear for 200-800 sq ft patches Can hide minimum delivery charges Square foot for patch repairs
    Best for larger jobs Still usable, but math gets repetitive Often simpler for full-yard installs Pallet for full lawns
    Shows waste and overage Only if the contractor includes overage allowance Better if pallets are counted with waste built in Pallet for irregular layouts
    Risk of hidden prep costs Moderate to high if “installed” is not defined Moderate to high if labor is separate Neither; ask for a line-item scope
    Labor transparency Good when labor is included in the foot price Poor unless install labor is shown separately Square foot with itemized labor
    Best for difficult access Can understate hand-carry effort Can better show pallet handling costs Pallet for tight access
    Best for phased work Easier to budget in sections Pallet counts may be awkward if work is split Square foot for phased installs
    Best for contractor accountability Good if prep and cleanup are named Good if coverage per pallet is written out Either, with written scope

    My view is straightforward: the best calculator is the one that makes the contractor name the square footage, the pallet count, and the labor scope separately. That is usually the easiest way to catch a quote that looks low because it is incomplete.

    Which pricing method is best for your yard size?

    Square-foot pricing wins for a small yard; pallet pricing wins for a broad, full-property install. That is the practical line I would use.

    If your project is a front-yard repair, side-yard patch, or a small backyard section, square-foot pricing is easier to control. Measure the area, add a little waste, and see whether the quote tracks. A 300-square-foot or 500-square-foot job often does not need pallet logistics unless access is unusually difficult.

    For a full lawn, pallet pricing often fits the contractor’s ordering process better. A grower ships sod by the pallet, and a crew can plan the install around pallet drops, staging, and sequence. That can reduce confusion if the yard is large, oddly shaped, or being done in one day.

    The weakness of square-foot pricing on bigger jobs is not the arithmetic. It is the habit of forgetting the other costs until the bill lands. Pallet pricing has its own flaw: it can sound neat while hiding the actual coverage. If the quote says “10 pallets” but not how many square feet that equals for that sod variety, you do not have a real comparison.

    For homeowners choosing who to call, I would use the pricing method that makes the contractor explain the work most plainly. If a salesperson resists that, I would keep shopping.

    When should I walk away from a sod quote?

    Walk away if the quote does not define prep, does not state coverage, or treats every lawn like a 1-day install. Those are signs the price is too vague to trust.

    Three red flags matter most:

    1. No line item for removal or grading. If your yard needs old turf torn out or the soil leveled, those costs do not disappear.
    2. No mention of irrigation or drainage issues. If the quote may leave irrigation correction out, sod over a bad sprinkler pattern or standing water can fail fast.
    3. A “per pallet” quote with no pallet coverage figure. Without square footage per pallet, the number means little.

    A bad sod job usually shows itself within the first few weeks: seams open, edges curl, the lawn feels uneven underfoot, or low spots hold water. Dead patches can come from watering mistakes, but they can also come from poor prep. If the contractor never discussed grading, you have less recourse. For irrigation or drainage problems, it is worth consulting a licensed contractor or local extension service before signing.

    Climate matters here too. In hot, dry regions, the first 7 to 14 days after installation are critical because sod dries quickly on the edges. In wetter regions, poor drainage and overwatering are the bigger risk. A contractor who talks as if every yard faces the same conditions is not giving you a local estimate.

    I would not choose the cheapest quote if it skips the parts that keep the lawn alive. Cheap on paper, expensive in the yard. That is the trade-off.

    What should I ask before I sign?

    I would ask five questions and want five direct answers:

    • How many square feet are you installing?
    • How many pallets does that require, and how many square feet does each pallet cover?
    • What is included in labor: removal, grading, laying, rolling, cleanup?
    • What changes the price on site?
    • Who handles delivery, and what access do you need?

    If the contractor answers those clearly, you can compare bids on equal terms. If the contractor dodges them, the quote is not ready.

    A good contractor should also tell you the install timeline. A typical job may take a day for a modest yard and longer if prep is heavy, but the exact duration depends on site condition, crew size, and delivery timing. Do not assume “one day” unless the scope is small and the prep is already done.

    FAQ

    Is sod cheaper by the square foot or by the pallet?

    Square foot is easier to compare, but pallet pricing can make more sense for larger jobs. The best choice depends on the size of the yard, access, and how the contractor prices labor and delivery. Reliable pricing references from extension services and professional landscaping groups usually emphasize comparing scope, not just headline price. See the National Association of Landscape Professionals and the University of Florida IFAS Extension.

  • Bermuda vs Zoysia vs St. Augustine for Home Lawns

    Bermuda vs Zoysia vs St. Augustine for Home Lawns

    Last updated: September 10, 2026

    Key Takeaways

    • First, if you have less than 6 hours of strong sun in much of the lawn, I would move St.
    • If you are choosing between Bermuda, Zoysia, and St.
    • Bermuda can be the right pick on toughness and recovery.
    • Bermuda usually wants more sun, shorter mowing, and tighter control.

    Pick the wrong grass, and you will know it by midsummer. If you are choosing between Bermuda, Zoysia, and St. Augustine, the short answer is this: pick Bermuda for hot, sunny lawns that get worn down, Zoysia for a lower-input all-around lawn, and St. Augustine for shade and a softer, broader blade feel. I write about turfgrass choices and lawn care standards, so I care less about marketing names than about heat tolerance, shade tolerance, mowing height, and how much trouble the grass causes later. In bermuda vs zoysia vs st. augustine home lawns, the details matter.

    The real question: which grass fits your yard, not the label?

    Bermuda vs Zoysia vs St. Augustine for home lawns

    When you pick the grass that matches your light, your mowing habit, and how much upkeep you can live with, the choice gets clearer. Bermuda can be a strong choice on toughness and recovery. Zoysia can be a good balance. St. Augustine fits where trees steal light.

    Simple on paper. Messy in real life. A full-sun front lawn in Georgia is a different problem from a lightly shaded side yard in Texas or a humid coastal yard with sandy soil. These grasses are all warm-season types, but they behave very differently once you start living with them. Bermuda usually wants more sun, shorter mowing, and tighter control. Zoysia grows slower and often needs less mowing, but establishment can be slow. St. Augustine handles shade better than the other two, but it is usually the weakest choice for cold snaps and heavy foot traffic.

    If I had to reduce the decision to one sentence, I would say this: Bermuda is the sports car, Zoysia is the sedan, and St. Augustine is the shade-tolerant cruiser. That comparison is useful because the trade-offs are real. Sports cars ride harder. Sedans are often less quick. Cruisers are comfortable but not built for rough use. A neat picture, sure — but the yard decides, not the brochure.

    Bermuda wins when you have sun, traffic, and a mower you do not mind using

    On a full-sun lawn that gets stepped on, Bermuda is usually the best bet. Families with kids, dogs, side yards that get trampled, and homeowners who want a lawn that knits back together after stress all tend to land here. Bermuda’s fine texture and aggressive spreading habit help it recover from wear faster than the other two. Many modern Bermuda cultivars are built for heat and drought tolerance once established, but they still want strong light. In plain English: shade is where Bermuda starts losing the argument.

    There is a price for all that toughness. Bermuda usually needs more mowing than the other two because it grows fast in warm weather. It also looks best when kept lower than St. Augustine, and often lower than Zoysia. If you dislike frequent mowing, Bermuda can turn from “clean and sharp” into “always behind.” It can also creep into flower beds and hard edges, which means you will spend time on borders and containment. That little nuisance adds up fast.

    Bermuda is not the right answer for a yard with mature trees, filtered light, or a homeowner who wants a relaxed mowing schedule. It is a poor choice if you want a soft, broad-bladed look; Bermuda’s finer texture reads as crisp and dense, not plush. For a lawn that can take a beating and still bounce back, Bermuda is the strongest of the three. If you want low fuss or shade tolerance, it is the wrong tool.

    Zoysia is the best middle ground if you want balance

    Bermuda vs Zoysia vs St. Augustine for home lawns

    For many suburban lawns, Zoysia is the sensible middle road. It usually gives you a denser, neater look than Bermuda without forcing the same mowing pace, and it tolerates more shade than Bermuda. It is not as shade-friendly as St. Augustine, but it can handle part sun better than many people expect. Zoysia’s dense growth can also crowd out some weeds once it fills in, which is one reason homeowners like the finished look.

    Patience is the catch. Zoysia can establish slowly, whether you start from sod, plugs, or seed where seedable cultivars are available. That slow start matters because thin turf is vulnerable to weeds and bare spots. For a lawn that looks complete in a few weeks, Zoysia can frustrate you. It is also not the best fit if your yard takes a lot of pounding. Dense does not always mean durable; heavy traffic can still bruise it. Strange but true.

    Zoysia is the grass I would point to for someone who wants a polished lawn without living on the mower. It suits people who value appearance, moderate maintenance, and a yard with some sun but not endless open exposure. I would not recommend it if you need quick establishment for a new build, or if you are trying to green up a field-like space for constant play. It is a patient grass for a patient owner.

    St. Augustine wins in shade, but it pays for that comfort

    When shade is the limiting factor, St. Augustine is the clear pick. Among these three, it is the one I would look at first for lawns under trees, near houses that cast afternoon shadows, or in humid climates where sun is partial rather than full. Its broad blades create a soft, carpetlike look that many homeowners prefer, especially in the South. For a classic warm-climate lawn that looks full under moderate shade, St. Augustine is the most forgiving option here.

    The drawback is that St. Augustine is not a universal solution. It is usually less cold-tolerant than many Bermuda and Zoysia types, and it can suffer when foot traffic is heavy. It also tends to ask for more water than Bermuda once summer heat and dry spells show up. If you want a lawn that shrugs off a dog running laps or a weekly soccer game, this is not the first grass I would choose. Its broad blade and softer feel are part of the appeal, but that same structure makes it less nimble under wear.

    St. Augustine is also not a good fit if you want a tight, manicured, golf-course-like finish. It can look lush, but it is not built for the same low-cut, highly refined appearance as Bermuda. I would choose it for partial shade, moderate foot traffic, and homeowners who care more about filling space than squeezing out maximum toughness.

    The honest side-by-side

    Bermuda beats the other two on wear tolerance and sun performance. Zoysia beats the other two on balance. St. Augustine beats the other two on shade.

    Criteria Bermuda Zoysia Winner for this condition
    Full sun Excellent Very good Bermuda
    Partial shade Weak to fair Good Zoysia
    Heavily shaded yard Poor Fair St. Augustine
    Foot traffic Best of the three Moderate Bermuda
    Mowing frequency Usually highest Usually lower Zoysia
    Establishment speed Often faster from sod or sprigs Often slower Bermuda
    Weed suppression once filled in Good Very good Zoysia
    Soft, broad-bladed feel Not its strength Moderate St. Augustine
    Cold sensitivity risk Depends on cultivar, but some are vulnerable Depends on cultivar, but often solid Zoysia
    Best “set it and forget it” fit No Closest of the three Zoysia

    A table will not tell you everything, but it does expose the real fault lines. Sun, shade, traffic, and mowing tolerance matter far more than the brand name on the pallet. The biggest mistake I see is choosing by appearance alone. A grass that looks beautiful in a sunny brochure can become a thin, patchy problem in a yard with afternoon shade or heavy play.

    Which one should you choose?

    Choose Bermuda if your lawn is mostly full sun, gets regular foot traffic, and you are willing to mow often for a tighter, tougher finish. Choose St. Augustine if shade is the main problem and you want a broad-bladed, softer-looking lawn. Neither if your yard is a mixed mess of deep shade, poor drainage, and constant traffic; in that case, I would fix the site conditions first or rethink having a turf lawn at all.

    That verdict is blunt because the wrong grass creates years of work. Bermuda in shade turns sparse. St. Augustine in hard use wears out. Zoysia can be the safest middle choice, but only if you can live with slow establishment. For most average homeowners in the warm South, I would lean Zoysia when the site is mixed and maintenance matters, Bermuda when the yard is sunny and active, and St. Augustine when shade dominates the decision. For bermuda vs zoysia vs st. augustine home lawns, that is usually the practical order.

    When the verdict flips

    The overall call changes in a few specific cases.

    First, if you have less than 6 hours of strong sun in much of the lawn, I would move St. Augustine to the front of the line. Bermuda stops making sense quickly there.

    Second, if the lawn is for dogs, kids, or frequent backyard use, Bermuda moves ahead even if it asks for more mowing. Traffic tolerance matters more than looks in that setting.

    Third, if you want the lowest-maintenance finish among the three and you are willing to wait through slower establishment, Zoysia is the better bet. That slower start is the trade-off, not a flaw you can ignore.

    Fourth, if you live where winter cold is a real annual event, cultivar selection matters enough that I would hesitate to recommend any of the three without local extension guidance. The Texas A&M AgriLife Extension and university extension turf guides are better references than generic retail labels for climate fit.

    What most generic comparison articles leave out

    Most comparisons get trapped in a shallow script: “Bermuda is tough, Zoysia is nice, St. Augustine is shady.” That is true, but not enough. The missing details are the ones that decide whether you will be happy six months later.

    Mowing height is one. Bermuda is commonly kept lower than the others. That affects labor, cut quality, and how quickly a lawn looks shaggy. Establishment speed is another. A slow-starting grass in a newly built yard can feel like a problem for an entire season. Traffic is another. A lawn that looks dense from the curb may still fail under kids, pets, or patio use. And shade reality matters too. “Some shade” is not the same as dappled morning light, and owners often underestimate that gap.

    I also think homeowners miss the hidden cost of borders and spreading habit. Bermuda can run. St. Augustine can spread too. Zoysia spreads as well, but more slowly. Any of the three can invade beds, but Bermuda often demands the most edge discipline. It is a little weed with a big personality, frankly.

    For practical guidance, I would trust university turf resources over retailer copy. Clemson Extension, Texas A&M AgriLife Extension, and the University of Florida IFAS Extension all publish turfgrass guidance that is specific about sun, wear, and regional fit. If you are narrowing the choice by climate, those are better starting points than a product page.

    What each grass is not the right answer for

    Bermuda is not for shade, relaxed mowing, or homeowners who want a soft, broad-leaf lawn.

    Zoysia is not for people who want fast establishment or a grass that shrugs off constant construction-level traffic.

    St. Augustine is not for heavy wear, very low mowing, or situations where cold tolerance is the first concern.

    That is the cleanest way I know to decide. Each grass has a lane. The problem comes when a lawn owner expects one grass to do another grass’s job.

    FAQ

    Is Bermuda harder to maintain than Zoysia?

    Yes. Bermuda usually asks for more mowing and tighter edge control than Zoysia, especially in peak growth months.

    Can St. Augustine handle full sun?

    Yes, but full sun is not its main advantage. It is chosen more for shade tolerance and a softer, broader look.

    Which grass is best for a backyard with kids and a dog?

    Bermuda is usually the strongest choice because it recovers better from traffic than Zoysia or St. Augustine.

    Which grass looks the most “lush”?

    St. Augustine usually gives the broadest, softest look. Zoysia is denser and more refined. Bermuda looks the crispest and finest-textured.

    For a yard with mixed sun and shade, what should I pick?

    Zoysia is usually the safest middle ground if the shade is moderate. If shade is heavy, I would move toward St. Augustine.

  • How Much Does Sod Installation Cost for a Typical Lawn?

    How Much Does Sod Installation Cost for a Typical Lawn?

    Last updated: September 10, 2026

    Key Takeaways

    • A quote that is 20% lower but excludes removal can end up costing more than the “higher” quote once you add the missing work.
    • I would also ask how long the crew expects the job to take.
    • How many days of watering do you expect from me right after install?
    • Once the site starts needing topsoil, grading, or tear-out of an existing lawn, the bill moves fast.

    For a typical suburban lawn, sod installation cost for a typical lawn usually lands in the low thousands, not the low hundreds. The final number mostly comes down to lawn size, site prep, and whether the old grass has to come out first. 1,000 square feet can cost far more than a 200-square-foot patch; labor and cleanup do not shrink at the same rate. So if you are calling contractors, the real question is not “What does sod cost?” It is this: “What is in the quote, and what turns a basic install into a much bigger bill?”

    What a normal sod job usually includes

    How much does sod installation cost for a typical lawn?

    Three pieces make up a straightforward sod installation: prep, the sod itself, and laying it. Simple enough. The lowest quote is often the least complete one, because many installers price the grass and labor but leave out dirt work, hauling, irrigation fixes, or disposal of the old lawn.

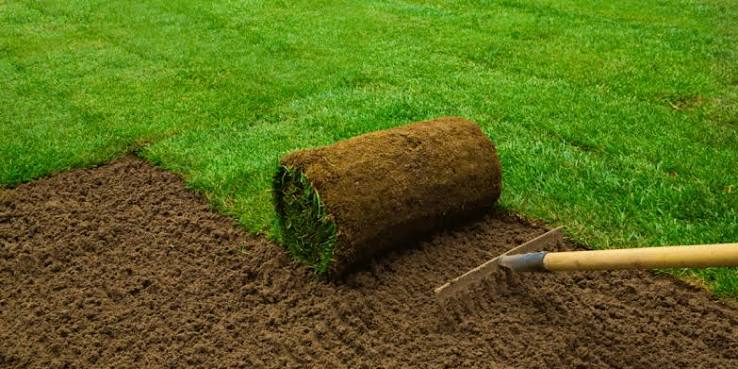
    For a standard lawn, I would treat “normal” as a yard that already drains reasonably well, has no major grading problems, and needs only light soil prep; if you are unsure, consult a local contractor or extension office and compare the site with guidance from the University of Florida IFAS or similar sources. Then the installer may remove weeds, loosen the top layer, level shallow dips, roll out sod in staggered seams, and water it in. But once the site starts needing topsoil, grading, or tear-out of an existing lawn, the bill moves fast.

    Square footage is the easiest way to think about it. Sod itself is usually priced by the pallet or by the square foot, while installation is often quoted by the square foot or as a lump sum. A smaller lawn still costs more per square foot than a large one because travel, setup, and cleanup do not shrink proportionally. Funny how that works.

    I would not hire purely on the lowest number unless the quote clearly says what happens with:
    – old turf removal
    – soil amendment or topsoil
    – grading
    – edging
    – sprinkler adjustments
    – haul-away and disposal

    Those line items are where a “cheap” job turns into a surprise bill.

    How much should I expect to pay for sod installation?

    Expect the total to be driven by lawn size and prep work, with small yards paying a higher rate per square foot than bigger ones. If you want a simple planning number, many sod projects end up feeling expensive because you are paying for a live product and skilled labor at the same time. That combo bites.

    I cannot give you a single honest dollar figure that fits every market, because local labor rates, freight, and seasonal supply change the price too much. What I can say is that the quote should usually separate these buckets:

    1. Sod material
    2. Delivery
    3. Labor to install
    4. Ground preparation
    5. Removal and disposal of the old lawn
    6. Cleanup and first watering

    That split matters more than the grand total. A quote that is 20% lower but excludes removal can end up costing more than the “higher” quote once you add the missing work.

    For a typical lawn, I would expect a contractor to ask about square footage and site condition before giving a firm number. If a contractor gives a flat price without asking whether the yard has clay soil, a slope, or a dead lawn that needs to be stripped, I would treat that as a warning sign and would ask for a site visit or a written scope, as recommended by many local extension services. Ask twice if needed.

    Here is the practical rule I would use: if the lawn is small and the surface is rough or full of weeds, expect the per-square-foot cost to be high. If the lawn is larger and the grading is already close, the unit cost usually falls.

    What changes the price the most?

    How much does sod installation cost for a typical lawn?

    Prep is usually the biggest price driver, not the sod itself. That is the part many generic articles get wrong. People fixate on the grass and forget that the ground underneath decides whether the sod survives.

    The main cost drivers are these:

    • Removing the existing lawn: If the old turf has to be stripped, hauled away, and disposed of, labor rises quickly.
    • Grading and leveling: A yard with dips, mounds, or drainage issues needs more machine or hand work.
    • Soil quality: Thin, compacted, or poor soil may need topsoil, compost, or tilling.
    • Access: If crews cannot bring equipment close to the yard, labor time goes up.
    • Slope: Steep ground takes longer to cut and set cleanly.
    • Irrigation: Sprinkler heads, broken lines, or a system that needs adjustment can add cost.
    • Season: Hot weather raises the risk of sod failure, so some installers are more selective about timing.

    A lawn in Houston on heavy clay, for example, may need different prep than a lawn in Denver with faster-draining soil. In wetter climates, drainage matters more; in hotter climates, watering logistics matter more. So a local contractor should be able to explain the ground, not just quote the grass. Otherwise, you are buying a black box.

    I would also ask what sod species the quote covers. The right grass depends on sun, shade, and region, and the USDA and university extension guidance both stress matching turf to local conditions. A mismatched grass can thin out even when the installation price looks fine. That is not just a pricing issue; it is a suitability issue.

    Sod or seed: which is the better buy?

    Sod wins when you need a finished lawn fast and you are willing to pay for that speed. Seed wins when the budget is tight and you can wait through establishment. Plain and simple.

    Sod gives you immediate coverage. It is the better choice if you are dealing with erosion, a house that is about to be listed, a side yard that has to look presentable soon, or a family that cannot babysit a bare lot for six to eight weeks. It also helps where rainstorms would wash seed away or where weeds would outcompete slow germination.

    Seed is cheaper because you are buying less labor and no mature turf. But the trade-off is time and uncertainty. You need watering discipline, warmer or more favorable weather, and patience for patchy germination. If you want a lawn that looks like a lawn this month, seed is the wrong tool.

    The honest side-by-side

    Criteria Sod Seed Winner for [condition]
    Upfront cost Higher because you buy mature turf and installation labor Lower because material is cheaper and labor is lighter Seed for tight budgets
    Time to usable lawn Fast; often looks finished immediately after installation Slow; establishment can take weeks to months Sod for fast curb appeal
    Failure risk Lower if installed correctly, but still sensitive to poor prep and watering Higher because germination depends on weather, moisture, and weed pressure Sod for difficult sites
    Watering demand Heavy at first, then tapers Frequent during germination and early growth Tie, depending on your schedule
    Weed competition Lower at the start because the lawn begins as turf Higher because bare soil invites weeds Sod for weed-prone yards
    Soil prep tolerance Less forgiving; uneven prep shows up quickly More forgiving of small surface flaws Seed for imperfect budgets
    Erosion control Immediate Slow Sod for slopes and wash-prone areas
    Seasonal flexibility Better in a narrow installation window Broader, but still season-dependent Seed for off-season planning
    Visual result on day one Strong Poor Sod for real estate or events

    My recommendation is simple: choose sod if the yard needs to look finished now and the site can support proper prep. Choose seed if you can wait, water consistently, and accept a less predictable result.

    What a bad sod job looks like

    A bad sod job is not subtle. Usually, you can spot it within days or weeks.

    The most common signs are:
    – visible seams that never knit together
    – edges that curl up or dry out
    gaps where sod pieces were cut too small
    – low spots that collect water
    – high spots that dry faster than the rest
    – footprints or roller marks left in soft soil
    – grass that turns yellow in strips because watering coverage is uneven

    A poor install often traces back to rushed prep. If the contractor laid sod over compacted dirt, old roots, or debris, the lawn may look acceptable at first and then decline. If the seams were lined up like bricks in a straight grid instead of staggered, you will often see rows as the lawn matures. If the installer skipped rolling or final watering, the sod can dry out at the corners.

    I would also watch for a quote that promises “no prep needed” on a yard that obviously needs grading. That is not efficiency; it is deferred failure. Sod needs contact with soil. Without that, roots struggle, and the lawn becomes expensive top dressing.

    If you are hiring, ask how the installer handles:
    – soil compaction
    – seam staggering
    – watering on install day
    – grade correction
    – warranty terms, if any

    A contractor does not need to promise perfection, but they should be able to explain how they avoid the obvious failures.

    When should you get multiple bids?

    Get multiple bids when the yard is bigger than a small patch, when the site has drainage issues, or when the first quote bundles several unclear line items. Two or three bids are enough for most homeowners.

    I would especially compare bids if:
    – one contractor includes removal and another does not
    – one quotes by square foot and another uses a flat total
    – one recommends topsoil and another says the existing soil is fine
    – one is pushing a grass type that does not match your climate
    – one timeline is unusually short without explaining why

    The goal is not to find the cheapest installer. It is to find the one whose scope matches your yard. A good bid for a 1,200-square-foot lawn in Atlanta will not look the same as a good bid for a shaded yard in the Pacific Northwest or a sandy yard in South Florida.

    I would also ask how long the crew expects the job to take. For a typical residential lawn, a simple install may be a one-day job, but soil repair, removal, or larger square footage can push it longer. If a contractor quotes a very large lawn as a one-day job with major prep included, that is worth questioning. Some promises are too neat.

    When does sod stop being the right answer?

    Sod stops being the right answer when the site is too expensive to prep, too shaded for the chosen grass, or too poor in drainage for turf to survive without major correction.

    I would reconsider sod entirely if:
    – the yard needs substantial regrading or drainage work
    – the budget only allows a cosmetic fix, not proper prep
    – the property gets deep shade and the recommended grass will struggle
    – you are trying to cover a very large area and can live with a slower timeline
    – the water bill after installation would be a problem

    There are also climate cases where the answer changes. In hot southern regions, a warm-season grass can make sense, but the installation window and watering burden matter. In colder regions, a cool-season grass may fit better, but late-season installs can be risky if roots do not establish before freeze-up. A local installer should be able to name the grass by type and explain why it suits your yard.

    My position is firm: sod is worth paying for when the site is ready or can be made ready without major excavation. It is not the right fix for a neglected yard that really needs drainage repair first.

    What should I ask before I sign a sod estimate?

    You should ask five things before you sign: what is included, what is excluded, what grass they are using, how they handle prep, and what happens if the lawn struggles after install.

    I would ask:
    1. Does this include removing the old lawn?
    2. Does this include grading and topsoil, or only laying sod?
    3. What type of sod are you installing, and why is it right for my site?
    4. How many days of watering do you expect from me right after install?
    5. What does the warranty cover, if anything?

    If the installer cannot answer those plainly, keep shopping. A clear bid is usually a sign of a clear job. A fuzzy bid often means a fuzzy lawn later.

    FAQ

    How long does sod installation usually take?

    For a typical residential lawn, a simple job can be finished in about a day, but larger yards or yards that need grading, removal, or irrigation work can take longer.

    Is sod more expensive than seeding?

    Yes. Sod usually costs more upfront because you are buying mature turf and labor, while seed costs less but takes longer and is less predictable.

    Do I need topsoil before sod?

    Not always, but if the existing soil is compacted, thin, or uneven, topsoil or soil amendment may be worth the extra cost because sod roots into the layer beneath it. A local extension office or landscaper can tell you whether the yard needs it.

    Can I install sod myself to save money?

    Yes, but only if the yard is small, the grade is already close, and you can move fast. Sod dries out quickly, so a DIY job becomes risky on larger lawns.

    What is the biggest mistake people make?

    They buy sod without paying for proper prep. Laying good grass over bad ground is one of the fastest ways to waste money.

  • When Can You Mow New Sod After Installation?

    When Can You Mow New Sod After Installation?

    Last updated: September 10, 2026

    Key Takeaways

    • The first mow is often due when the sod reaches about 3 to 4 inches, depending on species.
    • That usually takes 7 to 21 days, but the test matters more than the number on the calendar.
    • Verify that the top 1 to 2 inches of soil stay moist, not muddy.
    • If the sod is 3 inches tall, set the mower near 2 to 2.5 inches, not lower.

    New sod looks finished on day one. It usually is not. Wait until the turf has actually grabbed the soil, because a mower can turn a minor delay into torn seams and ruts fast. For a safe starting point, see your installer’s care sheet or a local extension guide before you mow.

    Who this advice is for, and what I’m assuming

    When can you mow new sod after installation?

    This is for a homeowner or property manager who has just had sod installed and now needs to know when the first mow is safe. I’m assuming the lawn was laid on graded soil, watered right away, and is being cared for like a new lawn, not a mature one. And I’m also assuming you already know the basic purpose of a mower and can tell the difference between a push mower and a riding mower.

    Grass type, season, and rooting speed all change the answer. Kentucky bluegrass, tall fescue, and perennial ryegrass often need a different start-up window than Bermudagrass, zoysiagrass, or St. Augustinegrass. Cool-season sod in spring may be ready in roughly 2 weeks; warm-season sod in hot weather may root faster, but soft soil can still delay mowing. Local rainfall matters too. In a humid coastal area, repeated showers can keep the root zone wet for longer. In a dry inland area, the sod can knit faster if irrigation is steady. For species-specific care, check new lawn care advice from your local extension office.

    I would not use the calendar alone, honestly. Check with your installer or local extension office if conditions are unusual. New sod is ready when two things line up: the roots have started anchoring, and the surface is dry enough to carry a mower without sinking. Steep slope? Soft fill soil? Poor drainage? Wait longer. A mower on a half-rooted sod sheet can shear the seams open in a single pass. The University of California Cooperative Extension and Penn State Extension both stress rooting and turf firmness over a fixed date.

    How do I know new sod is ready to mow?

    New sod is ready to mow when you cannot easily lift it by a corner and when your footprints no longer leave deep marks after watering has dried off. That usually takes 7 to 21 days, but the test matters more than the number on the calendar.

    I use a simple sequence before the first cut:

    1. Wait until the sod has had at least 3 full water cycles. Water daily at first unless your installer gave a different schedule. Verify that the top 1 to 2 inches of soil stay moist, not muddy. If water pools or the soil squishes, that is a problem because mower wheels will rut the surface.
    2. Check root attachment at three spots. Gently tug a seam and a corner in the morning and again late afternoon. You want resistance, not movement. If the sod lifts like a carpet, it is not ready.
    3. Measure blade height before cutting. Do not remove more than one-third of the grass blade at the first mow. If the sod is 3 inches tall, set the mower near 2 to 2.5 inches, not lower. Cutting too short exposes the soil and slows rooting.
    4. Inspect the ground firmness under your shoes. Walk a straight line across the lawn. Verify that your heel does not sink or create a soft track. If the surface gives under normal body weight, a mower will do worse.
    5. Use a sharp blade. A dull blade tears tender leaf tips, which shows up as brown frayed ends within a day or two. If the mower blade has nicked edges, sharpen it first. A clean cut matters more on fresh sod than on older turf.
    6. Mow when the grass is dry. Choose a dry window after morning dew has lifted. Wet blades bend, clog the deck, and let the mower slide on the sod. If the top looks glossy with moisture, wait.
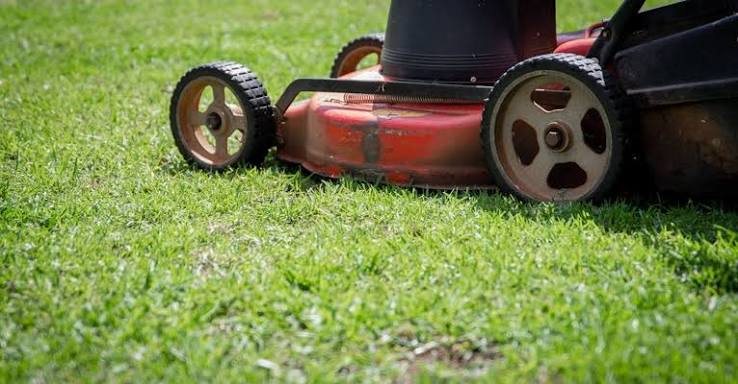
    7. Start with a light mower. A walk-behind mower puts less weight on the turf than a heavy rider. If you must use a riding mower, make sure the lawn is firm and avoid tight turns that scuff seams.
    8. Bag the clippings on the first cut. Verify that clippings are short and light enough to collect. Thick clumps left on new sod can block light and trap moisture. If clippings form piles, you cut too much.

    The first mow should be gentle. I would not scalp new sod to “clean it up.” The goal is thicker grass, not a golf-green finish in week one. Little difference, huge payoff.

    What should I check before I bring out the mower?

    When can you mow new sod after installation?

    You should check root hold, moisture, blade height, and the weather forecast before the first mow. Those four checks tell you more than a planting calendar does.

    Look at the forecast for the next 24 to 48 hours. If a heavy rain is coming, mowing now can leave tracks that fill with water and collapse at the seams. If a heat wave is coming and the sod is already stressed, a first mow can add pressure the grass does not need. A mild, dry day is best.

    Check irrigation timing too. New sod usually needs regular watering, but it should not be wet at mowing time. A good rule is to mow after the surface dries, often later in the morning or early afternoon, not right after irrigation. If the soil sticks to your shoe, wait.

    Look at the leaf length. The first mow is often due when the sod reaches about 3 to 4 inches, depending on species. Bermudagrass can be kept lower than tall fescue, but I would still avoid aggressive cutting on a new install. If your installer left the sod taller than expected, trim in stages over 2 or 3 cuts instead of one hard cut.

    Check your equipment. A mower with a clogged deck, dull blade, or low tire pressure can tear fresh sod. If the mower deck is set unevenly, it can scalp the high spots and miss the low spots. A simple pass with an even, sharp deck is safer than a fancy pattern.

    If you are hiring a lawn service, ask one direct question: “How soon do you mow new sod, and what do you check before the first cut?” A good contractor should answer with root hold, surface firmness, and cutting height, not just a date on the calendar. If they cannot explain why a first mow is delayed, that is a warning sign. You can also ask whether they follow turf establishment steps for the first cut.

    When should I stop waiting and call the installer back?

    You should stop the normal waiting approach when the sod is not rooting, the soil stays soft, or the lawn looks stressed enough that mowing would make it worse. At that point, the issue is not the mower; it is the installation or aftercare.

    Sod still lifts at the seam after 14 days: The roots have not anchored well — Do not mow yet. Ask the installer to inspect grading, soil contact, and irrigation coverage. If the sod was not pressed into firm contact, the first mow can rip it loose.

    Footprints stay visible for hours: The soil is too soft or too wet — Delay mowing and reduce watering frequency slightly if the root zone is saturated. A mower will rut the lawn and can smear the soil under the sod edges.

    Grass is growing fast but the underside feels loose: Top growth has outpaced rooting — Do not cut just because it looks tall. That top growth can fool people. Wait for attachment, then cut lightly.

    Edges are drying, curling, or turning pale brown: The sod is under water stress — Hold off on mowing and correct irrigation. Cutting stressed sod often removes too much leaf surface and makes recovery slower.

    Uneven settlement has created dips or humps over about 1 inch: The surface is not stable — Mowing now can scalp humps and miss dips. Let the installer address the grade, especially if the lawn was laid over fill or poorly compacted soil.

    Mowers would have to turn sharply on a slope: The risk of sliding or tearing is high — Postpone until the turf is firmer, then mow up and down slopes rather than across them. On steep grades, a light walk-behind is safer than a heavy rider.

    If the sod is still failing after a couple of weeks, I would not keep hoping a first mow will solve it. The root problem may be irrigation coverage, soil prep, or a bad fit between the sod and the site.

    The mistakes people actually make, and what they cost

    The most common mistake is mowing by date instead of by root hold. Someone hears “10 days” and starts the mower even though the sod still lifts. The cost is torn seams, visible lines, and patchy rooting that can take weeks to recover.

    Another mistake is cutting too short on the first pass. Fresh sod that is cut from 3 inches down to 1 inch loses too much leaf area and struggles to make food through photosynthesis. The lawn may yellow and thin. The fix is simple: take off no more than one-third, then wait a few days before the next cut.

    A third mistake is mowing wet sod. Wet turf bends under the wheels, and the deck can smear blades instead of slicing them. The result is clogged grass, wheel tracks, and a first cut that looks ragged. I would wait until the surface is dry to the touch and the blades are standing up.

    A fourth mistake is using a heavy riding mower on soft new sod. Those machines can compact the soil and leave ruts, especially near turns and at the edge of driveways. A walk-behind mower is usually the better first choice unless the lawn is large and already firm.

    A fifth mistake is ignoring blade sharpness. Fresh sod shows tearing immediately. Frayed tips turn brown faster than cleanly cut tips, which makes a healthy lawn look stressed. Sharpen the blade before the first mow if you can.

    A sixth mistake is blowing off clippings on the lawn. Long clumps can smother young grass and create damp spots that invite fungal problems. Bag the first cut, then switch to mulching only when the grass is established and growing evenly.

    When the standard timing does not apply

    The standard “about 10 to 14 days” answer changes when the grass species, weather, or site makes rooting slower or faster. Warm-season grasses such as Bermudagrass and zoysiagrass often establish differently from cool-season grasses like tall fescue or Kentucky bluegrass. In practical terms, the first mow may come sooner or later depending on how quickly the roots knit and how fast the blades grow.

    Shaded lawns usually need more patience than full-sun lawns. Less light means slower growth, and slow growth often masks weak rooting. If the sod is under trees or along a north-facing fence line, I would be conservative and check attachment carefully before cutting.

    Clay soils hold water and can stay soft longer than sandy soils. That means a lawn may look green and tall while still being too tender for a mower. Sandy soil drains faster but can dry unevenly, so the surface may crust while the root zone is still shallow. Both conditions call for a hands-on check, not a guess.

    If the sod was laid late in the season, growth can slow enough that the first mow happens closer to 3 weeks than 1. If it was installed in hot weather, you may need to mow sooner but very lightly because the grass can surge upward. Either way, I would avoid a hard first cut.

    On a slope, the margin for error is smaller. Even a slightly loose seam can slide when a mower turns across it. So mow straight lines and keep the mower light, especially during the first 2 or 3 cuts.

    How much does a first mow cost if I hire it out?

    A first mow is usually billed like a standard mow, but the price can run higher if the lawn is newly installed, unusually small, or still delicate. I would expect the cost to depend on lawn size, access, edging, bagging, and whether the crew needs to move slowly to protect the sod. A first visit may also include cleanup after installation, which adds time.

    If you are calling a contractor, ask for a quote that separates the first mow from ongoing maintenance. The first cut should not be priced like a routine weekly service if the crew has to inspect rooting, use a lighter mower, and bag clippings. Ask whether the price changes if the lawn is under a quarter acre, on a slope, or too wet on the scheduled day.

    I would also ask what happens if they arrive and the sod is not ready. A fair setup is either a no-charge delay or a small rescheduling fee, not a full mow charge for work that should not be done. If a company cannot explain that clearly, I would keep looking.

    What does a good first mow look like?

    A good first mow leaves the turf even, not scalped, and the seams still tight. You should see clean leaf tips, short clippings that were removed or lightly scattered, and no wheel ruts. The lawn may look a bit shorter, but it should not look shocked.

    The mower should take off only the top third of the leaf. If the grass was 3 inches tall, a finished height of around 2 to 2.5 inches is a reasonable first target for many lawns, though exact height depends on the grass type. If the cut exposes soil or brown stems, it was too aggressive.

    In the next 48 hours, the lawn should stay upright and green, not wilted. A little change in color at the tips is normal on fresh sod; broad yellowing is not. If the lawn looks worse after mowing, the cut was too low, too wet, or too early.

    FAQ

    Can I mow new sod after 1 week?

    Sometimes, yes, but only if the sod has rooted firmly and the surface is dry. One week is often too early for many lawns, especially in cool weather or on soft soil.

    Should I water new sod before mowing?

    Water the lawn as part of its establishment plan, but do not mow while the surface is wet. Let the top dry enough that your shoes do not sink and the mower tires do not leave marks.

    Should I bag the clippings on the first cut?

    Yes. Bag the

  • How to Fix Seams, Gaps, and Uneven Sod After Installation

    How to Fix Seams, Gaps, and Uneven Sod After Installation

    Last updated: September 10, 2026

    Key Takeaways

    • I would treat new sod like a temporary skin for the first 2 to 3 weeks, but if you’re unsure whether the lawn is still loose enough to move, consult a professional.
    • Cut only enough to free the seam, usually 1 to 2 inches under the edge.
    • Check again after 24 to 48 hours.
    • Do not leave lifted pieces sitting in the sun for 20 minutes while you prepare the rest.

    If your new sod has visible seams, open gaps, or raised edges, the fix for how to fix seams, gaps, and uneven sod after installation is usually to re-seat the pieces, topdress the joints, and keep the lawn evenly moist for the first couple of weeks. I’m talking about fresh sod that has not fully rooted yet; once it has knitted into the soil, the repair changes from “adjust and settle” to “cut out and replace.” For timing guidance, many turf extension guides recommend frequent light irrigation during establishment, but if the lawn seems anchored or the base feels unstable, consult a professional.

    Who this applies to, and what I’m assuming you already have

    How to fix seams, gaps, and uneven sod after installation

    This applies to a lawn installed within the last few days or, at most, a few weeks, where the sod is still flexible enough to lift by hand. I’m assuming you have a knife or spade, a landscape rake, a straightedge or board, a roller or a heavy lawn roller if one was used during installation, clean topsoil or leveling mix, and a hose with a sprinkler. I’m also assuming the base was prepared correctly with about 4 to 6 inches of loosened topsoil and that the sod type matches your climate, sun exposure, and irrigation.

    The answer is not to “fill” every flaw with more sod. Seams usually mean the pieces were laid too tightly or the ground settled after installation; gaps usually mean shrinkage, cutting mistakes, or pieces that pulled apart; uneven sod usually means the grade underneath was wrong or the sod was not tamped into contact with the soil. Those are different problems, and they need slightly different fixes.

    This is a normal homeowner repair if the issue is cosmetic or light settling. It is the wrong tool if the lawn has large hollow spots, standing water after watering, a soft spongy base, or dead strips from heat and drought. In those cases, the surface problem is only a symptom of a deeper install issue.

    Why seams, gaps, and bumps happen in the first place

    Seams and gaps show up because sod is living material, not tile. A pallet contains pieces that dry unevenly, curl a little at the edges, and shrink after they’re cut. Even a small 1/4-inch to 1/2-inch shrink in each piece can create visible lines across a yard. Uneven sod usually comes from one of three things: the soil was not graded flat, the sod was laid over soft fill that later settled, or the installer rolled a wet lawn too hard and pushed some pieces down while others stayed high.

    The fix depends on whether the problem is at the surface or in the base. Surface-only issues show as thin joints, lifted corners, and minor ridges under 1 inch. Base problems show as dips, soft spots, or a roller that bounces when you walk across it. If the ground underneath moves, any patching done on top will fail again.

    I would treat new sod like a temporary skin for the first 2 to 3 weeks, but only as a general rule of thumb; if the pieces seem to be rooting unevenly or the base is soft, consult a professional before forcing a repair. Until roots start to anchor, you can still nudge pieces into place. After that, the margin for correction shrinks fast. That is why timing matters more than cosmetics. A small defect fixed during week one is cheap; the same defect ignored until month two may require cutting and replacing sections.

    Climate matters too. In hot, windy areas, seams open faster because the edge dries before the center. In cool, wet regions, the problem is often the opposite: pieces swell, then settle as the soil dries. On clay soils, the base can hold water and heave slightly; on sandy soils, the lawn can drop where the subgrade was underfilled. Those conditions change how much topdressing is safe. A 1/4-inch dusting of soil is one thing; burying the crown of the grass is another.

    How do I fix sod seams and small gaps?

    How to fix seams, gaps, and uneven sod after installation

    You fix them by lifting, re-bedding, and lightly topdressing the joints, not by packing more dirt on top. The goal is to make the edges touch without burying the grass crown, which is the growing point where blades emerge.

    Here is the sequence I would use:

    1. Water the lawn lightly first. Moisten the sod and the top inch of soil 30 to 60 minutes before you repair so the pieces flex instead of crack. Verify the ground is damp, not muddy. If water squeezes up when you step, it’s too wet and will smear instead of settle.
    2. Lift the loose edges with a knife or spade. Cut only enough to free the seam, usually 1 to 2 inches under the edge. Verify the underside still has contact soil; if it is dry and dusty, the sod has not rooted yet and needs more frequent watering. If the piece tears away cleanly and roots are already matted through, the issue is older than a simple seam fix.
    3. Pull adjoining pieces snug, not tight. Slide edges until they just meet, with no overlap and no daylight showing between them. Verify the blades are aligned and the edges sit at the same height. If one side pops above the other by more than 1/4 inch, the base is uneven and needs leveling underneath.
    4. Fill narrow gaps with matching topsoil or leveling mix. Use clean, screened soil and keep the fill under 1/2 inch deep. Verify the soil sits flush with the top of the sod, not above it. If the fill covers the crown, the grass will yellow or rot at the edge.
    5. Press the seam down with your hand or a board. Apply even pressure along a 2- to 3-foot section so the roots touch the soil below. Verify the sod doesn’t rock when you step on it. If it still bounces, there is an air pocket underneath.
    6. Topdress lightly over the joint. Spread a thin layer, about 1/8 to 1/4 inch, and brush it into the seams. Verify you can still see most of the grass blades above the soil line. If you disappear the blade bases, you’ve covered too much.
    7. Water in the repair immediately. Use enough water to settle the soil without washing it out. Verify the seam darkens evenly and does not pool. If the fill runs away, the sprinkler is too hard or the slope is too steep for that material.
    8. Check again after 24 to 48 hours. Look for shrink-back, raised corners, or new low spots as the soil settles. Verify the joint stays closed. If the gap returns after one watering cycle, the base likely needs more grading, not another surface patch.

    This approach works best for gaps under about 1 inch. Bigger openings are not just seams; they are missing sections. For those, I would cut a matching piece from a spare strip rather than pile soil across the void. A soil bridge dries out too fast and leaves a weak patch.

    What causes uneven sod, and how much can you fix from the top?

    You can correct minor unevenness from the top, but you cannot flatten a bad subgrade with surface fill alone. The common rule of thumb is this: if the difference is under 1/2 inch, topdressing and careful rolling may solve it; if it is between 1/2 inch and 1 inch, re-lift and re-level that section; if it is more than 1 inch, the base needs to be rebuilt in that spot.

    The first check I would make is with a straight board or a 6-foot level. Lay it across the hump or dip and see how much daylight or drop you have. A gentle rise can come from a folded edge under the sod. A dip can come from compacted fill settling under a sprinkler line or foot traffic during installation. The fix changes with the cause.

    For small high spots, lift the sod, shave off excess soil, and reset it level with the surrounding grade. For shallow low spots, add screened topsoil in thin layers no deeper than 1/2 inch at a time, then press the sod back down and water. Do not dump a thick layer under an already laid piece. That leaves an unstable pocket that settles later.

    If the unevenness is across a larger area, I would stop treating it as a patch job and think in terms of grading, and if the area is broad enough that the pattern keeps returning, consult a professional or the installer. That may mean lifting several strips, redistributing soil, and resetting the runs so water flows away from the house and does not puddle. A yard can look flat enough to the eye and still hold water in a 2-foot depression.

    This is where a generic article often gets things wrong: it tells people to “roll the lawn.” Rolling can help contact, but it does not fix a bad grade, and on soft soil it can make the problem worse by pressing some areas lower. Use a roller only when the base is already close and the sod just needs contact. If you are trying to eliminate a noticeable dip, a roller is the wrong tool.

    When should I stop patching and call the installer back?

    You should stop patching when the problem is structural, keeps returning, or covers a large portion of the lawn. In those cases, the repair is not a seam fix anymore; it is a warranty, grading, or drainage issue.

    Gaps keep reopening after watering and a day of drying: the sod is shrinking because it was laid too dry or the soil underneath is not holding contact — ask the installer to inspect the base and replace sections if needed.

    You can feel soft spots that sink more than 1 inch under normal steps: the subgrade is settling or there is void space under the sod — surface fill will fail, so the area needs regrading and recompaction.

    Water pools for more than 10 to 15 minutes after irrigation: the grade or drainage is wrong — the fix is to reshape the soil, not to add more topdressing on top.

    Edges are yellowing or browning within the first few weeks: the crown may be buried or the sod is drying at the seam — uncover the crown if it is smothered, or raise the watering frequency if the root zone is too dry.

    More than about a quarter of the lawn shows uneven height: the problem is installation-wide, not local — that points to a leveling error or uneven rolling, and the whole section may need to be reset.

    The sod has visibly rooted and tearing it would rip established roots: the repair window has closed — cutting in new patches is safer than trying to slide old pieces around.

    If the installer promised a finished grade or a warranty on workmanship, this is the stage where documentation matters. Take photos of the gaps, dips, and any pooling before you change the area. That does not solve the lawn, but it makes the conversation about a specific defect instead of a vague complaint.

    The mistakes people actually make, and what they cost

    The most common mistake is filling seams with too much soil. That buries the crown, blocks air, and can cause a yellow line along the edge within 1 to 2 weeks. The fix is a thin topdress, not a mound.

    Another error is stretching sod pieces to close a gap. That leaves hidden tension in the strip, and the edge often pulls back again as it dries. The correct move is to cut a filler piece to fit the opening, even if that takes another 10 minutes.

    People also water too hard after a repair. A strong spray washes soil out of the seam and can expose roots. I would use a gentle cycle or a finer nozzle so the surface settles without moving. If the repair area is on a slope, water in two or three shorter passes instead of one long soak.

    Rolling too early is another problem. A heavy roller on soft ground can press one section down 1/2 inch or more while leaving adjacent strips high. Use it only when the soil is firm enough to resist footfall, usually after the first few days, not right after a flood of irrigation.

    A fifth mistake is ignoring the pattern. One crooked seam may be a hand-placement issue; repeated ridges every few feet usually mean the installer was laying across a crowned or uneven base. That changes the fix from spot repair to regrading.

    Finally, some people mow too soon. A mower wheel can catch a lifted edge and peel it back. Wait until the sod resists a light tug and the lawn has had at least one or two good watering cycles with no lifting at the edges. The exact timing depends on temperature and sod type, but if you can still move the piece by hand, it is too early.

    What changes in hot weather, heavy soil, or a sloped yard?

    You have to change the repair method when heat, clay, or slope makes the seam unstable. In hot weather above roughly 85°F, exposed edges dry fast, so I would work in short sections and water the seam immediately after each one. Do not leave lifted pieces sitting in the sun for 20 minutes while you prepare the rest.

    On heavy clay soil, use less topsoil and more careful pressing. Clay holds moisture, and a thick repair layer can stay wet too long, suffocating the crown. On sandy soil, the opposite is true: the repair dries quickly, so a slightly finer topdressing and more frequent light watering may be needed to keep the seam from shrinking back.

    On slopes, gravity works against you. Soil added to a seam can slide downhill, especially if it is loose and dry. In that case, use shorter topdress applications, press the sod from the uphill side first, and water in small cycles. If the slope is steep enough that water runs immediately off the surface, a standard topdress repair will not hold and the area may need erosion control or regrading.

    If the sod was installed over a sprinkler trench or utility repair, expect some settling. That zone usually needs repeated adjustment over 2 to 3 weeks because the fill compresses as it dries. A single patch is often not enough.

    How long does this take, and what should a repaired seam look like?

    A small seam repair usually takes 15 to 45 minutes for a few linear feet, and a larger uneven section can take a couple of hours if you have to lift and reset strips. The result should look subtle rather than perfect: the edges meet without an obvious crack, the surface feels firm underfoot, and the repair is barely visible from standing height after the next

  • Sod Types, Selection, and Lawn Matching: The Complete Guide

    Sod Types, Selection, and Lawn Matching: The Complete Guide

    Last updated: September 10, 2026

    Key Takeaways

    • Partial shade means roughly 3 to 5 hours.
    • Deep shade means less than 3 hours.
    • Some grasses look best at 1 to 1.5 inches, others at 2.5 to 4 inches.
    • For a lawn you can mow every 10 to 14 days, choose with that schedule in mind.

    Pick the wrong sod type, and the lawn may look fine at first. Then it slips. This sod types, selection, lawn matching — complete guide is about avoiding that mismatch before a single roll goes down. I mean the sort of failure a homeowner notices after the place already looks finished: thin spots, heat scorch, winter browning, constant irrigation, or turf that simply never belonged on that site. Here’s the plan. Match sod to climate, sun, water, use, and upkeep so the choice lasts for years, not weeks.

    Who this guide is for — and who should do something else

    Sod types, selection, and lawn matching — The Complete Guide

    Homeowners, property managers, and landscape buyers all fit here if they need sod for an existing yard, a new build, a patch repair, or a full lawn replacement. You already need a rough climate zone, a basic read on sun versus shade, and enough measuring skill to estimate square footage. Can you tell whether the lawn gets 6+ hours of direct sun, 3–5 hours, or mostly shade? Then you have enough to begin.

    I’m not writing this for a site with unusual drainage engineering, severe salt exposure, or a lawn that must survive very heavy wear without irrigation. Those cases are a different beast. A coastal lot with salt spray, a shaded courtyard under tree roots, or a playfield that takes daily abuse needs closer species selection, soil work, and sometimes a different groundcover entirely.

    What matters most is not “which sod looks nicest in the pallet photo?” It is “what grass species and cultivar can live where I am planting it?” Sod type means the grass species, and sometimes the cultivar, grown on a farm and cut with a root mat attached. That root mat is sod’s whole advantage over seed: instant cover and erosion control. It also makes the wrong pick fail quickly. A cool-season grass put into a long, hot, humid summer often burns out unless it gets intense water and careful management. A warm-season grass placed in a cold inland climate can sit brown for months and still be alive, yet the owner who wants green in January may hate it. Funny thing, really — biology does not care about curb appeal.

    Keep one rule in mind from the start: match the grass to the hardest part of the site, not the easiest. If half the yard is shade and the rest is sun, choose for the shade. If irrigation is limited, choose for drought tolerance, not beauty alone. If kids and dogs use the yard, choose for wear tolerance, not just fine texture. A lawn that needs 1 inch of water every few days is the wrong lawn for a dry lot, even if it looks perfect in the first month.

    What are the main sod types?

    Cool-season grasses, warm-season grasses, and a smaller group of specialty choices for problem sites make up the main sod types. The common names matter less than the species itself, because species drives heat tolerance, winter color, wear recovery, and shade performance. Know the species, and you can usually predict how the lawn will behave.

    Kentucky bluegrass, perennial ryegrass, tall fescue, and fine fescue all sit in the cool-season group. These grasses grow best when air temperatures are moderate, and they often stay green longer in spring and fall. Kentucky bluegrass has a fine-to-medium texture and can spread by rhizomes, those below-ground stems that help it fill in. Perennial ryegrass germinates fast from seed, but as sod it is used for quick establishment and a dense, smooth look. Tall fescue has a coarser blade and deeper roots than many cool-season grasses, which makes it useful where heat and periodic drought are concerns. Fine fescues, such as creeping red fescue and chewings fescue, are the shade specialists of the cool-season group, though hard wear is not their thing.

    Warm-season sod includes bermudagrass, zoysiagrass, St. Augustinegrass, centipedegrass, and buffalo grass in some regions. Heat and high light suit these grasses best. Bermudagrass is one of the toughest wear grasses, with fast recovery and a tight surface, but it can be aggressive. Zoysiagrass forms a dense carpet and often handles moderate shade better than bermuda, though it is slower to establish. St. Augustinegrass has broad blades and good shade tolerance for a warm-season grass, but it dislikes cold and tends to need more water than drought-hardier options. Centipedegrass is low-maintenance in the right climate, yet it is not a good choice for high traffic or rich, heavily fertilized lawns. Buffalo grass works best in drier, lower-input settings and is not the right answer for a manicured, golf-green look; consult a professional if you are unsure whether your site is suitable, because local soil and irrigation conditions matter, according to the University of Nebraska–Lincoln’s buffalo grass guidance.

    There are also blends and mixtures. A blend uses different cultivars of the same species; a mixture uses different species. The point is risk spreading. For example, a blend of several tall fescue cultivars can handle disease or heat pressure better than a single cultivar. The trade-off is obvious: blends and mixtures may be less uniform in color and texture than a single cultivar. That trade-off matters if the lawn sits beside a formal entry walk or a high-visibility patio.

    If you want the cleanest shorthand, here it is: cool-season sod is usually the right family for northern and transition climates; warm-season sod is usually the right family for southern, hotter climates. Usually. That word does a lot of work. The edges are where bad choices pile up.

    How do I match sod to my lawn?

    Sod types, selection, and lawn matching — The Complete Guide

    Start by ranking the site’s toughest conditions in this order: climate, sun, water, traffic, soil, and maintenance level. I would not reverse that order. People often begin with appearance and end with disappointment.

    First, pin down your climate band. Cool-season grasses are generally better for regions with cold winters and moderate summers. Warm-season grasses are generally better where summers are long and hot and winter dormancy is acceptable. In the transition zone, you do not get to skip this step. Tall fescue, zoysiagrass, bermudagrass, and some blends all compete there, and the “best” answer depends on sun, irrigation, and winter expectations. The USDA Plant Hardiness Zone Map is a useful starting point for climate context, but it does not replace local turf advice.

    Second, count sunlight in the planting area. Full sun means 6 or more hours of direct sun. Partial shade means roughly 3 to 5 hours. Deep shade means less than 3 hours. A lawn under mature maples or along a north side wall needs a different grass than a front strip baked all day by reflected heat. If the site has both conditions, pick the grass for the shade and accept that the sunny side may need more irrigation.

    Third, decide how much water the lawn will actually get. Irrigated lawns can support thirstier sod choices. Low-irrigation lawns need grasses with deeper roots or lower evapotranspiration demand, which is the amount of water lost through the plant and soil surface. If you do not know whether you can keep the lawn evenly moist during establishment for the first 2 to 3 weeks, do not choose a fragile type. The National Turfgrass Evaluation Program and university extension guidance both stress matching turf to realistic water supply.

    Fourth, be honest about traffic. A decorative lawn beside a front entry is not a soccer lawn. A dog yard is not a show lawn. Bermudagrass and perennial ryegrass tolerate wear differently; tall fescue works for many family lawns but can thin if traffic is constant and the soil is compacted. The right grass can handle foot traffic, sure, but no sod species likes chronically compacted clay with no relief.

    Fifth, consider mowing height and maintenance. Some grasses look best at 1 to 1.5 inches, others at 2.5 to 4 inches. That matters because low mowing usually means more frequent mowing and tighter irrigation discipline. If you want a lawn you can mow every 10 to 14 days, choose with that schedule in mind. If you want one that needs a very low cut, do not plant it on a calendar that only allows mowing every other weekend. The NC State Extension turf guide gives practical mowing ranges for several common lawn grasses.

    Finally, check your soil drainage. Sod needs intimate root-to-soil contact, and waterlogged ground can suffocate roots after installation. A simple test is to dig 6 to 8 inches, fill the hole with water, and see whether it drains in a reasonable period. If it stays soggy, the issue is not “which sod is best”; it is “what must be corrected before sod can survive here.”

    How do I choose between the most common sod species?

    Decide what loss you can live with, because every grass gives up something. No species is the densest, most drought-tolerant, most shade-tolerant, most wear-resistant, and lowest-maintenance option all at once.

    Kentucky bluegrass fits a classic northern lawn where color and a fine finish matter and irrigation is available. Its rhizomes help it spread and recover, which is useful. The drawback is water demand; it usually wants more than the toughest fescues, and it can stumble in prolonged heat or shade. I would not put Kentucky bluegrass on a dry slope, a heavily shaded yard, or a low-input property.

    Tall fescue is the practical workhorse for many homeowners. It handles a wider range of conditions than people expect, especially heat, drought stress, and average family use. Its leaf is coarser than Kentucky bluegrass, which some people dislike. But that coarser texture is part of why the grass can survive more abuse. If you want a lawn that looks formal and silky, tall fescue may not be your first choice. If you want something more forgiving, it often belongs near the top of the list.

    Fine fescue is the shade specialist. It earns its place where lawn grass is squeezed by trees, buildings, or limited sun. The price is lower wear tolerance and weaker performance in hot, high-traffic areas. I would not use it for a yard with dogs that run the same path every day.

    Bermudagrass is for high sun, heat, and wear. It makes a dense, resilient turf and recovers quickly when damaged. It is not for shade, and it is not for someone who wants minimal mowing in peak season. In the right climate, though, it can be a strong option for active yards. In cooler regions, it is usually the wrong species.

    Zoysiagrass sits in the middle of the warm-season world. It often looks refined, handles moderate wear, and can tolerate some shade better than bermuda. It also establishes more slowly, which matters because sod gives you instant coverage but does not erase the biology of slow root growth. If your goal is quick use after installation, zoysia can be frustrating. If you want a dense, lower-input lawn and can wait for it to knit, it has real advantages.

    St. Augustinegrass is valuable where shade and warm climates meet. Its broad blades make it easy to recognize. It is not the toughest for wear, and it needs more moisture than some people expect. It is often a sensible choice for suburban yards with tree cover in warm regions, but not for lean, drought-prone sites.

    Centipedegrass and buffalo grass are more specialized. They suit lower-input lawns and certain warm regions, but they are not universal replacements. Centipedegrass dislikes overfertilization and heavy traffic. Buffalo grass is best where a native, low-water approach matters more than a lush, formal lawn.

    What should I check before ordering sod?

    Before you pay for a pallet, check measurements, sun exposure, soil condition, irrigation coverage, delivery timing, and the farm’s grass identification. A bad check here costs far more than the sod itself.

    Measure the area accurately. Square footage is easy to underestimate around curves, bed edges, and narrow strips. Break the lawn into rectangles, triangles, and circles, then total the pieces. Add a small waste allowance for trimming, especially if the site has a lot of angles. A seller may price by the pallet, square foot, or roll, but your job is to know how much surface you truly need covered.

    Confirm the grass type in writing. “Sun and shade mix” is not enough. Ask for the species and, if available, cultivar names. A label that says tall fescue blend is better than a label that says “premium lawn sod” and tells you nothing else. If the seller cannot state the species, that is a warning sign.

    Check sod harvest and delivery timing. Sod is a living product. It should be laid as soon as possible after delivery, because stacked pallets generate heat and stress the root mat. If you cannot install the same day, store it in shade and keep it from heating up. The point is not to baby the grass; the point is to avoid turning a fresh load of sod into a compost pile.

    Look at irrigation coverage before you buy. A lawn with dead spots from broken heads or dry corners will punish any sod type during establishment. The first 10 to 14 days matter most. If a corner receives no water, the right response is to fix the sprinkler pattern or choose another area, not to hope for the best. The EPA’s WaterSense irrigation guidance is useful here because it emphasizes uniform coverage and efficient scheduling.

    Inspect the soil surface. Remove old turf, rocks, and debris. The soil should be firm, but not hard as concrete. Sod should lie flat with no big air gaps. A rough grade with dips and humps causes rolling water, dry ridges, and poor rooting. If you see standing water after irrigation or rain, correct the grading before laying sod.

    Ask about sod thickness and freshness. A strong root mat is part of what you are buying. Thin-cut sod can still work, but it dries faster and needs sharper installation discipline. Freshness matters more than marketing language. If the sod is warm, yellowing, or has a sour smell, something is off.

    How do I install sod so it actually matches the lawn?

    Install sod on a flat, clean, moist base; keep seams tight; and hold the root mat damp for the first few weeks. The sequence sounds simple. The details do the heavy lifting.

    1. Remove old vegetation and debris. Strip the existing turf, roots, stones, and trash from the top 1 to 2 inches of the surface. Verify that no clumps or buried sticks remain under the new sod. A problem sign is a bumpy base or old grass poking through seams.
    2. Fix the grade. Smooth the area so water runs away from buildings and does not pond. A gentle slope is enough; the exact pitch depends on the site, but flat spots should not hold standing water after a 10-minute irrigation cycle. If puddles remain, the grade needs correction before sod goes down.
    3. Test and loosen the topsoil. Loosen the upper 2 to 4 inches so roots can move into the soil. Verify that the surface is not glazed or compacted. If a screwdriver cannot enter easily, or if water beads and runs off, the soil is too tight.
    4. Amend only if the soil test or drainage demands it. A simple soil test kit or lab result is more useful than guesswork. If pH is far outside the preferred range for the chosen grass, correct it before installation. A problem sign is advice based only on color or texture of the soil.
    5. Lay the first row straight along a hard edge. Use the longest straight boundary, such as a driveway or walk, and stagger seams like brickwork. Verify that joints are tight with no visible gaps wider than about 1/2 inch. A problem sign is long continuous seams that line up row after row.
    6. Butt pieces tightly without stretching. Press edges together firmly and trim around curves. Do not overlap. Verify that seams touch but do not buckle. A problem sign is lifted edges, which dry out faster and leave brown lines.
    7. Roll or press for soil contact. Use a lawn roller lightly or walk boards over the sod to seat the root mat into the soil. Verify that you do not see air pockets or hollow spots under the sod. A problem sign is sod that feels springy or sounds hollow when stepped on.
    8. Water immediately and deeply enough to wet the root zone. The sod should be moist through the root mat and the top few inches of soil, not just damp on the surface. Verify that the sod is not drying at the edges by the end of the day. A problem sign is curling corners, a dull gray-green color, or dry seams after a few hours.
    9. Keep traffic off for the first 2 weeks. Limit use until roots begin to anchor. Verify by gently lifting a corner in a hidden spot after several days; resistance means rooting has begun. A problem sign is sod shifting under foot or lifting easily.
    10. Begin mowing only after the sod is anchored and the grass has reached the recommended mowing height. Keep the blade sharp and remove no more than one-third of the leaf at a time. A problem sign is tearing the turf or exposing seams after mowing.

    The first month matters more than the first day. Different grasses root at different speeds, and cool weather slows everything down. A spring install in cool-season turf often recovers differently than a summer install in warm-season turf. That is not failure; it is biology. Your job is to keep the root mat alive long enough to connect with the soil.

    When should I stop and choose a different sod type?

    Stop and choose a different sod type when the site asks for a trait your first choice cannot deliver. These are not small inconveniences; they are the conditions that usually lead to long-term failure or a maintenance headache that never really quits.

    Less than 3 hours of direct sun: Most turf grasses will thin there — choose a shade-tolerant option such as fine fescue or, in warm regions, St. Augustinegrass, or use

  • How to water new sod after installation

    How to water new sod after installation

    Last updated: September 10, 2026

    Key Takeaways

    • A simple tuna-can test can show uneven sprinkler output in 15 to 20 minutes.
    • I’d start here: water within 30 minutes of installation.
    • On a 90°F day with wind, water more often; on a 65°F cloudy day, water less.
    • After 7 to 10 days, cut back on frequency and run longer cycles.

    Table of Contents

    How to water new sod after installation

    New sod starts out thirsty. Very thirsty. At first, it needs frequent, shallow watering; later, you shift to deeper soakings once the roots begin knitting into the soil. Miss that first 2 to 3 weeks, and the grass can dry out, shift, or root badly. Get it right, though, and the turf settles fast and stops behaving like a carpet.

    Who this is for, and what I’m assuming you already know

    This is for someone who just had new sod installed, or who is figuring out how to care for sod laid in the last 30 days. I’m assuming you know where the sprinkler controls are, that your yard uses hose-end sprinklers, an in-ground system, or both, and that the sod went onto prepared soil rather than bare hardpan. I’m also assuming you know whether the grass sits in full sun, partial shade, or under trees, because that changes how quickly the surface dries.

    Water the sod and the top inch of soil evenly until the roots grab. Then reduce frequency and increase soak time. Simple, yes. Easy, not always. Moist is not swampy, and that difference matters. Standing water for hours is trouble because new roots need both water and air. Press a screwdriver into the soil below the sod: if it feels dry 1 to 2 inches down after the first week, you’re under-watering. If footprints squish water or the seams feel soft and slick, you’ve gone too far.

    For a local service business, this is where the decision about who to call starts. A good installer should leave you with a clear watering schedule for your climate and season, and should explain whether the sod was pinned, rolled, or installed over sand, loam, or amended topsoil. If they can’t tell you that, one useful piece of information is already missing. Honestly, I’d treat a lawn on a slope, in compacted clay, or installed during a heat spell above 85°F differently from a flat yard in cool weather; in those cases, talking with a local turf or irrigation professional makes sense. The University of Florida IFAS sod installation guidance also notes that slope and soil conditions affect establishment and watering needs. Source

    How should I water new sod after installation?

    How to water new sod after installation

    Water it immediately. Then keep the upper layer consistently moist with short, frequent watering for the first 7 to 10 days. After that, stretch the gap between watering sessions while making each run longer so moisture reaches the root zone, usually the top 2 to 4 inches of soil.

    Here’s the practical version I’d use to start:

    1. Water within 30 minutes of installation. Run enough water to soak the sod and the soil beneath it, usually about 10 to 20 minutes per zone with sprinklers, depending on output. Verify: the sod should look dark and feel heavy, and seams should no longer look dry and curled. Problem sign: edges lift easily or the sod already looks pale and brittle.
    2. Check coverage across the whole yard. Make sure every section gets hit by water, especially corners, strips along fences, and areas near walls. A simple tuna-can test can show uneven sprinkler output in 15 to 20 minutes. Verify: cans or shallow containers fill at roughly similar rates. Problem sign: dry patches appear in the same places each cycle.
    3. Water 2 to 4 times per day for the first week in warm weather. Each run is usually short, often 5 to 10 minutes, just enough to keep the surface damp without puddling. In cool, cloudy weather, one to two runs may be enough. Verify: the sod stays cool and flexible through the day. Problem sign: the top dries to a lighter color before the next cycle.
    4. Adjust for temperature and wind. On a 90°F day with wind, water more often; on a 65°F cloudy day, water less. Wind can strip moisture faster than heat alone. Verify: the sod does not crust or curl at the edges by midday. Problem sign: one side of the yard dries much faster than the rest.
    5. After 7 to 10 days, reduce frequency and increase duration. Move toward once-daily watering, then every other day, while making each cycle long enough to wet deeper soil. Verify: roots begin to resist a gentle tug, and the turf feels anchored. Problem sign: you can still lift a corner like a rug.
    6. Test root progress after about 10 to 14 days. Lift a corner at a seam in a hidden area; roots should start to hold the sod in place. Verify: you feel resistance instead of easy separation. Problem sign: the sod peels up cleanly and the soil underneath is dusty.
    7. Transition to deep watering around weeks 3 to 4. Water less often, but long enough to moisten 4 to 6 inches of soil when possible. That usually means one or two deeper sessions per week, not daily sprinkles. Verify: grass blades stay upright between waterings without wilting in the morning. Problem sign: footprints linger or the lawn looks gray-blue by afternoon.
    8. Stop watering on a fixed calendar if the soil tells you otherwise. Use the finger test, a screwdriver, or a soil probe to check moisture 2 inches down. Verify: soil feels damp, not muddy. Problem sign: the surface is green but the layer underneath is dry and crumbly.

    Runtime depends on sprinkler output. A rotary head, a fixed spray nozzle, and a drip line all behave differently, so minutes alone can mislead you. Depth is what counts. If your irrigation system delivers about 0.25 inch per cycle, that is a very different animal from 0.75 inch. Don’t guess if you can avoid it. A catch-cup test is a practical way to estimate output.

    For setup help, this is also a good moment to review your sprinkler layout and use a basic irrigation calculator or zone map. Sprinkler coverage affects how evenly new sod roots, and irrigation output determines whether a short run is enough.

    How do I know if I’m watering too much or too little?

    Look at the grass and the soil, not just blade color. New sod can look green while the roots are still dry, and it can look a little dull while still holding enough moisture.

    Too little water shows up as curling edges, a lighter gray-green cast, footprints that stay visible, and seams that separate. If the sod shrinks, the edges pull back and expose the joints. That matters because small gaps dry faster and can invite weeds before the sod closes. Too much water shows up as spongy footing, puddles that remain more than 30 minutes, sour-smelling soil, or a blackened seam line where water has stayed trapped. New sod laid on tight clay is especially vulnerable to that last problem.

    Here’s a useful check: lift one corner at a seam after several days. If the underside is still muddy, you’re probably overwatering or letting one pass run too long. If the underside is dry and the roots are not reaching, you’re under-watering or your sprinkler pattern misses that spot. Morning is often the best window because less water is lost to evaporation, but local weather, wind, and irrigation timing still matter. Evening watering can leave the blades wet overnight, which is not ideal for fungal pressure, and the EPA’s WaterSense guidance recommends watering early in the day to reduce evaporation loss. Source

    The trade-off is plain: new sod needs frequent moisture, but not endless saturation. That’s why a lot of generic lawn advice falls apart. It says “water deeply and infrequently” without admitting that this comes later, after the sod has rooted. During the first week or two, the rhythm should be more frequent and lighter, then deeper and less often. Chickens and eggs. Same story, different packaging.

    What are the mistakes people make with new sod?

    The biggest mistake is waiting until the sod looks thirsty before watering. By the time the blades curl, the surface layer may already be too dry for root initiation. The fix is to water on a schedule and adjust with soil checks, not by eye alone.

    Another mistake is blasting one zone for 30 to 45 minutes and then skipping the rest of the day. That can create runoff on slopes and airless soil under clay. Better: two or three shorter passes with a 20 to 30 minute gap between them, so the water has time to soak in.

    Shade trips people up too. Sod under trees often dries unevenly because tree roots compete for water, and the canopy can block rainfall while still letting wind through. Those spots often need the same frequency as sunlit areas, and sometimes more careful hand-checking.

    Walking on new sod too soon is another common miss. Foot traffic can break the weak early root contact and leave depressions that collect water. I’d avoid regular use for at least 2 weeks and limit access even longer if the lawn was installed in hot weather. If you must cross it, use a board or a stepping path.

    Don’t keep watering the same amount after the sod has rooted. That can keep the grass shallow-rooted, which makes it easier to scorch in a heat wave. Once the sod is established, the lawn should be able to go longer between soakings.

    And don’t ignore sprinkler head failure. A clogged nozzle or a head stuck at the wrong arc leaves one strip dry and another flooded. If a 3-foot-wide band stays different from the rest of the lawn, the schedule may not be the only issue; the distribution is. If the strip stays dry after you adjust run time, check the head, nozzle, pressure, and overlap. Sprinkler repair may be the fastest fix.

    When should I stop following the standard watering schedule?

    Any time site conditions make the standard schedule the wrong tool. New sod is not a one-size job, and a rigid calendar can do real damage.

    Heavy clay soil with puddling after 15 to 30 minutes: the water is not moving down fast enough — switch to shorter cycles with rest periods, and have the grading or soil structure checked if puddles keep forming.

    A slope where water runs downhill in under 10 minutes: the water is leaving before it can soak in — use cycle-and-soak watering, with 2 or 3 short runs separated by 20 minutes.

    Heat above about 90°F with dry wind: the sod will lose moisture much faster than a mild-day schedule assumes — water earlier in the morning and add an extra short cycle if the surface starts to curl.

    New sod installed over compacted fill or construction debris: roots may sit in a shallow layer with poor penetration — a normal schedule may not solve it, and the installation may need correction if roots stall after 2 to 3 weeks.

    Shady areas under mature trees: root competition and slower evaporation change the pattern — water those zones based on soil feel, not the same timer used for the sunny front yard.

    Sprinklers that leave a dry strip or a half-moon pattern: the problem is coverage, not timing — fix the head, nozzle, or pressure before increasing runtime.

    If you’re seeing standing water, foul smells, or sod that lifts easily after 2 weeks, the watering plan may no longer be the main issue. At that point, a local turf installer or irrigation contractor may be the right call, because the cost of a bad first month can be the cost of replacing sections of sod later. For broader lawn troubleshooting, see our lawn care services and drainage solutions pages.

    How long does it take for new sod to settle?

    Most new sod needs about 2 to 3 weeks to begin rooting well enough that you can reduce watering, but full establishment often takes longer, especially in hot weather or with cool-season grasses. That timeline is not a promise; it depends on turf type, soil prep, and season.

    A good result looks like this: after the first week, the sod still feels uniformly moist and does not have obvious dry seams. Around the second week, it starts to resist a gentle lift. By the third or fourth week, it should act more like part of the yard than a loose mat. The blades may still look a bit softer than mature lawn grass, but the turf should not shift underfoot.

    Cost matters here because watering new sod can change your water bill in a way people underestimate. The bill depends on local rates, irrigation output, and yard size, so I wouldn’t guess a number. What I can say is that a poorly adjusted system can waste enough water to matter quickly, especially on a quarter-acre or larger lawn.

    If you’re hiring the job out, ask the contractor how long they expect the rooting window to be for the specific grass type and month of installation. Ask whether they include a first-week watering plan in writing. Ask what they expect if the sod is laid during a hot stretch or on a slope. A careful installer should be able to answer without hand-waving.

    What changes in hot weather, shade, or different sod types?

    Hot weather usually means more frequent checking, not just more water. In 85°F to 95°F conditions, new sod can dry fast enough that the surface needs attention twice a day, especially if wind is involved. The morning run matters most; late-day watering is a backup, not the main event.

    Shade changes the rhythm too. Less sun can mean slower drying, but tree roots and blocked rainfall can make shaded spots uneven. I wouldn’t assume shade equals low-water needs. It often means, “water the same amount, but verify more carefully.”

    Different turf species root at different speeds. Warm-season sod such as Bermuda or zoysia generally wants heat to establish well, while cool-season sod such as fescue or Kentucky bluegrass behaves differently in early spring and fall. The practical takeaway is that the calendar matters. Sod laid in October in a cool climate will not follow the same watering pattern as sod installed in June in the South.

    If the yard has sandy soil, water may drain fast and require shorter, more frequent runs at first. If it has heavy clay, the same amount of water may sit at the surface and need cycling. That is why I’d always ask the installer what the native soil is, because soil type changes how you should water new sod during the first few weeks. For more on setup choices, see our soil preparation and sod installation guides.

  • Common Sod Installation Mistakes and How to Avoid Them

    Common Sod Installation Mistakes and How to Avoid Them

    Last updated: September 10, 2026

    Key Takeaways

    • That kind of failure usually starts in the first 48 hours, not months later.
    • The first 7 to 14 days matter most.
    • Another common failure is heat stress from delayed installation.
    • It also applies if you are comparing bids and want to know what a fair installation should include.

    Bad seams, weak grading, poor timing, and sloppy watering can ruin a fresh lawn fast; they leave dead lines, roots that never knit, and a bill for rework. So this guide on common sod installation mistakes and how to avoid them is aimed at a homeowner or property manager who is weighing a local sod installer against a quote, and it assumes you already know the basics: sod is cut turf laid over prepared soil, and it needs immediate water and close contact with the ground. Got drainage problems, standing water, a steep slope, compacted clay, irrigation that needs redesign, or a lot of tree roots already in place? That is where a rushed DIY job or the lowest bid tends to blow up first.

    Who this applies to — and who should do something else

    Common sod installation mistakes and how to avoid them

    This guide on common sod installation mistakes and how to avoid them applies to anyone getting sod installed on a typical residential lawn, townhouse yard, rental property, or small commercial strip where the goal is fast ground cover and a clean finish. It also applies if you are comparing bids and want to know what a fair installation should include. A good sod job is not just “roll it out and water it”; it is soil preparation, grade correction, tight seams, and a watering plan for the first 2 to 3 weeks.

    Not every site fits that simple formula. If the yard stays muddy after rain, the soil is heavily compacted, the slope falls hard toward a foundation, or the lawn area gets heavy foot traffic from day one, the standard method needs modification. In those cases, the price is usually higher because the job needs more grading, import soil, or drainage work. Cheap can be false economy here. A bare-minimum sod install in a flat, accessible yard can be the cheapest path, but that is only true when the site really is simple. A difficult site can cost meaningfully more because the labor is in the prep, not the turf.

    I’d judge a contractor partly by what they refuse to skip. If someone says the soil “looks fine” without talking about grade, topsoil depth, irrigation coverage, or how they will handle edges, that is a warning sign. A sloppy install often shows up as raised seams, soft spots, turf shrinking back from sidewalks, or patches that never root. That kind of failure usually starts in the first 48 hours, not months later.

    If you are trying to decide who to call, ask for the square footage, the prep steps, what soil they plan to add, and whether sod is harvested and installed the same day. A quote that does not separate labor, delivery, demolition, soil amendment, and cleanup is hard to judge.

    What a good sod installation actually requires

    A good sod installation requires level, firm soil, correct grade away from structures, tight seams, and water on the turf within minutes, not hours. “Grade” means the shape and slope of the soil surface. You want water to move away from foundations and low spots, while still leaving the lawn walkable and visually even.

    Here is the core sequence I would expect from a careful installer:

    1. Clear the area to bare soil. Remove existing grass, weeds, rocks, and construction debris, then strip the top layer deeply enough to eliminate mats of old roots; verify that nothing spongy remains underfoot, and watch for a surface that feels springy or uneven, which means old turf was not fully removed.
    2. Check and fix drainage before laying sod. Shape the soil so it falls away from the house by about 1 to 2 percent—roughly 1/8 to 1/4 inch per foot—then verify that no puddles form after a light hose test; standing water means the grade is wrong and should be corrected now, not after the sod is down.
    3. Loosen and improve the top layer. Till or cultivate the upper 3 to 4 inches where the soil is compacted, then mix in topsoil or compost only if the native soil is thin or poor; verify that the root zone is friable, not rock-hard, and if a shovel bounces or the soil comes up in plates, compaction is still a problem.
    4. Set final grade before delivery day ends. Rake the surface smooth, remove high spots, and fill low spots so the finished lawn is within about 1/2 inch of level across small areas; if you are unsure whether the surface is truly ready, consult a local landscaping professional before the sod goes down. Verify with a straight board or string line, and treat dips deeper than about 1 inch as a problem because they collect water and create soft turf. University of Minnesota Extension: sod establishment
    5. Install the sod tightly and in a staggered pattern. Lay rolls or slabs in brick-like offsets, not straight seams aligned across the yard, and butt edges together without overlap; verify there are no gaps wider than about 1/4 inch, because open seams dry out and invite shrinkage.
    6. Cut edges cleanly around beds, walks, and fixtures. Use a sharp knife or sod cutter to trim against concrete, curbs, and planting beds, then press the edges flush; verify there are no lifted corners or exposed soil strips, which usually become dry seams or weed lines.
    7. Roll the lawn to seat the roots. Use a lawn roller only enough to press sod into the soil, not compact it hard; verify the turf feels flat and well-contacted without sinking underfoot, and if the surface turns muddy or compressed, the roller was too heavy or the soil was too wet.
    8. Start irrigation immediately and evenly. Water long enough to wet the sod and the soil beneath it, often in 2 to 3 light cycles on day one rather than one long soak; verify the first inch of soil is moist, not puddled, and if water runs off or pools, the application rate is too high for the grade or soil texture.

    That list sounds basic. It isn’t. The turf itself is only half the product. The other half is the soil surface it lands on.

    A professional quote should usually reflect several variables: square footage, soil condition, access to the yard, removal of old lawn, delivery timing, and whether a topsoil layer is being added. In many local markets, a simple sod install may be priced by the square foot, while prep work and soil correction are priced separately. If a quote seems unusually low, I would ask what is excluded. The United States Department of Agriculture notes that soil properties and site preparation affect turf establishment, and sod vendors typically specify same-day installation for living turf; both are worth checking before you sign. USDA NRCS: soil quality for turfgrass and landscapes University of Georgia Turfgrass Extension

    Why sod fails even when it looks fine on day one

    Common sod installation mistakes and how to avoid them

    Sod fails when it is laid on the wrong surface, watered inconsistently, or installed too slowly after delivery. The common trap is that the lawn can look finished for a week while the roots are still sitting on a bad foundation.

    The biggest hidden mistake is shallow root contact. If the soil below the sod is dusty, lumpy, or compacted, the roots do not knit into it well. The lawn may stay green for a short time from stored moisture, then turn patchy when the top layer dries. Another common failure is heat stress from delayed installation. Sod is living plant material; if it sits stacked too long in sun or warm weather, the edges dry and the rolls heat up. That is a real risk in summer jobs where delivery and installation are not tightly scheduled. Ugly on day one can turn ugly twice as fast in July.

    The wrong watering pattern causes a different kind of damage. A lot of people overwater the surface and still miss the soil underneath. That leaves the sod wet on top but dry below. The result is weak rooting and a lawn that shifts when walked on. On the other hand, brief misting without enough soak leaves the new turf thirsty by afternoon. The first 7 to 14 days matter most. A good installer should talk about watering frequency by weather, soil type, and sun exposure, not give a single canned schedule. Penn State Extension: establishing a new lawn

    I also watch for seam failure. If seams are gapped or placed in long straight lines, they dry out first. You see that as brown joints, uneven settling, and shrinkage between pieces. The lawn may still survive, but it will not look like one continuous surface.

    If a contractor tells you the lawn “will settle itself out,” I would treat that as a warning. Sod can settle a little. It cannot fix bad grading, missing soil, or poor seam layout, so you should consult a professional or ask for the issue to be corrected before installation.

    What mistakes people actually make, and what they cost

    The most expensive mistakes are the ones that force rework in the first month. A bad sod job does not usually need “repair”; it often needs partial removal and a second round of prep.

    1. Skipping soil prep.
      Consequence: the turf roots into a hard crust instead of the ground below, so it dries out and moves underfoot.
      Correct alternative: spend the time and money on clearing, loosening, and correcting grade before any sod arrives.

    2. Installing over low spots or trench marks.
      Consequence: water collects, the sod stays saturated, and those areas soften or rot faster than the rest of the lawn.
      Correct alternative: fill and level depressions first, especially near downspouts, walk edges, and old utility cuts.

    3. Using a straight seam pattern.
      Consequence: long seams open as the sod shrinks, making the whole yard look striped and patched.
      Correct alternative: stagger joints like brickwork and keep pieces tight edge to edge.

    4. Letting sod sit too long before laying.
      Consequence: rolled turf overheats, edges brown, and thin spots appear even if watering starts later.
      Correct alternative: schedule delivery for the same day as installation and keep rolls shaded if they must wait briefly.

    5. Watering by guesswork.
      Consequence: the top stays damp while the root zone stays dry, or runoff washes soil away from edges.
      Correct alternative: water until the soil beneath the sod is moist, then adjust for heat, wind, and soil texture. University of Minnesota Extension: watering lawns

    6. Ignoring access and cleanup in the estimate.
      Consequence: surprise charges, rushed labor, or a crew that cuts corners to stay on budget.
      Correct alternative: get the quote in writing with disposal, prep, delivery, and cleanup separated.

    A bad job also looks bad in specific ways: seams you can see from the driveway, edges that curl at sidewalks, soft spots after the first irrigation cycle, or discoloration that starts in strips rather than patches. Those are not cosmetic quirks. They are clues that the base was wrong.

    When should you stop and call for a different plan?

    You should stop the standard sod plan when the site has conditions that make rooting or drainage unreliable. In those cases, the right move is usually more prep, a different ground-cover choice, or a contractor who can solve the site problem first.

    Standing water remains 24 hours after rain: That means the grade or drainage is wrong — Do not lay sod until the water path is corrected, because the turf will sit wet and fail in those low spots.

    The soil is heavy clay and turns slick when wet: That means compaction risk is high — Ask for mechanical loosening, amendment, or a more substantial soil rebuild, because surface raking alone will not create rooting depth.

    The lawn is sloped enough to wash soil away during watering: This means runoff will steal moisture and move the base — Use shorter watering cycles, erosion control, or terracing rather than a standard soak schedule.

    Tree roots cover much of the planting area: That means the sod will compete for water and may not root evenly — Reduce expectations, adjust irrigation, or consider a shade-tolerant ground cover where deep rooting is unrealistic.

    You need the lawn open to heavy foot traffic in less than 2 to 3 weeks: That means the turf may be damaged before it knits — Delay traffic or use a different surface, because fresh sod is not ready for abuse on day 3.

    There is no practical irrigation access: That means the sod cannot be kept alive through establishment — Add watering capability first or do not install sod yet.

    This is also where local conditions matter. In hot, dry regions, sod often needs more frequent early watering. In cool, humid regions, drainage and disease pressure matter more. If your area has watering restrictions, a contractor should explain how that affects establishment before the job begins.

    How long does sod installation take, and what should a good bid include?

    A straightforward sod installation often takes 1 day for a small yard and 2 to 3 days for a larger or more complex property, but prep can add time fast. If the site needs old turf removal, grading, topsoil, or irrigation adjustments, the job can stretch longer. The turf itself should not sit on the truck or in the driveway for long. That time window matters more in hot weather than in cool weather.

    A good bid should include square footage, removal of existing lawn if needed, soil prep, sod type, delivery timing, irrigation expectations, and cleanup. It should also spell out what happens if hidden issues appear, like buried debris, compacted fill, or bad drainage. If a bid is missing those details, the final invoice can jump later.

    Price varies by region and by what the ground needs. A flat, accessible yard is cheaper than a site with narrow side access, stump roots, or drainage correction. I’d be cautious about any price that treats all square footage the same, because the labor is not the same. A low price can also be the one that leaves out prep, which is how you end up paying twice. The most expensive lines on some bids are not the sod itself, but the correction work required to make common sod installation mistakes and how to avoid them irrelevant. A good result looks simple: tight seams, no obvious low spots, even color across the yard, and soil that stays firm when walked on lightly. The lawn should not feel spongy, and the edges should stay flush to concrete and bed lines. If you can see the installation work from the curb, that usually means the grading or seam layout was rushed.

    What I would ask before hiring a local sod installer

    I would ask five things before I signed anything: what soil prep is included, how they handle drainage, how soon after delivery the sod is installed, what watering plan they recommend for the first 14 days, and what visible defects they will fix if the lawn settles unevenly. Those questions tell you whether the contractor is pricing a surface job or a real installation.

    I would also ask what kind of sod they plan to install and why it fits the site.