

Last updated: October 25, 2026
Quick Answer
Repair sod damaged by pests and disease in 4 steps: identify the cause, stop active damage, remove failed turf, and replace the sod. For How to repair sod damaged by pests and disease, the order matters because active grubs, fungus, or poor soil can make new sod fail again. If the damage is spreading, recurring, or hard to identify, consult a qualified local turf professional or extension office before re-sodding.
Damaged sod can sometimes be repaired, but only after the pest or disease problem is identified and the site is stabilized. If the turf is thin, chewed, or patchy from grubs, insect feeding, or fungus, the right order is: confirm the cause, stop active damage, remove failed turf, correct the soil, then re-sod or patch the area. Because this is a yard-health problem with living organisms involved, it is worth speaking with a qualified local turf professional or extension office if the damage is spreading, recurring, or hard to identify. The topic here is How to repair sod damaged by pests and disease, and the repair sequence should stay tied to that topic throughout.
Key takeaways
- Start with the cause, not the patch: grub injury, insect feeding, and fungal damage each need a different fix.
- Repair works best when the pest or disease is no longer active; otherwise, new sod can fail too.
- A soil test helps show whether compaction, pH, or fertility is making recovery harder.
- Fungicide and insecticide are tools for specific problems, not general lawn medicine.
- If more than a small area is damaged, re-sodding part of the lawn is often cleaner than trying to nurse weak pieces back.
What counts as pest or disease damage in sod?
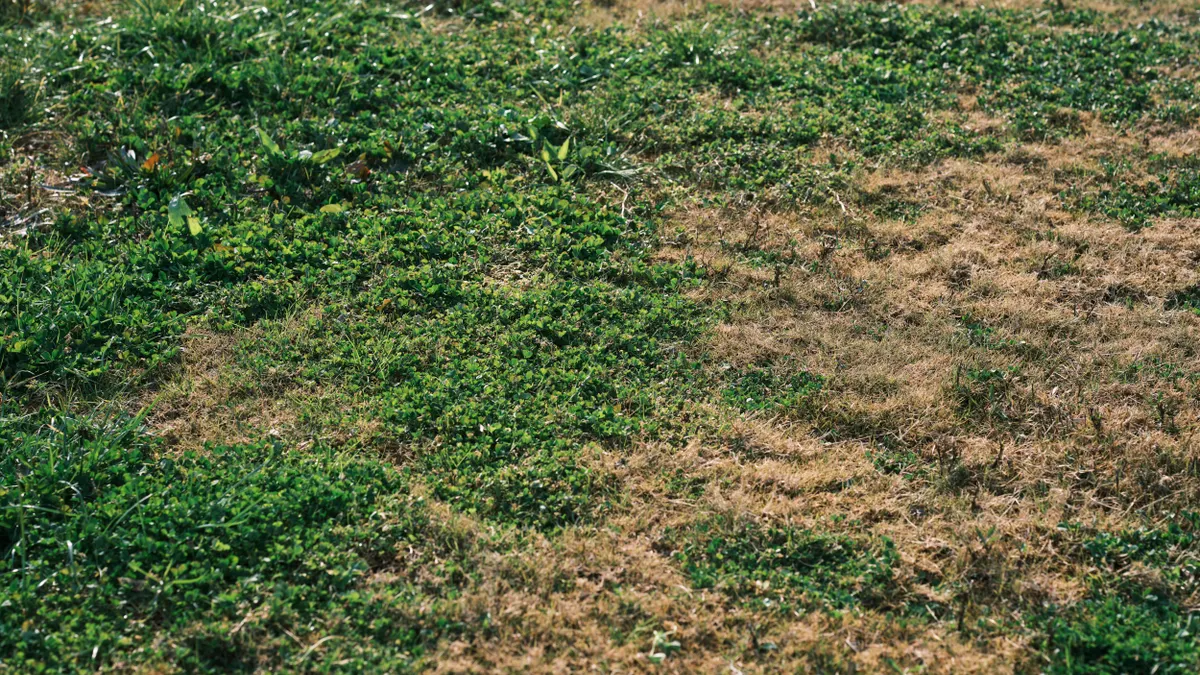
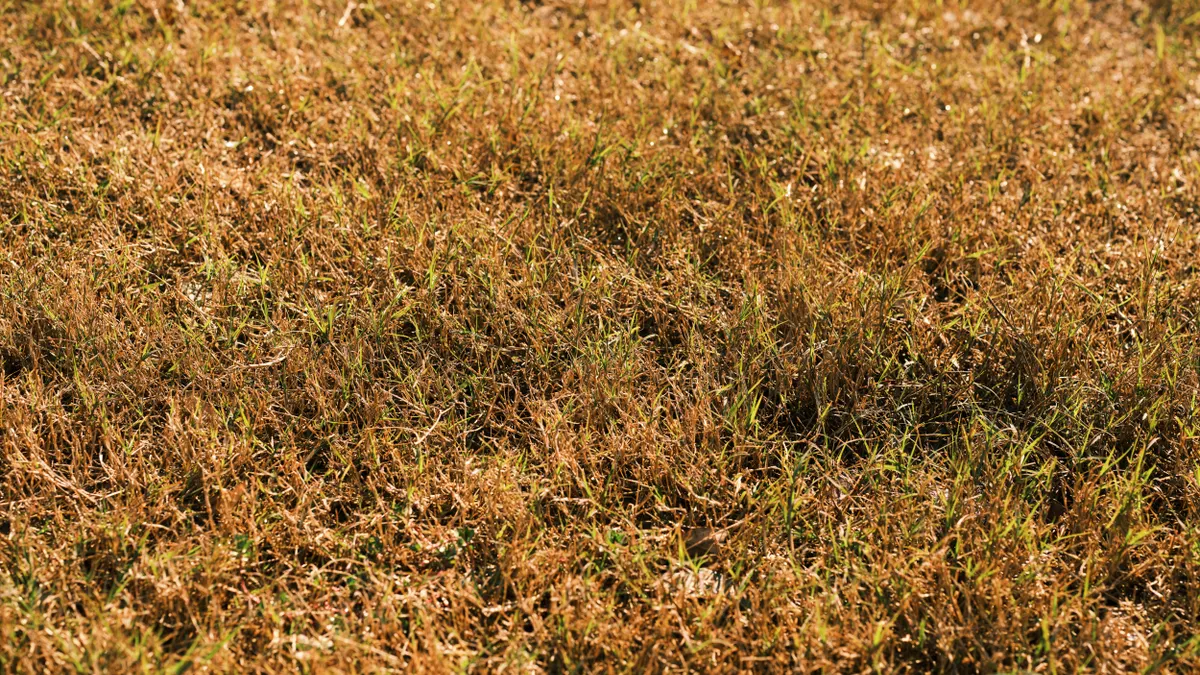
Pest or disease damage is any sod loss where living turf is being eaten, thinned, or killed from below or within the leaf tissue. The first clue is usually not the grass color alone. A reader should look for loose turf that peels up easily, patches that expand in irregular shapes, or blades with chewing, spotting, or powdery growth. Grubs are white, C-shaped beetle larvae that feed on roots and can leave turf detached from the soil. Fungal disease often shows up as rings, spots, or fast-moving thinning during humid weather.
The practical question is not “What is wrong with the lawn?” in the abstract. It is “Is this damage still active?” A patch with dead roots underneath will not knit back together just because it gets water. If the problem is active, fix that first. If the problem is no longer active, the repair path can move straight to cleanup and re-sodding.
The best first filter is often to tug the damaged sod gently and see whether it lifts easily. If it lifts like a loose rug, root loss is likely. If blades are spotted, matted, or fuzzy but roots still hold, fungus is more likely. If you see birds pecking, skunks digging, or an uneven patch that started small and grew, grubs become more likely. This is where a soil test and, when needed, a lab or extension diagnosis can save time before you spend money on new turf. For more on diagnosis, see the extension turf disease resources, the EPA lawn care guidance, and the USDA home lawn basics.
How do you repair sod damaged by pests and disease?
You repair it by stopping the cause, removing failed turf, correcting the site, and then replacing the sod in that order. The sequence matters because new sod laid over active grubs, untreated fungus, or poor soil usually fails again. For a homeowner working on a small area, a 10-by-10-foot patch is often a reasonable project; for larger or repeated damage, a professional diagnosis is usually the safer choice. A 10-by-10-foot patch is about 100 square feet, which gives you a useful size check before you buy materials.
-
Confirm the cause in the damaged area.
Lift a few pieces of sod and inspect the top 2 inches of soil and the root zone. Look for grubs, tunneling, slimy roots, or leaf spotting. If possible, compare the damaged section with a healthy section nearby. A problem here is obvious mismatches: no visible pest, but clear root loss, or visible fungus symptoms without matching weather conditions. -
Stop the active problem before repair.
Use the appropriate control method for the specific cause. A targeted insecticide may be needed for an active insect infestation; a fungicide may be considered when a fungal disease is confirmed or strongly suspected. The key verification is that new damage slows or stops over the next several days to a couple of weeks, depending on the issue. If the area keeps expanding, the cause is still active. -
Cut out all failed turf.
Remove dead or rotted sod and the thin layer of contaminated material beneath it, usually about 1 to 2 inches deep, so the new sod is not placed onto decaying tissue. Edges should be clean and square, not ragged. A problem sign is soft, foul-smelling, or stringy material left behind. -
Inspect and improve the soil.
Run a soil test before replacing large areas, especially if the damage is recurring. A soil test can show pH and nutrient issues that slow rooting or favor disease. Also check compaction: if a screwdriver cannot enter the soil easily, the site may be too dense for new roots. If the test suggests an imbalance, correct it before sod goes down. -
Level and firm the base.
Rake the soil smooth and firm it lightly so the new sod sits flat. The surface should not have dips deeper than about 1/2 inch across the patch. If the base is uneven, water pools in low spots and dries faster on high spots, which creates more stress and can invite a repeat problem. -
Install new sod immediately.
Lay fresh sod the same day the soil is prepared whenever possible. Stagger seams like brickwork and press edges tightly together. The piece should feel like it belongs to the ground, not float above it. Gaps wider than about 1/4 inch dry out fast and leave open edges. -
Water to settle, not to flood.
Water enough to moisten the soil beneath the sod and remove air pockets. The top layer should be damp, not muddy. If water runs off or puddles in minutes, the site is either compacted or too sloped. If the sod lifts easily after watering, it has not been seated well enough. -
Hold traffic off the patch while it settles.
Keep foot traffic, pets, and mower wheels off the repaired section until the new sod is anchored. New sod should resist a gentle lift at the edge before it is treated like the rest of the lawn, but if it still lifts easily, consult a turf professional or extension office before assuming it is ready. If the patch shifts when stepped on, the root contact is not yet adequate.
This sequence is the backbone of the repair. A small, clean patch can be managed by a careful homeowner. If the issue is spreading across multiple zones, comes back after treatment, or affects a large part of the lawn, that is the point to bring in a turf specialist rather than keep guessing.
What should be treated before replacement?
The active problem should be treated before replacement, but only the problem that is actually present. That sounds obvious, yet this is where many repairs go wrong. If grubs are still feeding, replacing sod only gives them fresh roots. If fungal disease is still active, new turf can pick up the same stress. If the underlying issue is compacted or poorly draining soil, neither insecticide nor fungicide will solve the site. If you are not sure which problem is active, consult a local extension office or turf professional before buying replacement sod.
For insect damage, the repair priority is to stop feeding and verify that no new root loss is occurring. For fungus, the priority is to remove infected debris, reduce the conditions that favor the disease, and use a fungicide only when the diagnosis supports it. Fungicide is not a generic rescue product; it is specific to fungal problems. Likewise, insecticide belongs to confirmed insect problems, not a thin lawn in general.
A useful rule is this: do not install new sod into an active battlefield. If the turf is still collapsing, the damage is not yet under control. If the soil is wet and sour, or if more than one nearby patch is failing, take the extra step of confirming the cause through an extension service, diagnostic lab, or turf professional before replacing anything.
The trade-off is time versus certainty. Waiting a few days for better identification is usually cheaper than re-sodding twice. That said, waiting too long can leave bare soil exposed, so once the cause is understood and stabilized, repair should move promptly.
When should I stop patching and re-sod the area?
Stop patching when the damage is larger than a small spot, the root zone is ruined, or the problem keeps returning. Repairing little pieces is useful only when the surrounding turf is healthy enough to knit in. Here are the situations where patching is the wrong tool:
Damage keeps expanding after treatment: The cause is still active or was misidentified — stop patching and get a better diagnosis before more sod is lost.
The sod lifts easily across most of the patch: Root failure is too extensive for spot repair — remove the area and re-sod the full section.
The soil is waterlogged after normal irrigation or rain: Poor drainage will keep stressing new turf — fix the drainage or soil structure first.
Multiple patches appear in different parts of the lawn: The issue is likely systemic rather than local — a soil test and broader diagnosis are needed.
You find repeated grub injury or repeated fungal outbreaks in the same season: The site is prone to recurrence — treat the cause and consider a larger replacement plan.
The surface is uneven by more than about 1/2 inch in the damaged zone: New sod will bridge highs and lows poorly — regrade before re-sodding.
A professional is especially useful here because repeated failure often means the real problem is not visible on the surface. A patch job cannot correct compacted soil, bad drainage, or a disease-prone site by itself.
The mistakes people make when repairing damaged sod
The biggest mistakes are usually about sequence, not effort. People work hard and still lose the patch because the order is wrong. Here are the common ones and what they cost:
-
Replacing sod before the pest or disease is controlled.
Consequence: the same roots get attacked again. Correct approach: stop the active problem first, then re-sod. -
Leaving dead roots and decayed debris in place.
Consequence: the new sod sits on a weak, disease-friendly layer. Correct approach: remove the failed turf down to clean soil. -
Skipping a soil test.
Consequence: pH or nutrient problems keep stressing the repaired area. Correct approach: test before major repairs, especially on repeat damage. -
Using insecticide or fungicide without a likely diagnosis.
Consequence: wasted product and a false sense of control. Correct approach: match the treatment to the cause, or seek confirmation. -
Installing sod over compacted soil.
Consequence: shallow rooting and poor water movement. Correct approach: loosen and level the base before laying the replacement. -
Overwatering after installation.
Consequence: the patch stays soft, oxygen-poor, and prone to rot. Correct approach: water to settle the sod, not to saturate it.
A plain limitation matters here: damaged sod is not always worth saving in place. If more than a modest patch is dead or the soil is the real problem, a clean re-sod is usually more reliable than repeated spot fixes.
What changes when the damage is insect-related versus fungal?
Insect-related damage usually means the roots or crowns have been eaten, while fungal damage usually means the blades or crown tissue have been infected or stressed by conditions that favor disease. The repair target changes because the failure point changes. With insect damage, the priority is protecting roots from further feeding. With fungus, the priority is reducing the conditions that help the disease spread and removing infected tissue.
This is where the terms matter. Grubs are a common below-ground pest because they feed on roots, which makes sod detach from the soil. Fungus refers to a broad group of organisms that can produce spots, rings, thinning, or rot. Fungicide is a specific product class for fungal issues; it is not a general lawn repair material. Insecticide is the corresponding tool for insect problems.
The practical difference shows up in timing too. If the damage is from grubs, the lawn may need a full removal of loosened turf before re-sodding. If the damage is fungal, the surrounding grass may still be living and can sometimes be preserved while the affected area is cleaned and reset. In both cases, a soil test is useful if the lawn keeps failing in the same place.
A common edge case is mixed damage: insects weaken the turf, then fungus takes advantage of the stressed grass. In that situation, only one fix is not enough. The repair has to address both the feeding damage and the conditions that let the disease follow.
How do you know the repair worked?
The repair worked when the sod stays flat, stays green at the edges, and begins to resist gentle lifting over the next few weeks. A successful patch does not need a dramatic signal. It looks boring: no new brown margin, no fresh chewing, no expanding ring, and no soft, hollow feel underfoot. If the patch is still loose after watering and a few days of settling, the base or root contact is not right.
A useful checkpoint is the first 7 to 14 days. That is when the new sod should be consistently moist but not soggy, and the edges should be holding together. If the same pattern of damage returns during that window, the cause was not fully addressed. If the patch looks stable but the surrounding turf starts declining, the problem is broader than the original repair.
The honest limitation is that some lawns do not rebound well after repeated pest or disease injury. In those cases, the correct fix is not more patching. It is a larger re-sod plan, soil correction, and, when needed, professional diagnosis of why the site keeps failing.
Should I treat pests before replacing sod?
Yes, if the pest is still active, the pest problem should be controlled before new sod goes down. New roots are easy targets, and untreated grubs or other feeding insects can undo a fresh repair quickly. The same general rule applies to disease: if the fungal problem is still active, replacing sod alone is a short-lived fix.
The exception is when the damaged area is already dead but the cause is no longer active and the soil has been corrected. In that case, removal and replacement can happen once the site is clean and stable. If you are not sure whether the problem is still active, a qualified turf professional or extension office can help narrow it down.
Can damaged sod spread to healthy areas?
Yes, some pest and disease problems can spread, but not every damaged patch is contagious in the same way. Insect injury usually spreads because the insects are still present in the surrounding soil. Disease spreads more readily when the weather and turf conditions keep favoring infection. If the issue keeps moving outward, treat it as a broader site problem and confirm the cause before re-sodding nearby areas.
Drafted with AI; not yet reviewed by a person.