Blog

  • How to tell if new sod is taking root

    How to tell if new sod is taking root

    Last updated: September 10, 2026

    Key Takeaways

    • A useful habit is to check the same spot every 3 to 4 days.
    • Check 12 to 24 hours after normal watering, not immediately after a deep soak.
    • Press the blade of a screwdriver or a hand trowel 1 to 2 inches under one edge.
    • On hot, windy days above roughly 85°F, the top can wilt before the roots are truly established.

    Table of contents
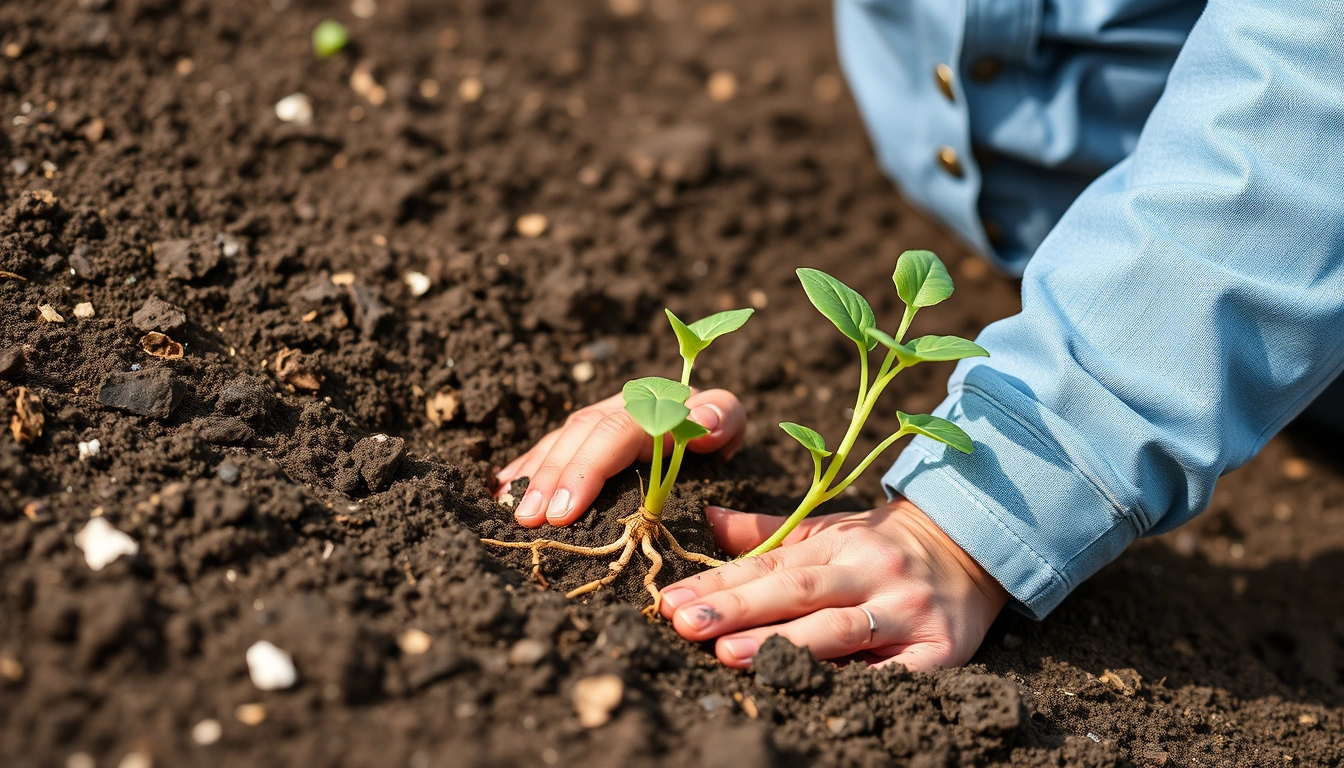
    How to tell if new sod is taking root

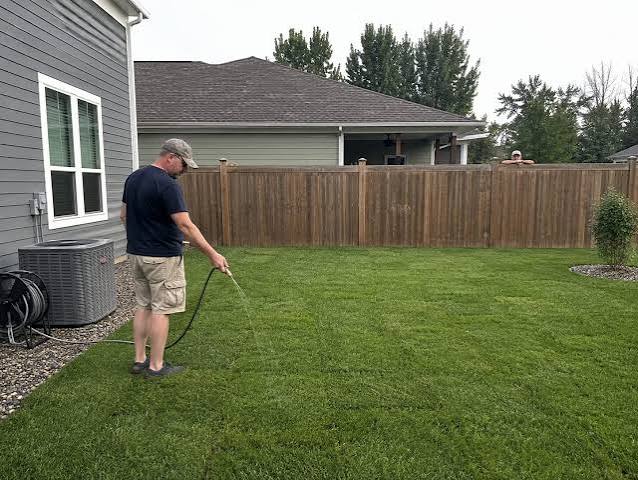
    New sod is taking root when it resists a gentle lift, begins to knit into the soil below, and shows new white roots at the seam within about 2 to 3 weeks in warm weather. Still peeling up like a rug after watering? Not rooted yet. This article on how tell if new sod is taking root gives the practical checks to use, from the first week through week 4, so you can judge contact, rooting, and establishment without guessing.

    Who this is for — and who should do something else

    Use this if you laid fresh sod yourself or had it installed and now want to know whether your watering and care are working. I’m assuming the sod is already down flat on prepared soil, the seams are tight, and you know the basic watering schedule the installer gave you or the sod farm recommends. I’m also assuming you want a practical check, not a guess based on how green the grass looks from the curb. For broader installation guidance, see the sod installation guide and the lawn watering schedule.

    I’d use this guidance for lawns, small yards, and repaired patches of cool-season or warm-season sod. The grass type changes the pace, sure, but not the core signs. Kentucky bluegrass often takes longer to knit than tall fescue; Bermudagrass and zoysia can root differently in heat, but all of them should eventually stop lifting, start anchoring at the edges, and show resistance when tugged gently. The USDA also notes that rooting and establishment depend heavily on moisture and soil contact, not color alone: USDA soil management resources.

    Bare soil that has only been seeded? Not this method. And sod laid over a hard, compacted base with no good soil contact is a different headache entirely. If the turf is floating on air pockets, broken seams, or dry dirt clods, the real question is not “is it rooted yet?” but “did it ever get proper contact?” A strip can look fine for a while and still fail underneath. Sounds cheerful, doesn’t it? If you suspect compaction or drainage problems, the soil prep checklist and lawn drainage fixes are better next steps.

    The standard to use is simple: once the sod has settled, corners should no longer lift easily, the roots should have crossed from the sod into the top 1 to 2 inches of soil, and the lawn should tolerate a light traffic test without shifting. In a normal spring or early-summer install, that often means the difference between “looks fine” and “actually anchored” is about 14 to 21 days. Cooler weather takes longer. For a plain-English overview of turf establishment timing, the University of Minnesota Extension has a useful sod establishment reference: University of Minnesota Extension.

    How can I tell if sod is taking root?
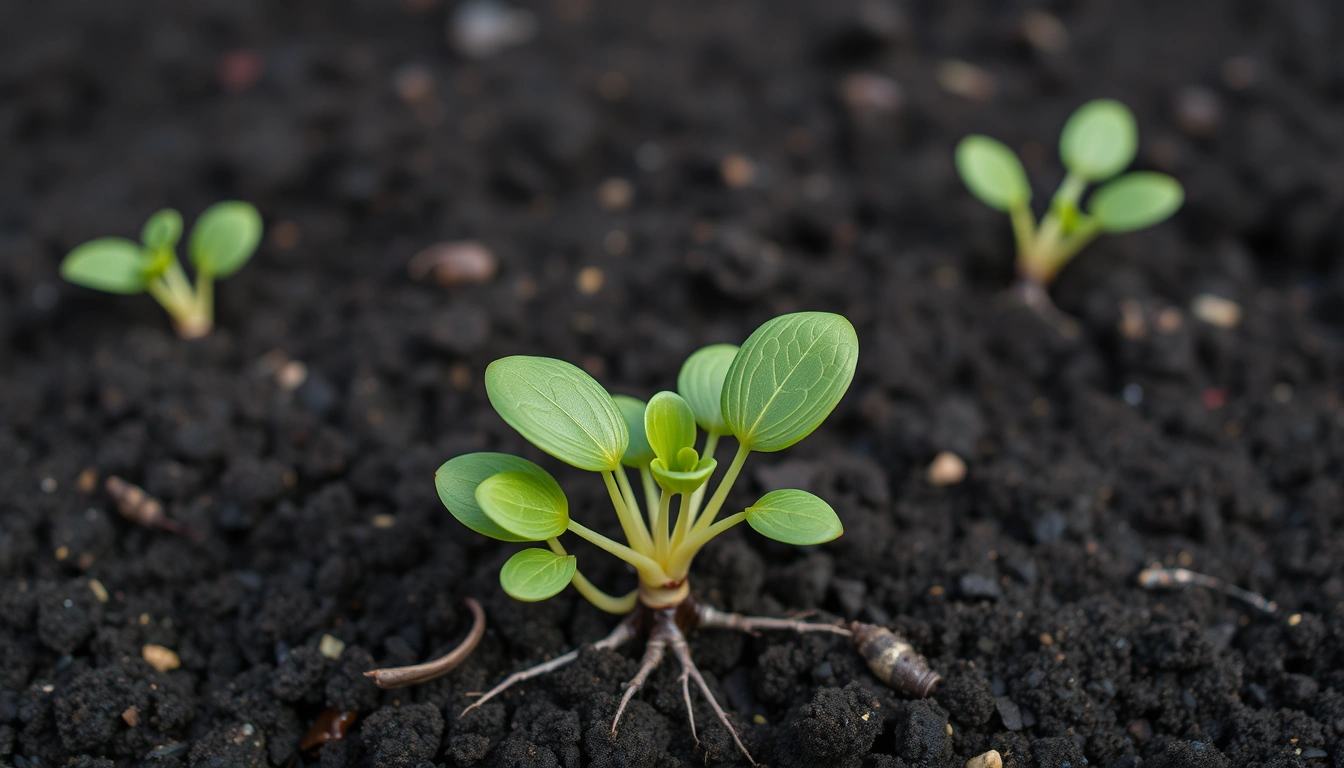
    How to tell if new sod is taking root

    Three signs should show up together: the turf resists lifting, the seams stop separating, and the roots make real contact with the soil below. Color alone does not tell the story; new sod can stay green from watering long after the roots are still shallow. For more on turf root growth and establishment, see how to water new sod.

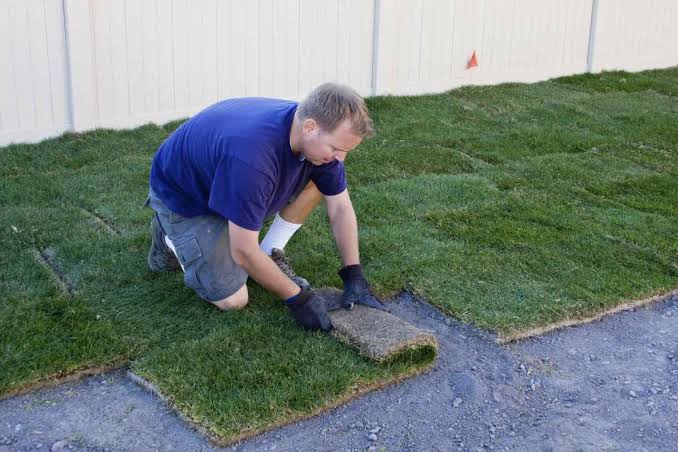
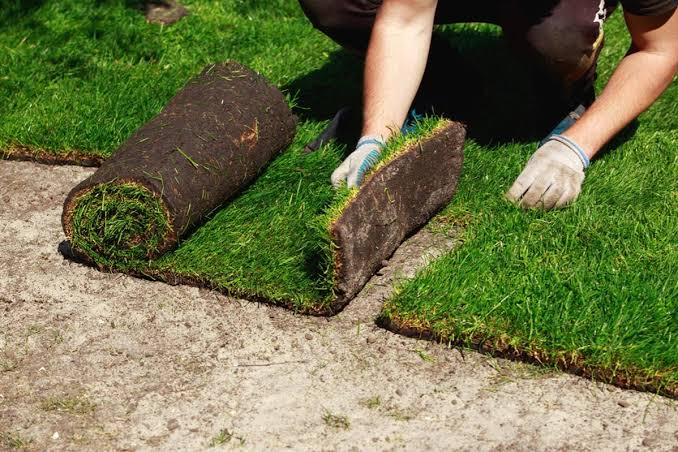
    Start with the simplest sign: try to lift one edge, not a whole strip. A rooted piece should feel pinned down. Unrooted sod moves as a sheet. If the corners rise easily, especially a day or two after watering, it is still leaning on surface moisture instead of anchors below.

    Next, look at the seam. The joints between pieces should start to disappear. At first, you may still see lines, but the turf should not separate when you walk across it. If a seam opens when you step near it, that usually means the roots have not crossed the gap yet, or the soil under there was too dry.

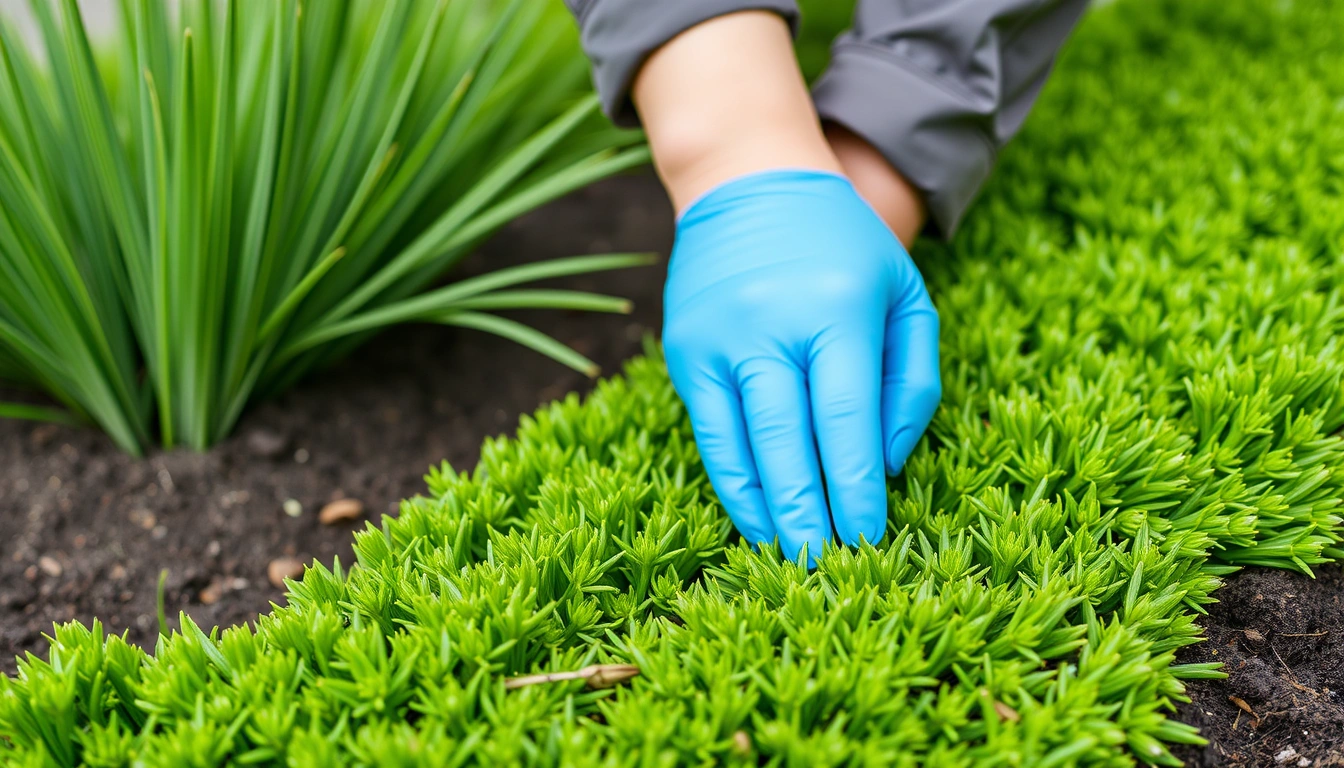
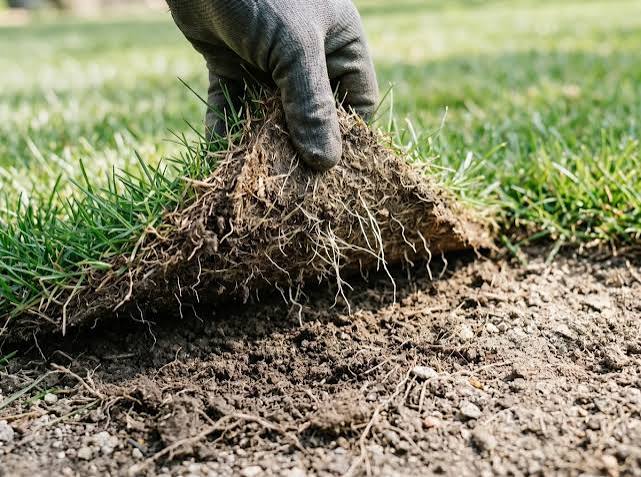
    Use a small pull test at a hidden edge. One hand, gentle pressure. That’s enough. You want short white roots, not just the brown mat that came with the sod roll. White or cream-colored root tips mean active growth. If you see almost no roots and the strip peels up cleanly, it is not established. Purdue Extension also recommends watching for root penetration and firm soil contact: Purdue Extension turf resources.

    Soil contact matters just as much as root length. Even roots that look present can fail if there is an air pocket underneath. Press down with your fingers or the sole of a shoe near the edge. The turf should feel firm, not spongy or hollow. A hollow sound or bounce means poor contact. That thud is a dead giveaway.

    A useful habit is to check the same spot every 3 to 4 days. Rooting is incremental, not dramatic. One day the sod will still lift; a few days later it will not. That change matters more than the top color, which can fool you for weeks.

    Step-by-step: the check I would use

    I’d use a 5-minute check in five spots across the lawn, including one seam, one edge, and one area that dries fastest. That gives you a real sample instead of a single lucky patch.

    1. Wait until the turf is not freshly soaked. Check 12 to 24 hours after normal watering, not immediately after a deep soak. What to verify: the surface should be moist, not puddled. Problem sign: if water is still sitting in low spots, you cannot judge rooting well because the sod may float.
    2. Pick 5 locations across the lawn. Include at least one corner, one seam, one sunny spot, one shady spot, and one area near a sidewalk or driveway. What to verify: rooting should be fairly even. Problem sign: one spot lifting while others hold can point to uneven irrigation or poor soil prep.
    3. Press the blade of a screwdriver or a hand trowel 1 to 2 inches under one edge. Slide it under just enough to test resistance, not to pry up the whole strip. What to verify: a rooted strip should resist and feel attached. Problem sign: if the tool slips under the sod with almost no resistance, the roots have not crossed into the soil.
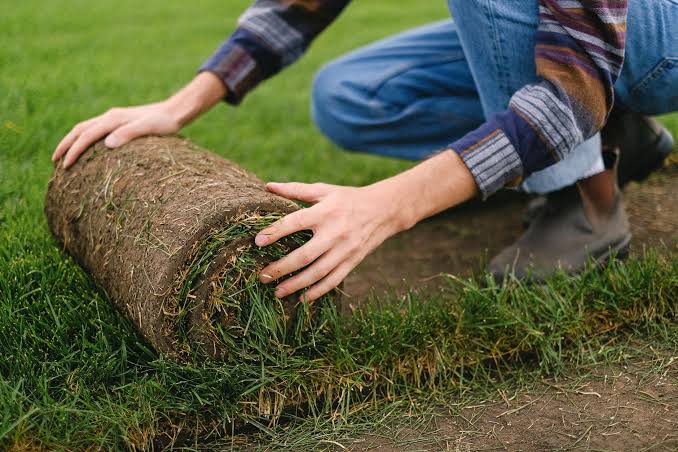
    4. Lift one corner gently about 1 inch, then stop. Do not yank. What to verify: rooted sod should barely move or should tear before it lifts cleanly. Problem sign: if the corner peels up like carpet, it is still loose.
    5. Inspect the underside at the edge. Look for white root hairs and root tips extending into the soil. What to verify: roots should be visible in the mat and beginning to anchor downward. Problem sign: if you only see the original sod mat with no new white root growth, it is not ready.
    6. Walk across the seam with normal pressure. Use a single step, not a jump. What to verify: the strip should not shift, wrinkle, or separate. Problem sign: movement underfoot means the root system is still too shallow or the soil is too loose.
    7. Run a hand across the blade tops and note whether the sod feels attached when you brush against it. What to verify: mature attachment feels stable, not airy. Problem sign: if brushing the grass makes the edges flutter, the roots are still weak.
    8. Compare the top growth to the root response, not just the color. If the grass has grown 1 to 2 inches taller but still lifts easily, it is growing on stored moisture, not yet anchored. Problem sign: fast top growth with no grip below usually means you are watering the surface but not encouraging deeper rooting.

    The biggest mistake is checking only by sight. A lush green lawn can still be unrooted. I’d rather see a slightly tired-looking lawn that stays put than a glossy one that slides when touched.

    How long does new sod take to root?

    New sod usually shows the first signs of rooting in about 7 to 10 days, but real anchoring often takes 2 to 3 weeks and sometimes longer. That depends on grass type, temperature, irrigation, and whether the soil under it was loosened and leveled correctly.

    Warm soil speeds rooting. Cool soil slows it down. If daytime temperatures are still mild and nights are cool, the top may stay green while the roots move slowly. In hot weather, the turf can also stall if the surface dries too fast. That is why “it looks good” is not the same as “it is established,” and if you are unsure whether the lawn is on track, consult your installer or a local extension office for a site-specific check. Muddy-looking optimism won’t help here.

    I’d treat the first week as the contact phase. The goal there is not deep roots; it is to prevent shrinkage and keep the underside damp enough for root growth to begin. The second and third weeks are when you should start seeing the sod resist lifting and the seams begin to knit. After that, the lawn should start behaving like part of the yard instead of like a rolled-up mat.

    Here is the blunt benchmark: if you can still lift a corner easily after 2 weeks of proper watering in warm weather, something is wrong with contact, moisture, or installation. If the sod is still loose after 3 to 4 weeks, I would stop assuming time will fix it.

    There’s one trade-off worth admitting. Rooting speed is not fully visible from above. Color can lie, and a quick rain or fertilizer flush can make everything look better than it is. The signs are resistance, seam closure, and root development at the edge, but if those signs are still mixed after several weeks, it is wise to consult a professional or local extension service before it fails. That is why I use a physical check instead of a calendar alone.

    Mistakes that make sod look rooted when it isn’t

    The most common mistake is watering so much that the grass stays green while the roots stay lazy. New sod needs moisture, but constant saturation can keep the root zone shallow and can even cause the base to stay soft. The fix is not “less water no matter what”; the fix is keeping the underside evenly moist without leaving standing water.

    Another mistake is pulling up the sod every day to check it. That tears tiny roots before they can anchor. For a fair test, check the same hidden edge only every 3 to 4 days and use a gentle lift, not a pry bar.

    People also mistake top growth for establishment. Grass blades can grow 1 inch or more before the root system is truly secure. That creates a false sense of success. A better move is to look under the edge for white root tips and test whether the strip shifts underfoot.

    A fourth error is ignoring dry corners near concrete, walls, or south-facing edges. Those spots lose moisture faster, and they are often the first places to fail. If the rest of the lawn is rooting and one edge keeps lifting, water pattern or heat reflection is probably the issue. The fix is to hand-water those areas briefly and more often, rather than flooding the whole yard.

    A fifth mistake is walking on the sod too soon. Foot traffic can break the tiny root hairs that are just starting to enter the soil. If you need to cross it, step lightly and limit traffic to the fewest paths possible for the first 2 to 3 weeks.

    A sixth mistake is thinking the job is done once the seams blur. Seam closure helps, but it is not the whole story. Rooting is about attachment below the surface. The right test is still a lift check and a soil-contact check.

    When should I stop checking casually and treat it as a problem?

    Treat it as a problem when the sod still lifts, shifts, or dries out in patches after 2 to 4 weeks of normal care. At that point, time alone is not the answer, and if the lawn is still behaving this way, consult a professional or local extension office before trying to “wait it out.”

    The sod lifts easily at multiple edges after 14 days: This usually means the roots have not contacted the soil well — Check irrigation and soil prep immediately, and re-seat loose pieces by pressing them down firmly; if large areas are floating, the base may need repair.

    Seams keep opening when you walk across them: The turf is not knit together yet — Reduce foot traffic and inspect whether the soil below is uneven or too dry; a dry seam can fail even when adjacent spots look fine.

    The underside stays brown and dry even though the top looks green: The top is surviving on surface moisture, not root uptake — Water more evenly and longer in each cycle so moisture reaches the sod-soil interface, not just the blades.

    You see fungus, a sour smell, or slimy patches under the sod: The base may be staying too wet — Back off irrigation and improve drainage; if the area is large, the sod may need to be lifted and reset.

    One section stays loose while the rest is anchoring: Local conditions are different there — Check for shade, compaction, poor fill dirt, or a broken sprinkler head; fix the cause instead of waiting for the weak area to “catch up.”

    After 3 to 4 weeks, the turf still peels up like carpet: This is beyond normal rooting delay — Reassess the installation, because the sod may have been laid on poor soil contact or under a watering pattern that never reached the root zone.

    That is the point where I’d stop treating the situation as routine aftercare. Waiting usually only buys you trouble: the edges dry, the seams fail, and whole strips can die back even if the top stayed green for a while.

    What to do if the usual signs do not fit

    The usual signs need adjustment if the sod was installed in extreme heat, in cool shoulder-season weather, or over a slope. In those cases, rooting speed and surface behavior can diverge more than people expect.

    On hot, windy days above roughly 85°F, the top can wilt before the roots are truly established. That does not automatically mean failure. It means the watering schedule has to protect the root zone without leaving the surface soggy. Short, frequent watering may be appropriate at first, then longer soaks once the sod starts to grip.

    In cool weather, especially when soil temperatures are low, the grass may stay dark and healthy-looking for 3 or more weeks before you get much visible root action. The correct response is patience plus consistent moisture, not aggressive pulling tests every day.

    Slopes are different too. Gravity dries the upper edge faster and can make seams slide. On a slope, I would look for lateral movement first. If the sod is creeping downhill, the problem is not just rooting but anchoring against movement. Extra pinning or better soil shaping may be needed during installation.

    Shade changes the picture as well. In deep shade, the grass may root slowly because it grows slowly. That means a lawn can look almost unchanged while still making steady progress below. The test there is still resistance to lifting, but I’d give more weight to soil contact and less to blade length.

    If you are dealing with a large area that behaves inconsistently, the standard answer is not to guess; it is to inspect the base. A $10 hand trowel and a careful edge check will tell you more than another week of hoping.
    A quick way

  • How to Lay Sod Step by Step

    How to Lay Sod Step by Step

    Last updated: September 10, 2026

    Key Takeaways

    • Rake or till the top 2 to 4 inches of soil so roots can enter it.
    • The soil beneath should be moist 2 to 4 inches down.
    • On many lawns that is around 10 to 14 days, but the grass and weather control the timing.
    • A standard roll is often around 2 feet by 5 feet, so the work moves fast once you begin.

    Fresh sod gives you an instant lawn. But only on a decent base. This guide shows how to lay sod step by step for a homeowner or property manager with a flat to mildly sloped yard, decent drainage, and a fairly normal soil base. Should the site have standing water, severe shade, heavy clay that stays wet for days, or a slope steep enough to shed water and soil, the usual method needs changes before you start. In those cases, sod alone is the wrong fix until grading, drainage, or soil correction comes first.

    What you need to know before you start

    How to lay sod step by step

    You can lay sod yourself when the area is already graded, you know what grass type you are buying, and you can water on the first day and for the first 2 to 3 weeks after installation. Sod is living plant material, not flooring. Leave it rolled too long, let it dry, or set it on loose soil, and the root zone struggles to knit into the ground. Ugly fast.

    I’d also draw a line around who should not use this as a first-pass solution: anyone trying to cover bare fill dirt, compacted subsoil, a muddy low spot, or a lawn with more than about 25 to 30 percent of the area repeatedly ponding after rain. Those are drainage or grading problems, not “sod problems.” Skip the fix, and the sod may look green for a week, then root poorly, thin out, and fail in patches. That’s the trade-off.

    Have a way to water the whole area evenly, plus a sharp utility knife or sod cutter, a straight rake, topsoil or compost for minor corrections, and enough time to install the sod the same day it arrives. A standard roll is often around 2 feet by 5 feet, so the work moves fast once you begin. And if grass species is still a guess, don’t guess; match the sod to your climate and sun exposure instead, because warm-season grasses and cool-season grasses want different windows of the year and different care patterns. See your local extension service for species selection and timing, such as the University of California Agriculture and Natural Resources or NC State Extension.

    How do you prepare the ground for sod?

    Clear, grade, loosen, and firm the surface first. That’s the sequence. The aim is a smooth, slightly rough bed that gives roots contact across the full underside of the sod.

    1. Remove old growth and debris. Strip away weeds, stones larger than about 1 inch, sticks, old turf, and construction scraps from the whole area. Confirm that the soil surface is visible everywhere and that nothing sharp or bulky is left under the new lawn. Hidden junk shows itself later when the mower hits it or the sod bridges over bumps and leaves air pockets.
    2. Fix the grade before you buy sod. Shape the soil so water runs away from buildings and low spots are eliminated. A common target is a gentle slope of about 1 to 2 percent away from foundations, though local grading standards vary; check the target with your municipality or a landscape professional if you are unsure. Use a long board and level or a string line. If water would still sit in a shallow bowl, stop and regrade; sod will not solve ponding. For drainage guidance, see the [EPA’s stormwater basics](https://www.epa.gov/soakuptherain/soak-rain-stormwater-basics).
    3. Add soil where needed. Spread 1 to 2 inches of screened topsoil or finished compost only where the surface is low or thin. Work it into the top few inches rather than leaving it as a separate layer. Make sure transitions are gradual, not lumpy. A visible ridge or trench will telegraph through the sod and dry unevenly.
    4. Loosen the top layer. Rake or till the top 2 to 4 inches of soil so roots can enter it. Do not deeply pulverize heavy clay into dust. Check that the surface is loose enough for a finger or screwdriver to penetrate several inches, but still firm underfoot. If your boot sinks deeply, the soil is too soft and will settle later.
    5. Set the final surface slightly below hardscape. Leave the soil about 1 inch below sidewalks, driveways, and edging so the sod tops out flush after it settles. Check the height at multiple edges. If the sod will sit proud of hardscape, mower wheels and water runoff will create a ragged edge later.
    6. Lightly firm and smooth. Use a lawn roller half full of water or simply walk the area in overlapping passes to settle loose soil. Then rake lightly to remove footprints and ridges. Make sure the surface is level enough that a 6-foot straightedge does not rock on it. If the soil still feels fluffy, the sod will sink unevenly.
    7. Moisten the soil, but do not saturate it. Water the prepared ground so it is damp several inches deep, not muddy. Make sure the top layer darkens and holds shape when squeezed without dripping water. If water puddles, wait; sod on mud slips, settles badly, and roots poorly.

    A generic article often skips the grade work and talks only about watering. Backwards, honestly. A well-watered lawn on a bad base is still a bad lawn. I’d rather see 30 extra minutes spent on leveling than a month spent nursing seams and bare spots.

    How to lay sod step by step

    How to lay sod step by step

    Lay sod in straight rows, stagger the seams, press the pieces into full contact, and water right away. The installation itself is simple; the details decide whether the lawn roots in or shrinks, gaps, and dries at the edges.

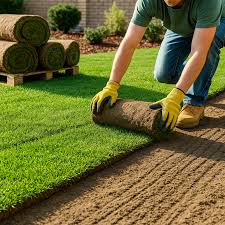
    1. Start along the longest straight edge. Place the first strip against a driveway, sidewalk, or straight bed line. Butt the edge tightly to the border without overlapping it. Be sure the first row is straight, because every later row follows it. One crooked starter row turns into wedge-shaped gaps that are annoying to hide later.
    2. Lay each piece tightly against the next. Push seams together so there are no visible gaps, but do not stretch the sod. The edges should meet like puzzle pieces, not overlap. Be sure that you cannot see soil between seams from standing height. If seams open wider than about 1/2 inch, they will dry out faster than the rest of the strip.
    3. Stagger the joints like brickwork. Cut the first piece of every other row in half, or by at least one-third, so seams do not line up. This is the standard pattern for a reason: it locks the surface together and reduces long weak lines. Ensure that no four corners meet in one spot. If seams stack, the lawn will separate more easily during shrinkage.
    4. Use a sharp knife for cuts. Trim around curves, sprinkler heads, and bed edges with a utility knife or sod knife. Make clean cuts; don’t tear the grass. Ensure the sod fits snugly around obstacles without buckling. A wrinkled piece traps air and dries unevenly.
    5. Press the sod into the soil. After a section is down, walk on it lightly or use a lawn roller only if the soil is firm enough not to compact badly. The purpose is root-to-soil contact. Make sure the pieces do not rock when stepped on. If a roll of sod feels springy underfoot, there is air underneath or the base is too loose.
    6. Keep the surface flush. If one piece sits higher than the next, trim the underside or adjust the base; do not force a thick edge down by stepping on it alone. Ensure that the lawn reads as one plane. High edges dry faster and snag mower blades.
    7. Finish each section with immediate watering. Water the sod right after it is laid, not at the end of the day if there is a long gap. The soil beneath should be moist 2 to 4 inches down. Check by lifting a corner of one edge only if needed: the underside should be damp, not slick with mud or dry and dusty. If the underside is dry, roots cannot bridge to the soil.
    8. Water the whole lawn evenly, then check the seams again. After the first watering, look for lifted corners, floating pieces, or areas where the sod shifted. Fix those immediately by pressing them back into contact. If water has made a low spot or the sod has drifted, that area needs correction before the next irrigation cycle.

    The most common mistake here is treating sod like carpet and walking faster when the job gets repetitive. Speed is fine; sloppy seams are not. Should you be unsure how quickly your site is drying, consult a local extension office or lawn care professional before changing the watering schedule. A clean installation buys you a lawn that can root uniformly in roughly 2 to 3 weeks under decent conditions, while a careless one keeps advertising every seam.

    What should you check after the sod is down?

    Check root contact, moisture depth, seam closure, and edge stability during the first 14 days, because that is when most failures show up. The first week is about keeping the sod from drying out; the second is about keeping it alive while roots begin to bite into the soil.

    For the first watering, the aim is to wet the sod and the top several inches of soil without creating runoff. After that, keep the sod consistently moist at the surface until rooting starts. In warm, dry weather, that can mean watering more than once a day on exposed sites; in cool or shaded conditions, it may mean less. The rule is not a calendar but a condition: the sod should never crisp at the edges.

    A simple check is to lift one corner in a hidden spot after a few days. You are not trying to pry the whole lawn up; you are checking for root threads beginning to enter the soil. If the underside is staying soggy, reduce irrigation and improve drainage. If it is dry and shrinking away from seams, increase watering and check for wind exposure or sun scorch. That’s the balancing act.

    Hold off on mowing until the sod resists a gentle tug and is rooted enough that a corner does not lift easily. On many lawns that is around 10 to 14 days, but the grass and weather control the timing. When you do mow, use a sharp blade and take no more than one-third of the blade height at once. Cutting too low too soon stresses fresh sod and can tear it from the soil.

    One thing many people miss: fertilizer is not a rescue plan. If the base is poor or the sod is drying out, feeding it more nitrogen can push weak top growth without solving root failure. I’d rather see even moisture and patience than a fast green-up that hides trouble.

    The mistakes people actually make, and what they cost

    The biggest mistake is laying sod on unprepared soil. The consequence is uneven settlement, gaps, and weak rooting. Spend the time on grading and loosening the top 2 to 4 inches before the first strip goes down.

    Another common error is lining up all the seams. That creates long, straight joints that split open as the sod dries and shrinks. The better method is to stagger rows like brick, with no four corners meeting in one place.

    People also let sod sit in stacks while they “get ready.” Fresh sod is living material, and heat builds inside a stack quickly. The consequence is yellowing, odor, and death at the center of the pile. Keep it shaded, unstack what you can install immediately, and work in the order it was delivered. No dawdling.

    Overwatering right after installation is another trap. The sod needs water, but if the soil turns to mud, the pieces can slide, the roots can suffocate, and low spots form. The alternative is thorough, even watering that moistens the soil several inches deep without standing puddles.

    The last mistake I see often is mowing too soon or too short. New sod has shallow roots at first, and aggressive mowing can tug it loose. Wait until it is anchored, then keep the first cut gentle.

    When should you stop and change the plan?

    You should stop and change the plan when the site conditions make ordinary sod installation a poor tool. This is the part people skip, and it is where the expensive mistakes happen.

    Water stands on the site for more than a few hours after rain: That means drainage is inadequate — do not lay sod until the grade is corrected or the drainage path is fixed.

    The soil is hard as concrete or full of construction debris: That means the root zone is not ready — remove the debris and loosen or replace the top layer before installing.

    The slope is steep enough that the soil slides when raked: That means the surface will not hold sod reliably — install with erosion control measures or ask for site grading first.

    The area is mostly deep shade under dense trees or structures: That means turf may thin out or struggle to stay dense — choose a shade-tolerant grass only if the species is suited, and accept that some sites are better planted differently.

    You cannot water immediately and repeatedly for the first 2 to 3 weeks: That means the sod will dry before it roots — delay the project until watering is reliable.

    The sod has been sitting hot and rolled for too long on delivery day: That means the material may already be stressed — install the freshest rolls first, and reject stock that is warm, slimy, or visibly yellowing.

    The wrong move in these situations is to push ahead and hope. Sod is unforgiving of bad timing and bad base conditions. If the site needs regrading, drainage work, or a different groundcover entirely, that is not a failure; it is the correct diagnosis.

    What changes on slopes, clay soil, and narrow spaces?

    Change the setup by controlling runoff, improving surface contact, and cutting smaller pieces where the layout demands it. A basic installation still works on mild slopes, heavier soils, and tight side yards, but only if you adjust the details.

    On slopes, lay the sod across the slope when possible, not straight up and down. That helps resist slipping while the roots establish. Pinning with sod staples can help on steeper areas, but use them only where needed so you do not create extra punctures and trip points. If the grade is severe, ask a landscape professional whether terracing or erosion control is the better first step.

    On clay soil, the issue is usually drainage and compaction. Loosening the top layer matters even more, but avoid working clay when it is wet enough to smear. If you can roll a ribbon of soil in your hand, it is probably too wet to work. Wait until it crumbles, then prepare the surface and water lightly after the sod is down. For clay soil guidance, the USDA NRCS offers useful soil basics.

    In narrow spaces, the trick is planning the cuts before you start. Precut strips for fence lines, utility edges, and tight corners save time and reduce waste. Place the full-width pieces first, then fill the small spaces with trimmed sections. That keeps the layout stable and avoids tiny slivers that dry out quickly.

    For cost and material planning, compare common sod types before you order:

    Sod type Typical use Approx. delivered cost per sq ft Notes
    Kentucky bluegrass blend Cool-season lawns $0.30–$0.60 Good color, slower establishment
    Tall fescue Cool-season lawns $0.35–$0.70 Stronger heat tolerance
    Bermudagrass Warm-season lawns $0.25–$0.55 Fast spreading, sun-loving
    Zoysiagrass Warm-season lawns $0.45–$0.90 Dense turf, slower to establish

    If you are estimating the job, a typical pallet covers roughly 400 to 500 square feet, though suppliers vary. Measure first, add a little extra for cuts and waste, and ask the seller whether delivery is priced by pallet or by square foot. For regional pricing and installation considerations, your local extension office or garden center is a better guide than a national average.

    What changes most is not the sod itself but the discipline around it. The lawn succeeds when the base is right, the seams are tight, and the watering is steady. That is the whole job, whether the yard is 200 square feet or 2,000.

  • Sod Aftercare, Maintenance, and Troubleshooting: The Complete Guide

    Sod Aftercare, Maintenance, and Troubleshooting: The Complete Guide

    Last updated: September 10, 2026

    Key Takeaways

    • Fresh sod lives or dies in the first 3 to 6 weeks.
    • You should water the sod immediately, press out air pockets, and keep foot traffic off it for at least 24 to 48 hours.
    • It should soak the sod and the soil underneath until the root zone is wet to a depth of about 3 to 4 inches.
    • Stay off it for 24 to 48 hours, and keep pets off longer if possible.

    Fresh sod lives or dies in the first 3 to 6 weeks, and this sod aftercare, maintenance, troubleshooting — complete guide is built around that narrow stretch. Too little water, and the seams dry, shrink, and start to pull apart. Too much, and the roots stay shallow while the turf can rot, yellow, or pick up fungus. So the job is simple on paper and fussy in practice: hold the surface evenly moist at first, then coax the roots downward, then move to normal mowing and feeding once the sod is anchored. Straightforward. Not easy.

    Who this guide is for — and what it assumes you already have

    Sod aftercare, maintenance, and troubleshooting — The Complete Guide

    This sod aftercare, maintenance, troubleshooting — complete guide is for a homeowner or property manager who has just laid sod, or is about to, and wants to keep it alive long enough for the roots to knit into the soil. I’m assuming you already have the sod installed on a graded base, the seams are tight, and you know whether your turf is a cool-season grass like Kentucky bluegrass or tall fescue, or a warm-season grass like bermudagrass, zoysia, or St. Augustine. That matters because the pace of rooting, mowing, and watering changes with grass type and season.

    I’m also assuming you have a hose, sprinkler, or irrigation timer, a sharp mower, and a way to check soil moisture by hand or with a screwdriver. No fancy meter required. What you do need is consistency, and a little note-taking helps in the first 14 days.

    This sod aftercare, maintenance, troubleshooting — complete guide is not the guide for someone trying to salvage sod laid over rubble, compacted clay with no grading, or a yard that stays waterlogged after rain. If the base drains badly, if the sod was installed crooked with air pockets underneath, or if the grass is already dead and crispy across large areas, aftercare alone will not fix the job. In those cases, the problem is installation or site conditions, not maintenance. Harsh, but true.

    Treat sod like a living transplant, not like carpet. And if you are unsure about the lawn’s condition, consult a local landscape professional or Cooperative Extension source before making major changes. The first 48 hours matter most, and the first 14 days matter more than any fertilizer or mowing trick. Remember one number: the top 1/2 inch to 1 inch of soil under the sod should stay moist during establishment, not soggy, not dry.

    What should I do in the first 48 hours after sod is installed?

    Water it immediately. Press out air pockets. Keep foot traffic off it for at least 24 to 48 hours. The first watering is not a light mist; it should soak the sod and the soil underneath until the root zone is wet to a depth of about 3 to 4 inches. That is deep enough to reach the roots without leaving the base puddled.

    Here is the sequence I would follow:

    1. Water right away after installation. Run sprinklers or a hose-end sprinkler until the sod and the soil beneath it are wet through the root zone, usually 15 to 30 minutes per zone depending on nozzle output. Verify: lift one corner after watering; the soil under it should be damp, and the underside of the sod should not look dry or dusty. Problem sign: if the seam edges curl or the sod feels crunchy within a few hours, the first soak was too light.
    2. Check for full contact with the soil. Walk the lawn gently or press with a lawn roller only if the installer left one and the soil is firm, not muddy. I would not roll saturated clay. Verify: the sod lies flat with no hollow spots when you step on it. Problem sign: if your foot sinks into soft pockets or the sod bridges over voids, roots will dry out before they touch soil.
    3. Keep traffic off the lawn. Stay off it for 24 to 48 hours, and keep pets off longer if possible. Verify: seams stay aligned and edges do not shift. Problem sign: footprints that remain after watering mean the sod is too wet or the base is too soft.
    4. Water again before the surface dries out. In hot, windy weather, that can mean 2 to 4 irrigation cycles the first day. In cool, overcast weather, it may mean one deep soak and a shorter top-up. Verify: the top layer stays damp to the touch, not muddy. Problem sign: gray-green color, curling edges, or a dull, wilted look usually means the sod is losing moisture faster than it is taking up water.
    5. Look at the seams, not just the top. The gaps between pieces should stay closed. Verify: seams are tight enough that you do not see broad strips of soil. Problem sign: seams opening by more than a finger’s width often mean shrinkage from underwatering or poor cutting.
    6. Shade and wind change the schedule. South- and west-facing strips, slopes, and windy corners dry faster than shaded areas. Verify: those areas do not brown first. Problem sign: a lawn that looks fine in the middle but pale at the edges can point to uneven coverage, so check sprinklers and runoff before assuming the grass itself is failing.
    7. Do not fertilize or spray herbicide yet. Wait until the sod has started rooting, usually around 2 to 4 weeks for many lawns, longer in cool weather or on heavier soil. Verify: the turf resists a gentle tug. Problem sign: fertilizer on unrooted sod can push weak top growth before the roots are ready.

    If the installer gave you a watering schedule, start there, but do not follow a schedule blindly if the weather changes. A 90°F day with wind strips moisture fast; a cloudy 65°F day does not. The best early check is often to peel back one edge in a hidden corner and feel the soil. If you are unsure what you are seeing, consult a lawn professional or extension agent before changing the watering plan.

    How do I water sod without drowning it or letting it dry out?

    Sod aftercare, maintenance, and troubleshooting — The Complete Guide

    Start with shorter, repeated cycles, then shift to deeper, less frequent watering as the roots anchor. The classic mistake is thinking “more water” means “more often.” It doesn’t. More often can keep the surface wet while starving roots of oxygen. Early on, the target is steady moisture in the top 1/2 inch to 1 inch; later, you want a deeper soak that pushes roots downward.

    For most lawns, the watering pattern looks like this:

    • Days 1 to 3: keep the sod evenly moist, often with multiple light-to-moderate cycles per day in hot weather.
    • Days 4 to 14: reduce frequency slightly but increase depth; aim for moisture about 1 to 2 inches below the sod surface.
    • Weeks 3 to 4: begin watering less often but more deeply, once roots are attaching.
    • After rooting: move toward the normal schedule for your grass type and climate, often about 1 inch of water per week from rain and irrigation combined, though local conditions vary.

    I’d rather see watering in the early morning and again in the late afternoon than a noon blast when evaporation is high. Midday watering burns off more water and can leave hot, wet patches that invite stress. Funny how fast a “helpful” routine can become a waste.

    Watch for these signs as you adjust:

    • Too dry: edges curling, a dull bluish cast, footprints staying visible, blades folding.
    • Too wet: mushy footing, algae on the surface, a sour smell, yellowing that spreads in low spots.
    • Uneven coverage: one section thriving while another dries first, which usually means sprinkler head spacing, pressure, or obstruction is off.

    A practical test is the screwdriver test. Push a screwdriver or soil probe into the root zone. In well-watered, loose soil, it should enter with moderate resistance. If it stops hard after an inch or two, the zone is too dry or compacted. If it slides in like soup and water squishes up, you are overwatering or dealing with poor drainage.

    If you use an irrigation system, verify throw distance and overlap. Heads should water head-to-head in most spray layouts, and rotor zones should be set to avoid dry arcs. A bad head pattern can make you think the whole lawn needs more water when only one strip does.

    When can I mow new sod?

    You can mow new sod when the grass has rooted enough that a gentle tug does not lift it, which is often around 2 to 3 weeks for fast-rooting conditions and longer in cool weather. The real trigger is not calendar time; it is anchoring. If the sod still lifts at the seam, mowing too soon will shear the roots and shift the pieces.

    Here is the mowing routine I would use:

    1. Wait for rooting, not just greenness. Try to lift a corner in a hidden area. Verify: resistance is firm and the slab stays put. Problem sign: if the sod peels up easily, it is not ready.
    2. Set the mower high. Cut no more than one-third of the blade height at a time. For many lawns, that means starting around 3 to 4 inches and removing only the top 1/2 to 1 inch on the first cut. Verify: the lawn still has enough leaf surface to photosynthesize. Problem sign: scalping exposes seams and weakens the plant.
    3. Use a sharp blade. A dull blade tears fresh turf and leaves tan tips. Verify: the cut looks clean, not shredded. Problem sign: ragged blades after mowing often point to a blade that needs sharpening or replacement.
    4. Mow when the lawn is dry on top. Early afternoon is often better than morning after dew. Verify: clippings flow through the deck instead of clumping. Problem sign: wet clumps can smother young sod and hide uneven spots.
    5. Change direction on the second mow. If you mow north-south first, mow east-west next time. Verify: the turf stands back up and does not track into ruts. Problem sign: repeated traffic in one pattern can flatten soft sod and make it root unevenly.
    6. Do not bag every cut unless the clippings are heavy. Light clippings can return nutrients, but heavy piles should be removed. Verify: no thick mat is left behind. Problem sign: clumps on top of the sod block light and trap moisture.
    7. Avoid mowing when the soil is soft. If your shoe leaves deep prints, wait. Verify: the mower does not sink. Problem sign: wheel ruts create low spots that dry out or collect water later.

    The first mow is where many new lawns get bruised. People wait just long enough for the grass to look “ready,” then cut it too short. That exposes the seams and turns a promising lawn into one that looks patchy for weeks. If the grass is tall, mow it down in two passes over several days instead of one aggressive cut.

    For warm-season sod such as bermudagrass or zoysia, rooting and mowing can be faster in warm weather. For cool-season sod, especially in spring or a cool autumn, the schedule can stretch out. Late fall installation on cool soil slows everything, and I would not push mowing just because the calendar says it has been three weeks. If the lawn is still soft underfoot, a landscape contractor or local extension office can help you decide whether it is safe to mow.

    What should I feed it, and when?

    Feed sod lightly only after it is rooted enough to take up nutrients, and do not assume more fertilizer makes it root faster. That guess causes soft top growth, stress, and sometimes burn. For many lawns, a starter fertilizer with more phosphorus relative to nitrogen is used at installation if a soil test calls for it, but local fertilizer rules vary, and some areas restrict phosphorus unless a test shows need.

    I’d handle feeding this way:

    • At installation: use fertilizer only if the soil test or local guidance supports it.
    • After rooting starts: apply a light feeding if growth is pale or slow.
    • After establishment: move to your normal seasonal program based on grass type.

    The safe rule is simple: follow a soil test, not a guess. A soil test from a university extension or reputable lab tells you pH and nutrient status. If you do not have one, I would avoid heavy feeding in the first couple of weeks. The grass needs roots more than it needs lush top growth.

    Watch the turf for clues:

    • Pale, weak color after rooting: may need nitrogen.
    • Dark green top growth with poor rooting: often too much nitrogen too soon.
    • Brown tips after fertilizing: can be fertilizer burn from uneven spread or application onto dry turf.
    • Patchy growth with healthy moisture: can signal a nutrient imbalance, but it can also be sun, shade, or drainage.

    If you use a spreader, calibrate it for the product you are using. The label gives the rate in pounds per 1,000 square feet or a comparable measure. Uneven spreader settings are a common source of streaking. I would never broadcast fertilizer on windy days or when rain is likely to wash it into pavement or drains.

    For authoritative guidance, I’d point you to your local Cooperative Extension service and the University of Maryland Extension’s turfgrass pages, which explain soil tests, establishment, and nitrogen timing in practical terms. The USDA Natural Resources Conservation Service also has useful guidance on soil and water management. I’m naming those organizations because the source matters more than a blog shortcut.

    What are the most common sod mistakes, and what do they cost?

    Underwatering, overwatering, mowing too soon, and assuming the lawn is established before it actually is — those are the big ones. Every one of them slows root growth, and root growth is the whole point of the first month.

    Here are the errors I see most often and what to do instead:

    1. Watering on a fixed timer without checking the soil.
      Consequence: the top stays wet while the root zone dries, or the lawn stays soggy in cool weather.
      Better move: check moisture by hand, with a screwdriver, or by lifting a corner in a hidden spot.

    2. Letting edges dry out first.
      Consequence: seams pull apart, corners curl, and the lawn starts to look checkerboarded.
      Better move: give hot, windy, and sunny zones extra coverage or shorter intervals.

    3. Cutting too short on the first mow.
      Consequence: scalping weakens the turf and exposes bare seams.
      Better move: keep the mower high and remove no more than one-third of blade height.

    4. Dragging hoses, heavy furniture, or foot traffic across soft sod.
      Consequence: shifted pieces, compressed soil, and broken new roots.
      Better move: keep movement off the turf until it is anchored, usually at least 2 weeks.

    5. Applying fertilizer too early or too heavily.
      Consequence: burn, weak top growth, and wasted product.
      Better move: wait for rooting and follow a soil test or product label.

    6. Ignoring low spots and drainage problems.
      Consequence: puddles, fungus pressure, yellowing, and shallow rooting.
      Better move: fix grading, runoff, or irrigation overlap before the lawn fully establishes.

    A generic article often says “keep it watered” and stops there. That is not enough. A lawn can be watered and still fail if one strip gets half the sprinkler output of the rest, if the sod never touched the soil below, or if the yard has a hardpan layer that blocks roots at 2 inches. The cost of those mistakes is usually not immediate death. It is uneven rooting, which shows up later as thin spots, drought stress, and a lawn that never quite stabilizes.

    When should I stop following the standard schedule?

    You should stop the standard schedule when the lawn is clearly wet enough to suffocate, dry enough to shrink, or damaged enough that maintenance alone will not fix it. The normal aftercare pattern is for healthy, properly installed sod on decent soil. It is the wrong tool in several specific situations:

    The sod lifts easily after 2 to 3 weeks: the roots have not anchored — slow the mowing schedule, keep moisture steady, and check for poor soil contact or a dry base layer.

    Water sits on the surface for more than a few hours after irrigation or rain: drainage is failing — reduce watering frequency, stop all extra irrigation, and correct grading or soil compaction before roots suffocate.

    Edges curl while the center stays green: coverage is uneven — increase watering to the dry zones, check sprinkler throw, and look for wind exposure or heat from pavement.

    Large areas turn yellow or brown in patches, not uniformly: that is often not simple thirst — inspect for irrigation gaps, trapped water, compaction, or disease-like patterns before adding more water.

    Footprints stay visible and the turf feels brittle at the same time: the sod is under severe moisture stress — water deeply right away, then shorten the interval and verify actual penetration into the root zone.

    The lawn was laid over a bad base, heavy shade, or chronic runoff: aftercare alone will not produce a durable lawn — adjust the site conditions or accept that this grass choice may not be right for the location.

    If any of those conditions are

  • How to choose the right sod for your yard conditions

    How to choose the right sod for your yard conditions

    Last updated: September 10, 2026

    Key Takeaways

    • A yard that gets 6 to 8 hours of direct sun can handle many grasses.
    • Look 24 hours after a heavy rain or irrigation run.
    • A yard that gets only 2 to 4 hours of filtered light needs a shade-tolerant choice, and even then you should be cautious.
    • Fine-textured lawns often look elegant but demand more mowing discipline and can show stress faster.

    Choosing the right sod for your yard conditions means matching grass to the site you already have: sun, shade, water, traffic, soil, and climate. Get that match right, and the roots settle faster while your to-do list stays shorter. Miss it, though, and you buy more watering, more patching, more fungus pressure, and a lawn that looks worn out by midsummer. Ugly trade-off.

    Who this is for, and what I’m assuming you already know

    How to choose the right sod for your yard conditions

    This fits if you are putting in sod on a normal home lawn, patching ground after construction, or replacing a lawn that is failing and you want something that can actually live in your site, not just in a catalog photo. I’m assuming you already know your rough location and can tell full sun from partial shade. I’m also assuming you can check a soil test or at least notice where water sits after rain.

    It does not fit neatly if your yard is on a steep slope that erodes, if you need a sports-field surface with heavy wear, or if you are in a place with strict water limits and no irrigation. In those cases, the better answer may be a different groundcover, a phased renovation, or a professional landscape plan.

    A few turf terms matter, so I’ll use them. Cool-season grasses do best in colder regions and include Kentucky bluegrass, perennial ryegrass, and tall fescue. Warm-season grasses do best in hotter regions and include bermudagrass, zoysiagrass, centipedegrass, St. Augustinegrass, and buffalograss. Cultivar means a named variety within a grass species, like a specific tall fescue bred for finer leaf texture or stronger disease tolerance.

    Don’t pick sod by color alone. A dark green pallet can still be the wrong choice for shade, drought, salt, clay soil, or foot traffic. The yard wins first.

    How to choose the right sod for your yard conditions

    The right sod depends on how your yard conditions stack up: climate, light, water, soil, and use. Put them in that order and you avoid choosing a grass that looks right for one corner yet fails everywhere else.

    Table of contents

    1. Identify your climate zone and grass family. Check whether your area leans cool-season or warm-season. Verify that against your state extension turf guide or a local sod farm’s recommended species list. Without the family first, the search is still too broad.
    2. Measure the actual light pattern. On a clear day, count direct sun in the target area: 6+ hours is full sun, 4-6 hours is partial sun, and under 4 hours is shade-prone. Check again at midseason, not in winter when trees are bare. Morning light under deciduous trees that turns into near-full shade by June is a warning sign.
    3. Check drainage after rain. Look 24 hours after a heavy rain or irrigation run. If water still pools longer than a day, choose a grass with better wet-tolerance only if the site can be corrected; otherwise, fix grading first. Turf will not cure standing water; if drainage is the issue, call a local extension office or a landscape professional.
    4. Test the soil, or at least the texture. A lab soil test is the cleanest option, often available through extension services for roughly the cost of a dinner out, though pricing varies by region. Verify pH and nutrient levels. Very sandy soil points you toward a sod that handles drought. Heavy clay points you toward one that can take slower drainage and compaction. Rock-hard summer soil or slick, sticky ground when wet is the bad sign.
    5. Match traffic to wear tolerance. For kids, pets, or regular mowing paths, choose a denser turf that repairs faster. Bermudagrass and Kentucky bluegrass recover well under wear; some finer, lower-input grasses do not. Check whether the sod is meant for ornamental use or active use. Visible paths after only a few weekends tell you enough.
    6. Match maintenance to your schedule. If you want less mowing, avoid fast-growing aggressive types that need frequent edging. If you dislike irrigation, avoid thirsty sod choices that go dormant or thin without summer water. Verify mowing height and fertilization needs before buying. A variety that needs weekly mowing at a height you will never keep is a headache waiting to happen.
    7. Check disease pressure for your area. Humid regions with warm nights favor fungal problems, especially if the lawn stays wet. Choose a species with reasonable disease tolerance and decent air movement. Verify the sod farm’s cultivar name and ask what it is known for, not just the species. Patchy discoloration on the sod, or a seller who cannot identify the cultivar, is a red flag.
    8. Buy enough of one type to keep the yard consistent. Use one species or one closely matched blend across the main lawn unless the site truly changes. Verify that shade areas, sunny strips, and wet corners are each accounted for. Mixing several sod types just because they were available on the same day is asking for a patchwork result.

    Here is the short version I would use: full sun and warm summers point one way; shade, drought, or heavy wear may point another; poor drainage and deep shade often mean sod is the wrong fix unless the site is corrected first. For regional turf selection, the USDA Plant Hardiness Zone Map and your local extension turf guide are better starting points than marketing labels.

    What should I match first: climate, light, or water?

    How to choose the right sod for your yard conditions

    Climate comes first, then light, then water, because a grass that belongs in the wrong temperature zone will struggle no matter how pretty it looks at the nursery. In a region with freezing winters, cool-season sod is usually the safer starting point. Long, hot summers usually push you toward warm-season sod. The USDA Plant Hardiness Zone Map is useful for winter reference, though turfgrass choice depends on more than winter minimums. For regional guidance, university extension turf charts beat marketing labels; Penn State Extension and North Carolina State Extension both publish practical grass-selection guides.

    Light matters just as much. A yard that gets 6 to 8 hours of direct sun can handle many grasses. A yard that gets only 2 to 4 hours of filtered light needs a shade-tolerant choice, and even then you should be cautious. Deep shade under dense trees is usually a poor place for standard sod. Grass in shade grows slower, dries more slowly, and gets thinner faster. If your “shade” is really morning sun plus hot afternoon shade from a fence, that is a different animal from under-oak shade with root competition and dry soil.

    Water is the third filter. If you can irrigate regularly during establishment and in summer, your options widen. If you cannot, drought tolerance should move up the list. A lawn that depends on frequent irrigation is not the same as one that survives a dry July on rainfall alone.

    Which sod fits full sun, shade, heat, or drought?

    The best sod for your yard conditions depends on which stress dominates your yard, because no grass handles everything. That trade-off is where generic advice falls apart.

    For full sun with decent irrigation, you have the widest choice. In hot regions, bermudagrass or zoysiagrass are often strong picks. In cooler regions, Kentucky bluegrass or tall fescue can work well. Bluegrass gives a classic look and can spread into small gaps, but it usually wants more water than tall fescue. Tall fescue has deeper roots and handles heat better than many cool-season options, but it does not spread the same way bluegrass does.

    For shade, caution is the right default. Tall fescue is usually more shade-tolerant than Kentucky bluegrass. Some St. Augustinegrass cultivars handle light shade in warm climates better than many other warm-season grasses. Still, no sod loves deep shade. If a spot gets less than 4 hours of direct sun and tree roots are sucking up moisture, I would expect thin turf and plan for that reality. That math stops working fast.

    For heat and drought, warm-season sod generally has the edge in hot climates. Bermudagrass tolerates heat and wear well but can be aggressive and may go dormant and brown in cold weather. Buffalograss can be a lower-water option in the right region, but it is not right for heavy shade or heavy traffic. Tall fescue is often a practical cool-season compromise where summers are hot but winters are still cold.

    For wet soil or poor drainage, the right answer is usually not “pick a wetter grass.” I would fix grading, add drainage, or rework the site. Some grasses tolerate wetter feet better than others, but standing water is a site problem first.

    For high traffic, choose density and recovery. Bermudagrass and Kentucky bluegrass are common answers. Fine fescue types are usually the wrong choice for a dog run or kids’ play zone.

    When should I stop and choose a different approach?

    Stop and change the plan when the yard conditions are fighting the grass harder than the grass can fight back.

    Deep shade under mature trees: Less than 3 to 4 hours of direct sun means standard sod will thin out fast — Use a shade-tolerant groundcover, prune responsibly, or accept a mulch bed instead of a lawn.

    Water sits for more than 24 hours after rain: The soil or grade is failing, not the turf — Fix drainage before buying sod, or the roots will stay shallow and prone to rot.

    Heavy foot traffic across a narrow strip: A lawn strip by a gate or patio edge wears out faster than most species can repair — Use pavers, stepping stones, or a tougher turf only in that zone.

    No irrigation during establishment: New sod needs frequent moisture while roots knit into the soil, often daily at first in hot weather — Delay installation or choose a different surface if you cannot water consistently for the first few weeks.

    Steep slopes with runoff: Sod can slide, dry unevenly, and fail to root before the next storm — Use erosion control, terraces, or a groundcover designed for slopes.

    Salty exposure near roads or coastal spray: Salt burn can ruin turf even when everything else looks fine — Pick a salt-tolerant species recommended by local extension, or move away from lawn in the harshest spots.

    What are the mistakes people actually make?

    Buying by color is the big one, and it costs months of patching. A darker green pallet can still be the wrong species for shade, drought, or traffic. Better to match turf to the hardest condition in the yard, not the prettiest sample.

    Ignoring the soil is the next slip-up. People lay sod over compacted clay, builder fill, or sand with no organic matter and expect roots to behave normally. The result is shallow rooting and fast drought stress. Better to fix compaction, add the right soil amendment only where a test suggests it, and level the grade before installation.

    Another miss is using one sod type for every zone. The sunny front lawn, shaded side yard, and wet backyard corner often need different answers. One area thrives while another fails. Split the property into zones and choose with those zones in mind.

    Maintenance gets underestimated, too. Fine-textured lawns often look elegant but demand more mowing discipline and can show stress faster. The result is a ragged lawn that never matches the picture on the pallet tag. Be honest about how often you will mow, water, and fertilize. Honestly, that part matters more than most people want to admit.

    Last, people assume all “shade tolerant” or “drought tolerant” labels mean the same thing. They do not. Those claims are relative, not absolute. Ask what the grass tolerates, under what conditions, and for how long.

    How do I read a sod label without getting fooled?

    Check the species name, cultivar name, and intended use, not the marketing slogan. The label should tell you whether the sod is Kentucky bluegrass, tall fescue, bermudagrass, zoysiagrass, St. Augustinegrass, or another actual turf species. If it gives only a trade name, that is not enough for a serious choice.

    The cultivar matters because two tall fescues, for example, can behave differently in texture, disease tolerance, and shade response. Ask for the full cultivar name if the seller has it. If the label says “blend” or “mix,” verify which species are included and why. A mix with one species that hates your site can still fail.

    Freshness is worth checking, too. Sod should be installed soon after harvest. If the rolls are hot, yellowing, dry on the edges, or crumbly, the clock is already working against you. A pallet left sitting in heat for even part of a day can suffer stress before it reaches the lawn.

    If the supplier cannot tell you the species, the cultivar, or the recommended mowing height in inches, I would keep looking. The label should be specific enough that you can compare it with a university extension recommendation, not just a sales pitch. For more label guidance, the Texas A&M AgriLife Extension turf resources are a useful check.

    What does a good match look like after installation?

    A good match roots evenly in about 2 to 3 weeks under decent conditions, stays upright instead of folding over in heat, and keeps color without constant rescue watering. The seams should knit, the edges should not dry out first, and the lawn should recover after a normal mow without scalp marks. If the grass looks fine only when freshly watered and goes flat or gray-blue every afternoon, the match is off.

    The first mowing height matters. Different grasses need different heights, and cutting too low is a common way to weaken new sod. Tall fescue is typically kept higher than bermudagrass; St. Augustinegrass is also cut higher than many cool-season lawns. Follow the grass-specific mowing height rather than one universal setting. The University of California Integrated Pest Management site and extension turf guides give practical height ranges for common species.

    A good result is not “perfect forever.” It is a lawn that fits the site with manageable inputs. If the grass asks for water, mowing, and disease control that do not fit your climate or schedule, it is the wrong sod even if it looked great on delivery day.

    Quick answers to common questions

  • What affects sod installation pricing: yard size, removal, grading, and access

    What affects sod installation pricing: yard size, removal, grading, and access

    Last updated: September 10, 2026

    Key Takeaways

    • A 20-foot carry and a 100-foot carry are not the same job.
    • A 500-square-foot lawn on open access is a very different job from a 500-square-foot lawn behind a fence with compacted clay and old roots.
    • A 1,200-square-foot lawn with clean edges and a straight run is easier than 1,200 square feet split into islands, curves, tree rings, and narrow strips.
    • A pallet of sod is not something a crew wants to carry 80 feet by hand through a narrow gate if they can avoid it.

    Sod installation pricing usually comes down to four things: how much square footage you need covered, what has to come out first, how much the ground has to be corrected, and how hard it is to get materials to the area. Know those four pieces — yard size, removal, grading, and access — and the quotes make a lot more sense. No guesswork.

    Who this is for, and what I’m assuming you already know

    What affects sod installation pricing: yard size, removal, grading, and access

    This is for a homeowner or property manager who wants a straight answer before calling three or four sod installers. I’m assuming you already know the rough area you want sodded, even if it’s only “the front yard plus a side strip,” and that you understand sod is sold by square foot or pallet, not by “a yard” in the landscaping sense. I’m also assuming the goal is a finished lawn, not a temporary green cover for a construction project.

    The biggest pricing mistake I see is treating sod as a simple material purchase; if you’re unsure, consult a professional and compare local bids. It isn’t. A quote can swing a lot depending on whether the crew is laying over bare soil, stripping old turf, hauling away debris, fixing slope, or squeezing through a narrow side gate. A 500-square-foot lawn on open access is a very different job from a 500-square-foot lawn behind a fence with compacted clay and old roots.

    I’m not going to pretend every market prices the same way. In some areas, clay subsoil and irrigation rules matter more; in others, haul-off fees or water restrictions change the job. If you live in a place with strict watering limits or heavy rainy-season soils, ask the installer how they handle establishment timing before you sign.

    How yard size changes the number on the quote

    Yard size affects pricing in two ways: material volume and labor efficiency. The larger the area, the more sod rolls or pallets you need, and the more hours it takes to prep, place, cut, and water-in the lawn. A small patch can cost more per square foot than a bigger, open rectangle because the crew still has to mobilize tools, unload material, and do the same finishing work.

    Most installers price by square foot for the base install and then adjust for minimum labor charges. That means a 150-square-foot repair can still carry a minimum-job price, while a 2,000-square-foot full yard may get a lower unit rate because the crew can work continuously. More square footage usually means more material, although labor does not always rise in a neat straight line.

    Shape matters almost as much as size. A 1,200-square-foot lawn with clean edges and a straight run is easier than 1,200 square feet split into islands, curves, tree rings, and narrow strips. Every extra corner adds cuts, waste, and time. Trimmed pieces around beds, trees, and curves may not always be reusable. Funny how the last 10 percent eats the clock.

    If you’re comparing bids, ask whether the quote is based on measured square footage or on a visual estimate. I would trust a contractor more if they can explain how they measured the area, especially if they mention a tape, laser measure, or scaled satellite image. If the number feels suspiciously round, it may be padded or guessed.

    What removal adds: old sod, weeds, mulch, rock, and debris

    What affects sod installation pricing: yard size, removal, grading, and access

    Removal can change the price as much as the sod itself because it adds labor, equipment wear, and disposal. If the installer has to remove existing turf, they usually strip the top layer, haul it away, and then prepare the subgrade below. That is much more than “laying over the top.”

    Old sod removal is one cost. Weed-heavy areas are another, because roots, stolons, and rhizomes can survive if the area is not fully cleaned out. Stripping out ivy, bermudagrass runners, or invasive groundcover takes more time than cutting a clean cool-season lawn. If the area has gravel, broken concrete, stumps, brick, or buried landscape fabric, expect the price to move again.

    Haul-off matters too. A contractor may charge for dump fees by load or bake disposal into the quote. If the job includes removing thick thatch, roots, or old mulch, the debris can fill a truck faster than a reader expects. That is one reason two quotes for the same square footage can differ by hundreds of dollars without either one being “wrong.”

    The cleanest bid breaks removal into lines: existing turf removal, debris haul-off, and final soil prep. I would be cautious if removal is vaguely described as “site prep included,” because that can hide a lot of extra labor once the crew arrives. Ask what happens if they uncover buried debris after the old layer comes off. That question is worth asking before the truck is unloaded.

    Why grading changes both price and outcome

    Grading changes price because it changes the amount of earth that has to move and the skill needed to set the final slope. Grading means shaping the soil so water drains away from the house, doesn’t pond in low spots, and gives the sod a stable bed. It is not the same as “raking it smooth.”

    Light grading on a mostly level yard is usually a finish pass: fill a few low spots, shave a few highs, and establish a uniform surface. Heavy grading means moving material across the site, importing topsoil, or reworking a bad slope. If the yard has settled trenches, a recent irrigation trench, or a dip that holds water after rain, the job takes longer and costs more.

    The technical term here is subgrade, which means the prepared base soil under the sod. If the subgrade is uneven, the sod will follow it. That creates humps, seams, and shallow depressions that show up later when the grass is established. A cheap quote that skips grading can leave you with a lawn that looks fine for a week and then fails at the first hard rain.

    I would ask any installer whether the quote includes a final grade measured in inches of adjustment or only “minor leveling.” In ordinary residential work, a few inches of correction is common; major recontouring is a different scope. If a contractor says the existing slope is fine even though water already pools there, that is a bad sign. Sod does not fix drainage by itself.

    Why access can turn a straightforward job into a slow one

    Access affects price because sod is bulky, heavy, and awkward to move. A pallet of sod is not something a crew wants to carry 80 feet by hand through a narrow gate if they can avoid it. The farther the material has to move from driveway to installation area, the more labor you pay for.

    A wide driveway, clear side yard, and flat route to the work zone make the job faster. Tight access does the opposite. Think 36-inch gates, steep side yards, stairs, retaining walls, pool enclosures, or backyard areas only reachable through the house or over a long cart path. Those are the conditions that increase labor most visibly.

    Access also includes where the crew can park, stage material, and load out debris. If trucks cannot get close, the crew may need wheelbarrows, hand-carrying, or smaller equipment. That slows both removal and installation. In some cases, the installer will add a delivery fee or a “difficult access” charge because the standard pallet-drop plan no longer works.

    Ask how far the sod must be moved from the drop point to the farthest installation point. A 20-foot carry and a 100-foot carry are not the same job. If your backyard is fenced and the only opening is a narrow gate, mention it early. That one detail can change the entire quote and the schedule. Short walk, easier bill. Long walk, not so much.

    How to compare quotes without getting fooled

    A useful quote separates material, removal, grading, access, and finishing work. If it only gives you one lump sum, you can’t tell what is actually included. I would want the estimate to state square footage, sod type, prep scope, haul-off, and whether watering-in is part of the job or left to you.

    The first number to check is the measured area. Measure length and width in feet, then subtract patios, beds, paths, and other non-sod areas. For irregular shapes, break the yard into rectangles and triangles instead of guessing. Even a rough sketch with dimensions helps. A contractor should be able to explain any major difference between your number and theirs.

    The second number is the prep scope. Ask whether the bid includes:
    – removal of existing turf or vegetation
    – rough and final grading
    – soil amendments or topsoil
    – compaction correction in ruts or settled spots
    – debris hauling
    – delivery staging

    The third check is schedule. Sod should be installed and watered promptly after delivery. If the crew says the turf may sit out for many hours in sun and wind, that is a problem. Fresh sod dries fast at the edges, especially in warm weather.

    I would also ask what counts as a change order. If they uncover buried rock, saturated soil, buried irrigation line, or unusable access after starting, does the price change? A fair contractor will tell you up front what triggers a price adjustment.

    When the standard approach does not apply

    The standard “remove, grade, and install” approach breaks down in a few specific situations. In each one, the quote should change, and if it does not, I would be wary.

    Water stays on the site for more than a day after rain: that means drainage is not just a finish problem — the subgrade may need rework or a different groundcover, not just fresh sod.
    The area is steeper than about 3:1 slope: that is a steep slope for many residential lawns — sod may need stapling, erosion control, or a different design approach.
    The yard has heavy tree root exposure: that means the surface is too shallow or uneven for simple grading — the installer may need to raise or redesign the bed.
    Access is through a narrow gate or inside courtyard: that means hand-carry labor will rise — expect slower installation and a higher labor charge.
    Existing grass is invasive or tangled with debris: that means removal will take longer and may need repeated passes — do not accept a quote that assumes quick strip-out.
    The soil is extremely compacted clay or construction fill: that means sod roots may struggle unless the top layer is loosened and improved — a surface-only job is the wrong fix.

    If any of those apply, the cheapest quote may be the least complete one. The right move is to ask for a revised scope, not a bargain version of the wrong plan.

    The mistakes people make, and what they cost

    The first mistake is undermeasuring the lawn. If you round down by 200 square feet, you may run short on sod or pay a rush fee for a second delivery. The fix is to measure every section and subtract non-sod areas carefully.

    The second mistake is skipping removal when the old surface is uneven. Sod laid over bumps, dead turf, or root mats can root poorly and look lumpy within weeks. The better alternative is full strip-out where the existing surface is broken or unhealthy.

    The third mistake is assuming grading means “a quick rake.” A rake will not correct drainage or settle a washboarded subgrade. The alternative is a proper finish grade with fill, cuts, and a final check for slope away from structures.

    The fourth mistake is ignoring access until install day. That can force hand-carrying, delays, or an unplanned surcharge. The better choice is to describe the gate width, side-yard clearance, and parking limits when you request the bid.

    The fifth mistake is choosing the cheapest quote without asking what is excluded. A low number may leave out haul-off, soil, or prep, then grow once the work starts. The better alternative is a line-item estimate with the job scope written plainly.

    How long sod installation usually takes, and what a good job looks like

    A small, open lawn can often be finished in a day, while a larger yard with removal and grading may take two days or more. The time depends less on the sod itself than on prep. A clean 800-square-foot install on easy access is not the same as the same area with old turf, poor drainage, and narrow entry.

    A good result starts with a flat, consistent subgrade, not a patchy one. Seams should be tight, edges cut cleanly, and the sod should sit flush without obvious lips between pieces. There should not be soft pockets, exposed soil gaps wider than a couple of inches, or low spots that collect water after the first rain.

    The best installers also leave you with clear watering instructions for the first 1 to 2 weeks, because establishment matters as much as installation. In warm weather, sod can dry quickly, especially on edges and slopes. If the crew finishes and gives no guidance on watering frequency or first-week traffic limits, that is incomplete work.

    If you want one rule of thumb to carry into pricing conversations, use this: every layer you ask the crew to fix before the sod goes down adds value, but it also adds labor. Removal, grading, and access are not hidden charges; they are the work.

    Questions people ask before they call for quotes

    Sod pricing is most predictable when you ask direct questions and force the scope into the open. The answers should tell you whether the quote is realistic or incomplete.

    How do I know if I need removal or just grading? If the existing surface is healthy, level, and free of debris, you may only need grading. If it is patchy, weedy, lumpy, or root-bound, removal is usually the better choice.

    Why do two installers quote different prices for the same lawn? One may include removal, haul-off, and grading while the other is pricing only labor to lay sod. The scope matters more than the headline number.

    Does access really change the price that much? Yes. A long carry, narrow gate, stairs, or poor parking can turn a simple job into slow manual labor.

    What should I ask before I sign? Ask for square footage, prep scope, removal method, grading details, access assumptions, and what triggers a change order.

    What does a bad sod job look like? It looks like visible seams, lifted edges, pooling water, uneven seams, and turf laid over a bumpy base. If you see those on day one, they usually get worse.

  • Best sod grass types for sun, shade, drought, and traffic

    Best sod grass types for sun, shade, drought, and traffic

    Last updated: September 10, 2026

    Key Takeaways

    • Yards with under about 6 hours of direct sun are the wrong match for some sod types.
    • Check whether the area gets 6+ hours, 3–5 hours, or less than 3.
    • Check whether you can keep the root zone moist for the first 2–3 weeks.
    • Test the soil texture in 10 minutes.

    Picking sod grass types for sun, shade, drought, and traffic is really a matching exercise. Match the toughest condition first. Not the nicest one. Full sun, deep shade, low water, and heavy foot traffic each point you toward different sod, and the wrong pick will thin out fast, no matter how tidy the installation looks on day one.

    Who this applies to — and what it assumes you already know

    Best sod grass types for sun, shade, drought, and traffic

    Homeowners choosing between cool-season and warm-season sod are the main audience here, especially if one issue dominates the yard: intense sun, real shade, drought stress, or regular foot traffic. I’m assuming you already know your rough region and can tell whether your lawn gets 6+ hours of direct sun, 3–5 hours, or less than that. I’m also assuming you know sod is laid as live turf, not seeded, so the first 2–3 weeks matter a lot.

    The real question is not “what is the best grass?” It is “what grass will still look acceptable after the hardest part of my site does its work?” A yard with 8 hours of sun and heavy play needs a different answer than a backyard under mature trees that only gets morning light. Generic “all-purpose” advice usually falls flat because turfgrass species are narrow specialists. A mile wide, an inch deep.

    I’m not going to pretend one sod type wins every category. Bermuda handles heat and sun extremely well, but it is a weak choice for deep shade. St. Augustine takes shade better in warm climates, but it is not the top pick for foot traffic. Tall fescue deals with drought better than many cool-season grasses, yet it can still struggle in brutal summer heat without irrigation. That trade-off is the whole ballgame.

    If your site has more than one severe problem at once — say, dense shade plus heavy traffic, or deep drought stress plus freezing winters — the answer may be “use a blended approach” or “fix the site conditions first.” I’ll get to those cases below.

    Table of contents

    Which sod grass is best for sun, shade, drought, and traffic?

    Best sod grass types for sun, shade, drought, and traffic

    For sod grass types for sun, shade, drought, and traffic, the best fit is the one that can take the site stress without constant correction. In warm climates, I’d start with Bermuda for full sun and wear; in cooler climates, Kentucky bluegrass or tall fescue make more sense. For shade, St. Augustine is the usual warm-region sod, while fine fescues are the better shade grasses in cooler areas, though they’re sold as seed more often than sod. For drought, bermudagrass and tall fescue are the usual starting points, with zoysiagrass as the slower-growing middle path. For traffic, Bermuda and zoysia lead in warm regions, while perennial ryegrass and Kentucky bluegrass are stronger in cool regions.

    Here’s the practical breakdown:

    • Bermuda grass sod: Good for full sun, heat, and heavy traffic. It spreads fast and bounces back quickly from wear. The drawback is shade intolerance; under trees, it thins. It is wrong for yards with under about 6 hours of direct sun.
    • Zoysia grass sod: Good for sun to light shade, moderate drought, and medium-heavy traffic. It feels dense underfoot and holds up well once established. The drawback is slow establishment and slower recovery from damage. It is wrong for people who need quick repair after pet or play damage.
    • St. Augustine grass sod: Good for warm-climate shade and a softer, broader-bladed lawn. It handles filtered light better than most warm-season sods. The drawback is weaker traffic tolerance and a tendency to struggle in drought. It is wrong for narrow, hard-used play areas.
    • Tall fescue sod: Good for cool-season drought tolerance and mixed sun. Modern tall fescue cultivars have deep roots and cope with heat better than many cool-season lawns. The drawback is that it is not ideal for low-mow perfection or very heavy traffic. It is wrong for hot, humid regions where warm-season turf dominates.
    • Kentucky bluegrass sod: Good for cool-season lawns with traffic and self-repair. It spreads by rhizomes, which helps it fill in worn spots. The drawback is higher water demand than tall fescue, especially in summer. It is wrong for low-water sites.
    • Fine fescue: Good for dry shade in cool climates, but it is usually less durable under traffic. The drawback is poor wear recovery. It is wrong for lawns that get regular sports, dogs, or lots of running.

    If I had to boil it down to one line: Bermuda usually owns sun and traffic, St. Augustine is the common shade pick in warm climates, tall fescue is a solid drought-oriented option in cooler regions, and zoysia is the compromise grass that handles several stresses fairly well.

    How do I match sod to my yard step by step?

    Match sod to your yard by measuring light, water, wear, and climate before you buy a single pallet. Start with the conditions you cannot change easily.

    1. Measure direct sun in the problem area. Count hours of direct sunlight on a clear day in June or July, or in the sunniest part of your season. Check whether the area gets 6+ hours, 3–5 hours, or less than 3. A lawn area that stays under 4 hours and still needs a traditional turf surface usually rules out Bermuda and pushes you toward shade-tolerant choices.
    2. Identify your climate zone and summer pattern. Use the USDA Plant Hardiness Zone map as a rough guide, then think about summer heat and humidity, not just winter low temperatures. Check whether your region is cool-season, transition zone, or warm-season dominant. A common mistake is choosing a cool-season sod for long, hot, dry summers without irrigation.
    3. Assess traffic by use, not by guesswork. Count where people walk, where kids cut corners, and where dogs turn. A path that gets daily crossing or more than a few minutes of play each day needs higher wear tolerance. Check whether the same strip gets compaction or repeated abrasion. Using shade grass in a dog run and expecting it to stay dense is a bad bet.
    4. Check water access before choosing drought-tolerant grass. Drought tolerance is not the same as zero water. Newly laid sod usually needs frequent irrigation for establishment, often daily at first depending on weather and soil. Check whether you can keep the root zone moist for the first 2–3 weeks. Installing any sod in summer with no irrigation plan is asking for trouble.
    5. Test the soil texture in 10 minutes. Sand drains fast, clay holds water, and loam sits in between. Check drainage by digging a small hole and filling it with water; if it stays soggy for hours, some grasses will struggle. Putting a drought grass into constantly wet soil or a shade grass into powder-dry sand without amendments is the wrong move.
    6. Choose the species that matches the worst stress first. For full sun and wear, start with Bermuda or zoysia in warm climates; for shade, start with St. Augustine in warm regions or fine fescue in cool ones; for drought, lean toward tall fescue or Bermuda. Check that the choice also fits your climate zone. Pick one trait only, and another stress will usually bite you later.
    7. Ask about the cultivar, not just the species. Cultivar means the named variety within a species. A ‘tall fescue’ sod block can vary a lot in color, density, and disease tolerance depending on the cultivar. Check whether the farm is selling a single cultivar or a blend. Buying unlabeled “premium” sod with no cultivar information is shaky ground.
    8. Plan the maintenance level you will actually keep. Bermuda often wants lower mowing height and more sun; tall fescue tolerates a wider range but still needs consistent care; St. Augustine can be more forgiving in shade but does not like rough wear. Check that your mower, watering, and fertilizer routine fit the grass. Choosing a high-maintenance turf for a low-maintenance yard usually ends badly.

    A good result is a lawn that stays dense through the season with only normal thinning at edges and worn paths. A bad result is a lawn that looks fine for 6 weeks, then thins in the same places every year because the grass was never matched to the stress.

    What sod grass is best for full sun?

    Bermuda grass is the strongest all-around sod choice for full sun, heat, and heavy use, with zoysia and Kentucky bluegrass close behind depending on climate. In warm regions, Bermuda is the first grass I’d look at if the lawn gets 8 or more hours of direct sun and people actually use it. It spreads aggressively, recovers from damage quickly, and tolerates close mowing better than most turf grasses. That makes it a common pick for active yards, sports areas, and high-visibility front lawns.

    The drawback matters just as much: Bermuda is poor in shade. Even light canopy cover can weaken it, and once it starts thinning, weeds move in fast. It is also not the grass I’d choose for someone who dislikes frequent mowing, because the look people want from Bermuda usually comes with regular cutting. No free lunch.

    Zoysia is my second choice for sunny lawns when the site has some drought pressure or the owner wants a denser, carpet-like texture. It handles traffic well once established and holds color reasonably well in heat. The drawback is slow recovery. If you scarify, tear up, or heavily wear a zoysia lawn, it can take time to knit back together. It is not the grass for a household that wants instant repair after every rough patch.

    For cooler climates, Kentucky bluegrass is the classic sunny, traffic-tolerant choice because it spreads by rhizomes and fills damaged areas better than many grasses. The trade-off is water use. If the site gets long, dry summers, bluegrass can go thin unless irrigation is steady.

    What sod grass is best for shade?

    St. Augustine is the best common sod grass for warm-climate shade, while fine fescue is the shade specialist in cooler climates, although it is often more available as seed than sod. Shade means less than about 4 hours of direct sun or broken sunlight under trees, porches, or the north side of a house. In those conditions, Bermuda usually fails first, and even zoysia can thin if the shade is persistent.

    St. Augustine’s advantage is broadleaf shading tolerance. It can stay acceptable where other warm-season grasses become sparse. It also has a softer, fuller look that many homeowners prefer around patios and side yards. The drawback is traffic tolerance: it is not the best grass for kids’ paths, dog runs, or any area that gets repeated wear. It is also less forgiving in drought than Bermuda or tall fescue.

    Fine fescue is the cool-season answer when shade and lower maintenance matter more than wear. It can handle filtered light and lower fertility better than many turf grasses. The drawback is that it is not a sports-lawn grass. I would not choose it for a yard where the same strip is crossed 20 times a day or where pets regularly turn in place.

    A common mistake is thinking “shade tolerant” means “any dark corner.” Deep shade under dense tree canopies is often better solved with mulch, groundcovers, or a hardscape strip than with sod. Grass needs light as much as it needs water.

    What sod grass handles drought best?

    Bermuda and tall fescue are the best drought-aware sod choices, with zoysia as a slower, moderate-water option. Drought tolerance is not the same as surviving on neglect; it means the grass can stay functional with less water once established. That distinction matters because new sod needs consistent moisture while roots grow into the soil.

    Bermuda is the standout in hot, sunny, dry sites. It has a strong recovery habit and handles heat well. The drawback is that it wants sun, not shade, and many owners find the mowing frequency tiring. It is wrong for people who want a shaded, low-input lawn.

    Tall fescue is the cool-season workhorse for water-conscious yards. Its root system is deeper than that of many cool-season grasses, and newer turf-type tall fescues are bred for better density and appearance than older coarse types. The drawback is that it is still a cool-season grass; in prolonged summer heat, it can go off-color or thin without water. It is wrong for the hottest southern sites unless irrigation is part of the plan.

    Zoysia sits between those two. It can use water efficiently once mature, but it is not as fast to recover as Bermuda and not as shade-friendly as St. Augustine. For a homeowner who wants a reasonably tough lawn and can accept slower establishment, it is a sensible middle path.

    When should I stop trying to make sod work?

    I would stop trying to force a standard sod lawn when the site conditions are asking for a different surface. That is often cheaper and more durable than fighting the wrong grass for years.

    Less than 3 hours of direct sun: Deep shade for turf — choose mulch, shade plants, or a shade-tolerant groundcover instead of expecting sod to stay dense.
    Repeated foot traffic in the same 2–3 foot path: This creates compaction and bare spots — use pavers, stepping stones, or a dedicated walkway.
    No irrigation for the first 2–3 weeks after installation: New sod will struggle to root — delay installation until you can water properly.
    Heavy tree-root competition in the top 6 inches of soil: Roots steal water and space — either cut back the lawn area or improve soil and irrigation first.
    Standing water that lasts more than a few hours after rain: Poor drainage will rot roots and thin turf — fix grading or drainage before laying sod.
    Hot, dry climate plus deep shade: This is one of the hardest lawn combinations — accept that turf will be maintenance-heavy and often inconsistent.

  • How to prepare soil for sod installation

    How to prepare soil for sod installation

    Last updated: September 10, 2026

    Key Takeaways

    • Loosen the top 2 to 4 inches of soil.
    • Dig a small hole about 6 to 8 inches deep, fill it with water, and watch how fast it drains.
    • Mix amendments into the top 3 to 4 inches instead of leaving a soft layer on top.
    • A good sod base is smooth, slightly firm, and loose enough in the top 2 to 4 inches for new roots to enter the soil.

    Sod roots quickly only when the ground is ready. Clear the site. Fix the grade. Break up the top layer, deal with obvious drainage trouble, and leave behind a surface that is firm, moist, and smooth — not airy or spongy. For homeowners and property managers deciding whether to hire a lawn contractor, landscape installer, or grading crew, this guide on how to prepare soil for sod installation gives the practical answer. For how to prepare soil for sod installation, the goal is a base that supports rooting, drainage, and a level finish.

    Table of Contents

    How to prepare soil for sod installation

    Who this is for — and who should do something else

    This fits a yard that will get sod over existing soil, not over construction debris, buried concrete, or a soil profile that is collapsing after rain. It assumes you already know the basic layout of the area, have measured the square footage, and know whether the site is full sun, shade, or a mix. One trade-off sits underneath all of it: sod is fast, but it will not fix lousy soil. So if the ground is compacted, standing water collects after a 1-inch rain, or the finish grade is off by a couple of inches, the problem will just hide for a few weeks.

    Honestly, I would treat this as a service job, not a weekend guessing game, when the yard needs regrading, when there are sprinkler heads to adjust, or when you suspect more than about 2 to 3 inches of poor soil has to be replaced. Consult a professional if the yard needs regrading or drainage correction; the USDA NRCS notes that surface and subsurface drainage problems can require more than simple topdressing, and site-specific conditions matter. New construction lots are especially tricky because subsoil is often scraped thin and packed hard, and clay-heavy areas can sit wet for hours after irrigation. If the soil is already loose, drains properly, and only needs cleaning and leveling, a homeowner can often manage the prep. If a drainage correction would require moving soil to change slope, that is where a grading contractor earns the money.

    A generic article would tell you to “prepare the soil” and stop there. Not enough. Sod usually fails because the base is uneven, too hard, or too dry at install. A decent installer should be talking about depth, slope, compaction, and soil contact, not just about “freshening up” the ground. That’s the real test.

    What a good sod base actually needs

    How to prepare soil for sod installation

    A good sod base is smooth, slightly firm, and loose enough in the top 2 to 4 inches for new roots to enter the soil. Simple on paper. Trickier in practice. The surface should fall away from the house at roughly 1/8 to 1/4 inch per foot, which moves water without making the yard feel sloped. Low spots deeper than about 1/2 inch will hold water and become soft underfoot; high spots may not seem like a big deal until the sod dries unevenly and the mower catches the ridge.

    Compaction matters more to me here than perfect soil “richness.” Sod roots need contact with mineral soil, not a thick layer of loose compost that settles later. A thin soil amendment — often 1/2 inch to 1 inch of screened compost mixed into the top few inches — can help on tired or sandy ground, but too much organic matter creates a soft layer that shifts underfoot. The USDA NRCS recommends using soil tests and matching amendments to the existing profile, because a richer-looking surface is not automatically a better rooting base if it sits between the sod and the firm soil below. Soil can look fancy and still behave like a pillow.

    Before laying sod, the finish should let you press with your foot and leave a shallow impression, not a deep boot print. If your footprint sinks more than about 1/2 inch, the ground is probably too soft. If it feels like pavement, it is probably too compacted. Either one slows rooting. A contractor should be able to explain how they plan to land in that middle zone, especially if the site has clay, fill dirt, or builder’s debris.

    In most markets, preparation is a separate line item from the sod itself. For an average residential yard, soil prep can cost less than the sod or more than the sod, depending on grading and haul-away. A simple clean-and-level job may take a day; a site that needs excavation, imported fill, and drainage correction can take several days before the first roll goes down. The cost per square foot often rises when the crew has to haul soil, reset irrigation, or import screened topsoil.

    How do I prepare soil for sod installation?

    You prepare soil for sod installation by clearing, grading, loosening, amending only what needs it, and then firming the surface so the sod sits flat with full contact. Here is the sequence I would expect a competent crew to follow.

    1. Remove all old turf, weeds, rocks, and debris. Strip out vegetation and anything larger than about 1 inch across, including sticks, construction scraps, and buried trash. The surface should be bare mineral soil, not a mat of roots or dead grass. If you can still see patches of old sod or clumps that spring back when stepped on, the cleanup is incomplete and the new sod will sit unevenly.
    2. Set the finished grade before adding soil. Establish slope away from structures at roughly 1/8 to 1/4 inch per foot. Check that doors, edging, downspouts, and walkways will still clear the new grade. If raising the lawn would block siding, cover vents, or bury a patio edge, stop and change the plan before you build the surface too high.
    3. Loosen the top 2 to 4 inches of soil. Use a tiller, rake, or shovel depending on the size of the area. Break up clods so the largest pieces are smaller than a fist, and remove buried roots or rocks as you go. The soil should be cut with a hand trowel rather than bouncing off a hard crust. If the tiller just skips across the top, compaction is still there and sod roots will struggle to penetrate.
    4. Test drainage in the problem spots. Dig a small hole about 6 to 8 inches deep, fill it with water, and watch how fast it drains. A hole that still holds water after several hours signals a drainage issue that soil prep alone will not solve. Make sure low areas are corrected before sod arrives; otherwise, you are planting into a future puddle.
    5. Add topsoil or compost only where the site needs it. Spread screened topsoil to build grade, or a light compost layer of about 1/2 inch to 1 inch if the native soil is poor. Mix amendments into the top 3 to 4 inches instead of leaving a soft layer on top. Do not create a distinct “fluffy” layer over hard soil, which causes settling and uneven rooting.
    6. Rake the surface until it is smooth and even. Use a landscape rake or leveling rake to remove ridges, footprints, and dips larger than 1/2 inch. Check the finish with a straight board or long level across several directions. If the board rocks, you still have highs and lows that will show through the sod.
    7. Firm the soil lightly, then recheck the grade. Walk the area with flat steps or use a water-filled roller if the site is large enough. The goal is to settle loose soil, not crush it into a slab. The surface should give slightly underfoot but not sink deeply. If your footprints remain deep, the base is too soft and should be re-raked and compacted again.
    8. Water the prepared soil lightly before installation. Moisten the top layer so it is damp, not muddy. In hot weather this may mean watering 30 to 60 minutes before laying, depending on soil type and wind. Make sure the surface is cool and slightly damp when sod arrives. If water pools or sheen appears on top, the soil is too wet and the sod will slide or rot at the seams.

    A contractor should be able to explain why they are using topsoil, not just dumping it. On many jobs, 1 to 2 cubic yards of screened topsoil is enough for a small repair area, but a full yard installation may require far more. The right amount depends on the existing grade, not a fixed bag count. If someone talks only in “a few wheelbarrows” and never mentions slope or compaction, that is a warning sign. Smoke and mirrors. Not a plan.

    What should I ask before I hire someone to prep a yard for sod?

    Ask how they will handle grade, soil depth, drainage, and cleanup, not just how quickly they can lay the sod. A good answer includes measurements. I would want to hear a plan for slope away from the house, a description of how deep they will loosen or replace the topsoil, and whether they will reset sprinkler heads, edge the lawn, or haul away debris. If a contractor cannot tell you whether they are working with the top 2 inches or the top 6 inches, they are probably improvising.

    Also ask whether the estimate includes stripping old turf, importing screened topsoil, leveling, and final rolling. Those are separate tasks in many jobs, and a low price may only cover the visible part. Cost often rises when access is tight, when a wheelbarrow has to cross a long side yard, when the lot is steep, or when the crew must work around irrigation lines. A flat, open rectangle is cheaper to prep than a backyard with retaining walls and mature trees.

    Ask what they do when the soil is too wet or too dry. That matters because a crew that installs on muddy soil or dust-dry clay can ruin the surface before the sod even arrives. A serious installer should be willing to delay by a day or two if conditions are wrong. I would rather hear, “We need to wait until the grade firms up,” than, “We can make it work.”

    And ask what the finished yard should look and feel like. The right answer is usually smooth, slightly firm, and even with a gentle fall for drainage. The wrong answer is “nice and fluffy.” Fluffy soil settles. Settled soil leaves seams, dips, and edge gaps that dry out the sod.

    What mistakes do people make before sod goes down?

    The expensive mistakes are usually the invisible ones made in the prep phase. They do not show up until the sod starts lifting at the edges or the lawn develops humps after the first watering cycle.

    1. Skipping grade work because the yard “already looks level.” The consequence is puddling in low spots and dry ridges on high spots. The correct move is to check with a straight board, string line, or laser and fix slopes before installation.

    2. Leaving the soil too loose. The consequence is settling after the sod is laid, which creates seams, wrinkles, and soft spots. The correct move is to firm the soil lightly and recheck the surface before delivery.

    3. Overusing compost or topsoil. The consequence is a soft, settling layer that roots poorly and shifts underfoot. The correct move is to mix thin amendments into the top few inches and keep the final layer stable.

    4. Installing over wet, muddy ground. The consequence is smearing the soil, sinking the sod, and sealing off oxygen to the roots. The correct move is to wait until the surface is damp but workable.

    5. Ignoring buried debris. The consequence is dead patches, raised humps, and damage to mower blades later. The correct move is to rake and inspect before a single roll is opened.

    6. Forgetting irrigation height. The consequence is sprinkler heads buried too deep or left too high, which means poor coverage and mower damage. The correct move is to reset heads to the final grade before sod goes in.

    These mistakes are easy to miss because the lawn looks “done” on day one. That is why I judge prep by the base, not the photo.

    When does standard prep not apply?

    Standard prep does not apply when the yard has drainage failure, severe compaction, or contaminated fill. If water sits longer than a few hours after rain in the same place, soil prep alone will not fix it; the grade or drainage path has to change. If the site is hard enough that a shovel barely bites into the top 2 inches, you may need mechanical loosening or import soil rather than a light rake-and-go approach. If the area was built on rubble, brick fragments, or unknown fill, the top layer may need to be removed and replaced.

    It also changes in clay soils and sandy soils. In heavy clay, I would be more cautious about overworking wet ground, because it turns to paste and seals shut. In sand, the issue is often the opposite: the ground may drain too quickly and need organic matter blended into the top layer to hold moisture. On slopes, erosion control matters before installation. In hot, windy weather, prepared soil can dry in an hour or two, so sod should arrive the same day the base is finished.

    This is the point where the cheapest bid is often not the right bid if the proposal does not account for drainage correction, soil import, or sprinkler adjustments. That is a problem for anyone who expects the sod to root and survive the first season.

    How long does soil preparation take, and what does a good job look like?

    Soil preparation usually takes from part of a day to several days, depending on yard size and corrections needed. A small, straightforward front lawn may be ready the same day if the soil is already decent and the old turf comes up cleanly. A larger property with grading changes, debris removal, or imported topsoil can take longer, especially if the crew has to wait for a dry surface. Sod itself should go down soon after prep is finished, ideally the same day, because exposed soil dries, crusts, and erodes.

    A good job looks boring in the best way: no puddles, no sharp ridges, no visible trash, no soft sinkholes, and no abrupt changes in height at walkways or beds. If you can drag a board across the surface and it does not catch, that is a useful sign. If the prepared soil feels firm enough to walk on without deep footprints, yet still has a shallow give, that is the kind of base that supports sod installation and helps roots establish.

  • Why new sod turns yellow or brown

    Why new sod turns yellow or brown

    Last updated: September 10, 2026

    Key Takeaways

    • If the top 1 to 2 inches dry out, the leaf blades dehydrate fast.
    • Lift one corner of a damaged piece 1 to 2 inches.
    • If the slab lifts with almost no resistance after 10 to 14 days, rooting is weak.
    • Feel the soil 2 inches below the surface.

    New sod turns yellow or brown for three plain reasons: it is short on water, short on roots, or taking a beating from heat and transplant stress. Usually, the turf is trying to establish itself and cannot keep moisture even. Not a mystery disease, most of the time. More like a plant running on fumes.

    The real question is simpler than it sounds. Is the sod drying out, drowning, or failing to touch the soil? That answer tells you whether recovery is realistic.

    What this means, and when my answer applies

    Why is new sod turning yellow or brown?

    I’m talking about freshly installed sod, usually within the first 2 to 6 weeks after laying it, before the roots have fully moved into the soil below. This fits if you put it over prepared soil, topsoil, or a leveled lawn surface and you know the grass type at least roughly: bermuda, Kentucky bluegrass, fescue, zoysia, St. Augustine, or similar cool-season or warm-season turf. For establishment basics, see the USDA Natural Resources Conservation Service on soil management and establishment guidance: https://www.nrcs.usda.gov/

    Water stress is the usual culprit in that window. Poor root-to-soil contact comes next. Heat damage can follow close behind, especially when sod sat on a pallet too long before installation. Ugly, but common. If the sod turns brown in patches and still peels up easily, the root system has not settled in yet. If it goes yellow all over and feels spongy or soggy, too much water and too little oxygen may be the problem. For irrigation scheduling and turf water needs, the University of California Agriculture and Natural Resources has useful guidance: https://ucanr.edu/

    This is not the same as an older lawn going off-color after years of growth. Established turf brings different headaches. It also is not the right read for broad, fast-moving dead spots caused by chemical spills, concentrated pet urine, or grubs chewing up old turf. Different mess. Different fix.

    And no, every yellow blade does not mean the grass is dying. During the first 7 to 10 days, some sod loses color at the tips and still bounces back normally. The job is to tell normal installation shock from an irrigation mistake or a bedding-soil problem before the window closes. Tricky? Sure. But not impossible.

    Why is new sod turning yellow or brown?

    New sod turns yellow or brown because the canopy loses moisture and energy faster than the root system can replace them. Several things can trigger it, but the visible pattern usually arrives in the same order: dull green, then straw yellow, then tan or brown.

    Uneven moisture is the main offender. Fresh sod needs frequent watering because harvesting cuts the roots short. Until those roots reach the native soil, the slab lives on a shallow reserve. If the top 1 to 2 inches dry out, the leaf blades dehydrate fast. If the soil stays wet for days, the roots can suffocate because turf roots need oxygen as much as water. That part bites hard.

    Heat matters too. In hot weather, sod can scorch while it is still on the pallet, especially if a pallet sits in direct sun for more than a few hours. After it is laid, a day with high evapotranspiration — the combined loss of water through soil evaporation and plant transpiration — can outrun your watering plan. Wind makes the situation worse. A 90°F day with steady wind can dry fresh sod far faster than a cool, cloudy day, even if you watered that morning.

    Poor installation creates another issue: air gaps. If the sod bridges over a rough grade, the roots touch only high spots, not the full soil surface. Then one edge may stay green while the other edge browns. Poorly butted seams, curled edges, and dry pockets under the slab all slow rooting.

    Grass type matters as well. St. Augustine sod, for example, can show shade or drought stress faster than bermuda. Kentucky bluegrass behaves differently from zoysia. I would not treat all yellowing the same way across species because rooting speed and water tolerance are not identical; honestly, that trade-off is why local extension advice helps so much.

    If the sod is turning yellow evenly but not collapsing, I think stress first. If it is patchy, I think contact or irrigation pattern. If it is soft and smells sour, I think too wet. The color is the clue. Not the diagnosis.

    How do I tell water stress from root failure?

    Why is new sod turning yellow or brown?

    Check the moisture at the sod-soil interface, the texture of the roots, and how tightly the slab grips the ground. A knife, trowel, or screwdriver is enough; no special gear is needed.

    1. Lift one corner of a damaged piece 1 to 2 inches. Slide a trowel under the edge and check whether roots are reaching into the native soil. Verify that you see white or light tan roots threading downward. If the slab lifts with almost no resistance after 10 to 14 days, rooting is weak. That means the sod is still dependent on surface watering and is vulnerable to drying.
    2. Feel the soil 2 inches below the surface. Dig down with your fingers or a small trowel. The goal is evenly moist soil, not mud. Verify that it feels like a wrung-out sponge. If it is dusty dry, you are under-watering. If it glistens, squishes, or smells sour, you are over-watering or have drainage trouble.
    3. Check the underside of the sod piece. Look for roots, damp soil contact, and any gap larger than about 1/4 inch. Verify that the sod sits flat with no hollow sound when pressed. A hollow sound or visible void means the slab may be bridging over high spots, which slows root contact.
    4. Inspect the color pattern across 3 to 5 adjoining pieces. Uniform pale yellow suggests a watering or heat issue. Edge browning on one side often points to poor seam contact or a dry high spot. Patchy circles can mean a sprinkler coverage problem. A sprinkler head should throw water far enough to overlap adjacent heads by roughly 50% in many layouts; if one arc misses, a strip will fade.
    5. Press a blade between your fingers. Healthy grass blades feel flexible. Brittle blades that crack or crunch mean moisture loss. If the blades are limp and the base feels wet but the color is yellow, that points more toward oxygen stress than drought.
    6. Check the time since installation. In the first 7 days, surface drying is normal if the watering cycle is short. Between days 7 and 21, the sod should begin to resist gentle lifting. If it has not started rooting by the end of week 3, something in the site setup is wrong.
    7. Look for a root-zone barrier. Construction clay, compacted subsoil, a heavy thatch layer, or old weed fabric can block rooting. Verify that a probe or trowel can enter the soil to at least 4 to 6 inches without unusual resistance. If it stops at a hard pan or smeared layer, water may be pooling above it.

    A good result is simple: the sod stays green, the edges stop curling, and the slab resists a gentle tug after about 2 to 3 weeks, depending on weather and grass type. A bad result is not just brown color; it is easy lifting, sour smell, or a wet-but-dead look. The whole thing can turn on a dime.

    What do I do first if the sod is already changing color?

    Correct moisture first. For most new installs, that means watering the whole area deeply enough to wet the top 4 to 6 inches of soil, while avoiding puddles and runoff. If the surface dries in under 30 minutes on a hot, windy day, the site may need shorter, more frequent cycles rather than one long soak.

    Start with a test zone: mark a 3-foot by 3-foot square and check it at the same time each day for 3 days. The target is consistent moisture, not a fixed schedule copied from a neighbor. If the top inch dries but the second inch stays moist, the timing is close. If both inches dry by midday, increase frequency. If the area stays shiny or muddy for more than a day, back off and inspect drainage.

    Next, verify sprinkler coverage. Run the system long enough to see whether each head reaches the edge of the next head’s pattern. Missing overlap creates brown stripes that often get blamed on disease. On a small lawn, even one clogged nozzle can leave a 2-foot-wide dry band. Mechanical problem. Not turf failure.

    If the grass has slipped out of contact with the soil, press it down with a lawn roller only if the soil below is moist, not saturated. A roller on muddy soil can make compaction worse. If the grade is uneven by more than about 1/2 inch in spots, lifting and relaying those pieces is better than watering them into a bad fit. Sometimes the simplest fix is the messy one.

    Do not fertilize as the first fix unless the install was done on exhausted soil and you already know the nutrient status. Fertilizer can push leaf growth faster than the young roots can support, which makes yellowing worse. I would choose water, contact, and drainage checks before any feeding. That approach is wrong for somebody who already has standing water, because more water will not save a suffocating root zone.

    The mistakes people actually make, and what they cost

    Watering by the calendar instead of checking the soil is the most common mistake. A fixed “10 minutes every morning” plan can leave one yard dry and another flooded. The cost is either wilted sod or root rot. The better alternative is to check moisture 2 inches down and adjust by weather.

    Letting pallets sit too long before installation is another one. Fresh sod can heat up in stacks, especially in sun or wind, and the root mats can dry out before they ever touch the lawn. The cost is edge browning within a day or two of laying. The smarter move is to install as soon as possible and keep unused pieces shaded and damp, not soaked.

    Mowing too early or too short causes a third problem. New sod that gets cut before it is anchored can tear, shift, and lose more leaf surface than it can spare. The cost is slower rooting and visible seams. The correct alternative is to wait until the sod resists a light tug and then mow at the highest recommended setting for that grass, usually leaving at least 2.5 to 3.5 inches on many cool-season lawns.

    Chasing color with fertilizer is another trap. Yellowing from drought, heat, or poor contact does not need nitrogen first. The cost is weak, fast top growth and more stress. The better alternative is to fix water and root contact before adding anything. Soil first. Leaves later.

    Assuming every brown patch is disease also wastes time. New sod can brown from one bad sprinkler head, a dry seam, or a gap under a corner. The cost is delay and money down the drain. The correct alternative is to trace the watering pattern and lift a few pieces for inspection.

    Walking on loose, fragile sod rounds out the list. Foot traffic breaks new roots and leaves depressions that collect heat and water unevenly. The cost is permanent unevenness in small areas and slow establishment. The better alternative is to limit traffic for the first 2 to 3 weeks, especially in heat. Not glamorous. Just effective.

    When should I stop troubleshooting and change course?

    Stop with the standard recovery steps when the sod is too damaged, the soil is physically wrong, or the site conditions will keep defeating the grass. Here are the situations that change the answer:

    The sod lifts like a rug after 14 to 21 days: The roots have not knitted into the soil — patching the watering schedule alone will not fix a bad seedbed or poor contact. Reassess grading, loosen the topsoil, and relay the affected sections.

    The area stays wet for more than 24 hours after watering: The root zone is oxygen-starved — reduce irrigation and check for compaction, clay, or drainage blockages. If water cannot move through the soil, the grass will keep yellowing.

    Browning follows one sprinkler arc or a straight line: This is a coverage problem, not a turf problem — clean, adjust, or replace the affected head and retest overlap before doing anything else.

    The sod was installed in extreme heat and sat on the pallet for hours: The planting stock may have been damaged before installation — some sections may recover, but badly heat-damaged rolls often fail. Replace the sections that are most damaged instead of assuming every roll will recover on its own.

    The soil beneath is hard, smeared, or only a few inches deep: The sod has nowhere to root — improve the root zone to at least several inches of workable soil before expecting normal recovery. Thin or compacted fill is the wrong tool for turf.

    The color change is accompanied by a sour smell or black, slimy roots: That points to rot from excess moisture — cut back watering immediately and fix drainage. More irrigation will make it worse.

    These are the places where “wait and water” stops being good advice. The wrong move is to keep increasing water or fertilizer when the root zone is already failing.

    What a healthy recovery looks like — and what edge cases change the plan

    A healthy recovery usually shows up in 7 to 21 days, depending on temperature and grass type. You should see less curling, firmer footing, and richer color from the center of the blade outward. The seams begin to disappear, and the sod takes a light pull without lifting. In warm weather, rooting often happens faster than in cool, cloudy conditions, but the exact pace depends on the species. Bermudagrass and zoysia generally behave differently from fescue and Kentucky bluegrass, and shade slows all of them.

    There are edge cases where the standard watering-and-contact plan needs adjustment. Shade is one: in areas with less than about 4 hours of direct sun, new sod dries more slowly but also grows roots more slowly, so overwatering becomes easier. Clay soil is another: it holds water well but can suffocate roots if puddling survives. That’s a nasty one.

  • Sod Installation Cost and Project Planning — The Complete Guide

    Sod Installation Cost and Project Planning — The Complete Guide

    Last updated: September 10, 2026

    Key Takeaways

    • A flat, accessible 800-square-foot patch with no tear-out is one sod installation cost project.
    • Even a modest 1 to 2 inches of topdressing over a large area adds material and labor.
    • A 2,500-square-foot front and back yard with rubble, clay, and slope is a different sod installation cost project with a different labor profile.
    • I would also plan the sod installation cost project around a window of 1 to 2 days when someone can stay available.

    Sod installation cost is usually driven less by the grass itself and more by the ground work under it: removal, grading, soil correction, access, and how quickly the crew can lay and water the turf. Want the blunt version? The real question in sod installation cost and project planning — complete guide terms is not just “How much per square foot?” but “What does this site need before sod goes down, and what will that add to the bill?” This sod installation cost and project planning — complete guide also helps you compare quotes, spot missing line items, and budget for watering, cleanup, and site prep.

    Who this guide is for — and what I’m assuming you already know

    Sod installation cost and project planning — The Complete Guide

    This sod installation cost and project planning — complete guide is for a homeowner, landlord, or property manager who is trying to budget a sod job and decide whether a quoted price is fair. I’m assuming you already know the difference between sod and seed at a basic level, and that you have a rough idea of the area you want covered, even if it is not measured perfectly yet. No square footage? Get that first. I would not trust any quote, no matter how polished, until the area is measured in square feet or square meters and the crew has seen the site.

    I’m also assuming you are dealing with a normal residential yard, not a sports field, a steep commercial embankment, or a new build with heavy construction damage. Those jobs can still use sod, but the planning changes enough that a generic price per square foot becomes a weak guide. In a yard with clay soil, compacted subgrade, irrigation already in place, or a lot of access obstacles, the prep can cost as much as the grass itself. In a yard with decent topsoil and easy machine access, the job can be much simpler. Easy? Not always.

    This is not a do-it-yourself warning dressed up as advice. Small, flat areas can be feasible for many people, but once the job includes regrading, drainage correction, or over about 1,000 square feet, it is wise to consult a professional because a bad install can leave you with seams that dry out, low spots that puddle, or turf that never roots evenly. For guidance on prepared seedbeds and firm soil contact, see university extension resources such as NC State Extension and University of Florida IFAS. If that happens, the base is the culprit, not the sod variety. In those cases, I would want a contractor who can explain grading, soil depth, and irrigation in plain language.

    For reference, the National Turfgrass Federation and many university extension programs recommend planning sod on a prepared, leveled seedbed with good soil contact rather than laying it on hard, unmodified ground. That standard matters more than the brand of grass.

    How much does sod installation cost?

    Sod installation cost usually lands in a broad range because two lawns with the same square footage can require very different site work. The quote often includes some mix of sod supply, delivery, labor, soil prep, grading, debris removal, and first watering guidance. A simple, accessible lawn with light prep will price very differently from a yard that needs old turf removed, drainage repaired, or soil brought in.

    The clearest way to think about cost is to split it into layers:

    • Sod itself: priced by the square foot, square yard, or pallet.
    • Prep and labor: removal of old grass, tilling or scarifying, leveling, topsoil, and installation.
    • Extras: hauling, edging, minor irrigation work, fill dirt, or compost.

    If a contractor gives you one lump-sum number, ask them to break out those layers. A “cheap” quote that skips prep often becomes expensive after the lawn fails in patches and has to be fixed. A reputable quote should also state whether cleanup, delivery, and watering instructions are included.

    A generic article often gets this wrong by treating sod as a flat material cost, so it is safer to consult a professional when the yard has drainage issues, grading changes, or uncertain soil depth. The same grass can perform very differently depending on soil, climate, and drainage. For example, warm-season grasses such as bermudagrass and zoysiagrass are common in hotter regions, while cool-season grasses such as Kentucky bluegrass and tall fescue are more common in colder climates. The climate does not just change what you buy; it changes how picky the site prep needs to be. In areas with hot, dry summers, a lawn laid on shallow topsoil can burn out quickly if the root zone is thin. In rainy regions, poor grading can leave the sod sitting in water.

    I do not want to pretend that there is one universal “average cost” that matters everywhere. There isn’t. What matters is whether the quote reflects the actual condition of your yard. A flat, accessible 800-square-foot patch with no tear-out is one sod installation cost project. A 2,500-square-foot front and back yard with rubble, clay, and slope is a different job with a different labor profile.

    If you want a reliable budget, ask for at least three numbers: sod supply, prep labor, and irrigation or drainage work. Then compare whether each quote includes delivery, topsoil depth, and cleanup. A missing line item is usually where the surprise bill hides.

    What drives the price up or down?

    Sod installation cost and project planning — The Complete Guide

    The price moves when the site moves out of “easy install” territory. The biggest cost drivers are area, access, soil condition, slope, and water.

    Area: Larger lawns can lower the per-square-foot labor rate because the crew spends less time on setup relative to output. But a larger site also increases the chance that a hidden issue, such as a drainage pocket or compacted strip, will show up.

    Access: If a crew can unload pallets near the work area, the job is faster. If they have to wheel sod through a narrow side yard, around a pool, or up stairs, labor rises. A pallet of sod is heavy; machine access matters. A simple gate can change the whole quote.

    Removal: Existing turf that needs to be stripped and hauled away adds both labor and disposal fees. If the old grass is full of weeds, rooted in hard clay, or mixed with stones, removal takes longer. Some crews charge separately for stump grinding or root cleanup if trees were removed.

    Grading and soil correction: This is the part many homeowners underestimate. Sod needs a smooth, firm base. If the yard is rough, rutted, or sloped the wrong way, the crew may need to bring in topsoil, fill low spots, and regrade so water drains away from the house. Even a modest 1 to 2 inches of topdressing over a large area adds material and labor. A bad slope is not cosmetic; it can create standing water and root failure.

    Soil type: Sandy soil drains fast and may need compost or additional organic matter to hold moisture. Heavy clay holds water, compacts easily, and can need tilling, amendment, or more careful grading. Neither is “better” by default; both just change the prep plan.

    Climate and season: In hot weather, the job has to move quickly because fresh sod dries out fast. In cooler, wetter periods, too much rain can delay grading or make soil too soft to work. In some regions, dormant-season installation is common for certain grasses; in others, summer stress makes that a bad idea.

    Irrigation: If there is no working irrigation system, you need a clear watering plan. Hand watering a large new sod install is possible only if someone can do it on schedule. A missing irrigation system is not always a deal-breaker, but it should be part of the planning and discussed with a contractor before work begins.

    Edges and details: Curves around beds, trees, paths, and utility boxes take more cutting and waste more material than a simple rectangle. More cuts mean more labor and more seams to keep tight.

    I would be suspicious of a quote that is far below the others without a clear explanation. Low bids sometimes leave out prep, topsoil, edging, cleanup, or the first critical watering instructions.

    What do I need to plan before calling a contractor?

    You need a measured area, a clear idea of the current site condition, and a short list of what you want the finished lawn to do. That sounds simple, but it is what separates a usable quote from a vague estimate.

    Start with the area. Measure length and width for each section of lawn, then subtract patios, beds, driveways, and other hardscape. If the yard has curves, break it into rectangles and triangles and round up. Contractors often quote with a waste factor because sod comes in pieces and the edges get trimmed. A modest waste allowance is normal; a huge one should be explained.

    Next, look at what is already there. Ask:
    – Is there existing turf to remove?
    – Is the soil soft or compacted?
    – Does water already pool anywhere after rain?
    – Are there tree roots, construction debris, or buried obstacles?
    – Is there a slope toward the house, sidewalk, or neighbor’s property?

    Then decide how finished you want the lawn to look on day one. A “good enough for family use” lawn and a “front-yard curb appeal” lawn are not the same. A front yard with visible seams and uneven elevation will look unfinished even if the sod is healthy.

    The site condition matters even more than the turf type in many cases. For example, a thin layer of new sod on compacted fill is a short-lived fix. Proper soil contact is the issue. Sod roots need contact with moist, firm soil so they can knit into the ground. If there is a gap under the sod, the roots struggle and the turf dries in sections.

    Because of that, I would also plan the project around a window of 1 to 2 days when someone can stay available. Fresh sod cannot be left alone for long on installation day, and the first watering period is when most mistakes show up. If you are going out of town, that is the wrong week to schedule it.

    When you call contractors, ask them to estimate from photos and a site visit, and ask what they need from you: access, water, parking, or utility marking. That sounds basic, but good planning reduces delays and avoids extra labor charges.

    How is sod installed, step by step?

    Sod is installed by preparing a level base, laying tight seams, and watering immediately so the roots can begin to bond with the soil. The details matter because a good-looking first day can still fail if the prep is wrong.

    1. Mark and measure the area precisely. Lay out the lawn in square feet or square meters and note beds, slopes, and obstacles. Verify that the total area matches the amount of sod ordered, plus a small waste margin for cuts. A mismatch between the measured site and the pallet count is the problem here, and it usually means either material shortage or extra leftover cost.
    2. Remove old grass, weeds, rocks, and debris. Strip existing turf if needed, and clear stones larger than about 1 inch, sticks, and construction waste. Verify that the surface is free of hard clumps and buried debris. Leaving roots, rubble, or weed mats in place causes bumps and weak seams.
    3. Correct grade and drainage. Shape the surface so water moves away from buildings and does not collect in low spots. A common target is a gentle fall away from structures, not a flat basin. Verify that no area holds visible water after a hose test or rain. A dip near the foundation or a hollow that stays wet will rot roots.
    4. Loosen and condition the top layer of soil. Tilling, scarifying, or raking the top 2 to 4 inches can improve root contact; on some sites, compost or screened topsoil is added. Verify that the surface is crumbly, not hard as concrete, and that any added material is blended evenly. A shiny compacted crust under the sod blocks rooting.
    5. Set edges and create clean borders. Cut beds, walkways, and hardscape lines before laying turf. Verify that edges are straight or smoothly curved, with no overhang into beds. Sloppy edges dry out first and make the job look rushed.
    6. Lay sod in a staggered pattern. Start along a straight edge and fit the pieces tightly like brickwork, staggering seams so they do not line up. Keep seams snug, with no visible gaps wider than about 1/2 inch. Long continuous seams are the problem, since they open as the sod shrinks or settles.
    7. Trim carefully around obstacles. Use a sharp knife to fit around sprinkler heads, trees, corners, and utilities. Verify that sprinkler heads stay exposed and that no sod covers access points. Burying heads or leaving large slivers makes those areas dry out and die.
    8. Roll or press the sod into contact with the soil. A lawn roller or firm tamping helps eliminate air pockets. Verify that the sod feels flat and bonded, not spongy or floating. Trapped air or loose pieces dry faster and root unevenly.
    9. Water immediately and deeply enough to moisten the base. Water soon after installation, not hours later, and continue with a frequent schedule during the first 1 to 2 weeks depending on heat and wind. Verify that the sod and the soil beneath it are moist, not puddled. Dry seams, curled edges, or soggy spots from overwatering are the warning signs.

    That sequence is the backbone of the job, but it is not just a checklist. The details decide whether the lawn roots in a few weeks or struggles for months. One overlooked patch of compacted soil can create a dead strip that is obvious by midsummer.

    How long does a sod project take, and what should the finished lawn look like?

    A typical residential sod project can take one day for installation or several days if there is significant removal, grading, or drainage work. The schedule depends more on prep than on the sod-laying itself.

    For a simple, small yard with access and minimal prep, the crew may strip, grade, and lay sod in the same day. For a larger or messier site, one day may be spent on removal and grading, then another on installation. If topsoil needs to be delivered or irrigation repaired, the project can stretch further. Weather can also push the schedule. A wet clay yard may be too soft to grade cleanly after rain, and hot, windy conditions compress the watering window.

    The first visual check is simple: the lawn should look level, tight, and deliberate. You should not see major humps, troughs, or long open seams. Edges should meet hard surfaces cleanly. There should be no standing water after irrigation or a normal rain. If the sod looks flat but springy, or if you can lift corners easily, the base is not firm enough.

    A healthy finished job also has the right feel underfoot. It should not squish like a sponge or crunch on dry dust. On day one, some seams may be visible, but they should not be gaping. Within a few weeks, if watering and weather cooperate, the grass should begin to knit into the soil. The exact rooting timeline depends on grass type, temperature, and moisture, so I would not promise a fixed number of days. Warm soil usually speeds rooting; cold soil slows it down.

    One thing a generic article often misses is timing with your calendar. If you have pets, kids, or outdoor furniture, plan for a period of restricted use. Heavy foot traffic too early can shift seams and bruise the sod before it has rooted. If the lawn is part of a main entrance, you may need temporary walk paths.

    The other thing people forget is cleanup. A good project does not end with turf on the ground. Excess soil, scraps, torn pieces, and packaging should be removed. If those details are ignored, the yard looks unfinished no matter how nice the grass is.

    When should you stop and change the plan?

    You should stop and change the plan when the site conditions make a standard sod install a poor fit. Sod is not the answer to every lawn problem, and forcing it onto the wrong base is how homeowners pay twice.

    Water pools for more than 24 hours after rain: The grade is wrong or the subsoil is holding water — Fix drainage and regrade before installing sod, or the roots may suffocate.

    The soil is hard enough that a screwdriver barely enters 3 to 4 inches: The ground is too compacted for good root contact — Loosen, amend, or replace the top layer before laying turf.

    The yard has large patches of construction debris, buried rock, or old concrete: The surface cannot be leveled properly — Remove the debris first; otherwise the sod bridges over hard spots and fails in uneven sections.

    The slope runs toward the house or a walkway: Water management is wrong — Regrade so runoff moves away from structures, or expect water damage and slippery surfaces.

    There is no reliable watering plan for the first 2 weeks: New sod may dry out fast, especially in hot or windy weather — Delay the project until someone can water on schedule or the site has working irrigation.

    The project includes steep banks or narrow strips under 18 inches wide: Those areas are hard to keep moist and anchor — Use a different groundcover, erosion control, or a specialist plan instead of standard sod.

    The lawn must be ready for heavy use immediately: Fresh sod needs time to root — If the site must handle traffic right away, sod is the wrong tool because seams can shift and edges can lift.

    You are expecting sod to fix poor soil without prep: It will not — Thin topsoil, drainage problems, and compaction still need correction, or the lawn will struggle from the start.

  • How to install sod correctly — The Complete Guide

    How to install sod correctly — The Complete Guide

    Last updated: September 10, 2026

    Key Takeaways

    • The answer is that the first 48 hours matter more than almost anything else.
    • Improve the top 4 to 6 inches of soil.
    • Begin watering within 30 minutes of laying the first pieces, and certainly before the edges curl.
    • Keep traffic off for the first 2 weeks.

    Fresh sod gives you an instant lawn. But only if the job is done fast, tight, and on prepared soil. This how install sod correctly — complete guide shows you how to lay it so the seams knit, the roots grab, and you don’t end up with raised edges, dry patches, or a lawn that fails in the first hot week.

    Who this guide is for — and what you need before you start

    How to install sod correctly — The Complete Guide

    This how install sod correctly — complete guide is for a homeowner or property manager installing sod over bare soil on a yard that already has decent drainage and a reasonable amount of sun, not for a site that needs grading, irrigation design, or erosion control on a slope. I’m assuming you can rent a plate compactor or hand tamper, have a shovel, a rake, a utility knife, a hose with a sprinkler, and can get the sod delivered the same day you plan to install it. I’m also assuming the soil is not frozen, waterlogged, or full of construction debris.

    How do you get sod to root instead of just sitting there? Simple: the first 48 hours matter more than almost anything else. Sod should go onto moist, firm, level soil, then get rolled for contact and watered deeply enough to keep the root zone damp without turning it into mud. Sounds easy. It isn’t. A 1-inch gap, a 2-inch lip, or a 24-hour delay in watering can be enough to leave a visible seam or a dead strip.

    Not every yard deserves sod. If your site needs more than about 2 inches of grade correction, if water pools after rain, if the area is shaded so heavily that grass struggles anyway, or if you are trying to stabilize a steep bank, this is the wrong fix for the real problem. Sod will not hide bad drainage, and it will not forgive a lumpy base. Brutal, but true.

    If you want a reference standard, the work lines up with basic turf establishment guidance from university extension programs and with common industry practice around soil contact, watering, and root establishment. The details vary by grass type, but the setup does not: prep, lay, press, water. For an overview of turf establishment, see the University of California Agriculture and Natural Resources and Penn State Extension guidance on lawn installation and watering.

    How do you install sod step by step?

    Prepare a smooth, firm base. Then lay the pieces in a staggered pattern, keep every seam tight, and water before the grass dries out. The order matters; try to “make it neat later,” and you usually end up with gaps and uneven edges. Messy on day one becomes expensive by day three.

    1. Clear the area completely. Remove old turf, weeds, rocks larger than 1 inch, sticks, строитель rubble, and any roots that will keep the sod from lying flat. A sod cutter makes this faster on larger yards; a shovel works for small patches. Verify that the surface is bare soil, not a mat of dead grass. If you still feel spongy thatch or hit hidden high spots with a rake, the base is not ready.
    2. Fix the rough grade before the sod arrives. Aim for a finished surface that falls away from the house at roughly 1/8 to 1/4 inch per foot for drainage. Fill low spots and shave high spots now; do not rely on sod thickness to hide them. Verify the slope with a long straight board and a level, or by eye if you are experienced. If water would sit in a shallow bowl after a rain, that is a problem that will show through the lawn.
    3. Improve the top 4 to 6 inches of soil. Loosen compacted soil and mix in compost if the soil is thin, sandy, or poor, but avoid burying the site in a thick layer of loose material. A light incorporation is enough; the goal is rootable soil, not a fluffy seedbed. Verify that the topsoil can be raked smooth without clods bigger than a golf ball. If the surface turns to paste when wet or dust when dry, stop and correct the soil condition first.
    4. Set the final grade and firm it lightly. Rake the soil smooth, then water it enough to settle dust and reveal soft spots. Let it dry to damp, not muddy, and then walk or tamp it until footprints are shallow. If you can sink more than about 1/2 inch with a normal step, it is too loose. Good sod needs contact with firm soil so roots can bridge into the ground.
    5. Start along a straight edge. Lay the first row against a driveway, sidewalk, patio, or other straight boundary. Unroll each piece so the long edges are tight and the ends butted, with no overlap and no visible gaps wider than about 1/4 inch. Stagger the end joints in the next row like bricks. Verify that seams do not line up across rows, because aligned joints create long weak lines that dry out and separate.
    6. Trim for curves, trees, and fixtures with a sharp knife. Cut from the back side of the sod so the blade bites cleanly. Leave a neat edge around sprinkler heads, drains, and tree trunks without wrapping sod against bark. Verify that no sod piece is draped over a fixture or forced to buckle. Buckling means the piece is too large for the space and will dry badly at the raised edge.
    7. Press the sod into the soil. After laying several pieces, use a lawn roller one-third full of water or a hand tamper on small areas. The purpose is not to crush the grass; it is to force soil-to-root contact. Verify that the sod does not rock underfoot and that the corners lie flat. If a corner lifts or the seam springs open after rolling, the base beneath it is uneven.
    8. Water immediately and deeply enough to wet the root zone. Begin watering within 30 minutes of laying the first pieces, and certainly before the edges curl. Soak the sod until the water reaches the soil under it; on a new installation, that usually means the top few inches stay evenly damp. Verify by lifting a corner of a spare piece or checking the edge of a seam: the soil underneath should be moist, not powdery. If runoff starts before the soil wets, shut off the water, let it soak in, and continue in cycles.
    9. Keep traffic off for the first 2 weeks. Limit walking to maintenance only. A single shortcut across fresh sod can shift seams and create depressions that collect heat and dry faster. Verify that pets, kids, and hoses are not dragging across the new lawn. If a seam opens, press it back immediately and water that area again.

    The details shift a bit by grass type. Warm-season sod such as bermudagrass, zoysia, or St. Augustine usually roots fastest in warm weather and wants consistent moisture without staying soggy. Cool-season sod such as Kentucky bluegrass or tall fescue can be installed in cooler periods and still needs the same soil contact and watering discipline. Same steps. Different pace.

    One thing people get wrong is thinking the sod itself solves grading. It does not. Sod is only about 1/2 inch to 1 inch thick, depending on the product and moisture content. If the base is lumpy, the lawn will be lumpy.

    What should the soil look and feel like before the first piece goes down?

    How to install sod correctly — The Complete Guide

    Smooth, slightly damp, and firm enough that a footprint is shallow — that is the target. Not soft enough to squish. That is the point where roots can make contact without the sod sinking unevenly. A common mistake is installing on loose fill or on hard-compacted dirt with no topsoil work at all. Both cause trouble, just in different ways.

    Three layers, really. First, remove what does not belong: rocks, sticks, construction debris, old turf, and roots. Second, shape the grade so water moves away from structures and does not pond. Third, set the firmness so the sod sits on the ground instead of floating over it.

    A simple check uses a 6-foot board and a level. Place the board on the ground and look for rocking. If it rocks, you have a high spot. If it bridges over a hollow, you have a low spot. Another practical check is with your shoe heel. If you leave deep impressions, the soil is too loose. If the soil is brick-hard, you need to roughen the surface and usually add a thin layer of workable topsoil rather than laying sod directly on that crust. Otherwise, the lawn is basically starting on concrete.

    The best time to correct soil problems is before delivery day, or at least before the sod is on site. Once the sod is on site, the clock starts. Many sod jobs fail not because the grass was bad, but because the soil underneath had no chance to support it. Extension guidance from land-grant universities consistently emphasizes soil preparation and moisture management as the main determinants of establishment. That is not fancy. It is just the part people rush. For more on soil prep and establishment, see Iowa State Extension and the University of Florida IFAS guidance.

    If you are dealing with imported topsoil, keep the layer modest. A deep loose layer can settle unevenly later and create a wavy lawn. If you are adding compost, blend it into the top 4 to 6 inches rather than leaving it as a separate blanket. That gives roots a consistent path downward.

    Honestly, I would skip sod on a yard with standing water after a normal rain until drainage is corrected. That is not a preference; it is a failure mode waiting to happen.

    How do you lay the pieces so they root evenly?

    Lay sod like masonry: stagger the joints, keep the edges tight, and avoid stretching the pieces. The first row sets the whole job. If that row wanders, every row after it inherits the mistake. No amount of fiddling later fixes a crooked start.

    Begin at the longest straight edge you have, such as a driveway or patio, and work across the yard. Lay each strip in a brick pattern so end seams do not line up with the seams in the row above or below. Push pieces snugly together without overlapping. A 1/4-inch gap may not look like much on day one, but it dries into a visible seam later. Do not stretch sod to make it fit. If a piece is too long, cut it cleanly with a sharp knife. Stretched sod shrinks back.

    Around curves, use smaller pieces and cut them to fit exactly. Around sprinkler heads, leave enough clearance that the head can rise and spray freely. A buried or crowded head creates dry rings and weak zones. Around trees, do not pile sod against the trunk flare. Leave the root flare visible; burying it invites rot and poor gas exchange at the base.

    If you are installing on a slope, work across the slope, not straight up and down it, and use stakes or sod staples only where the pieces tend to slip before rooting. On gentle slopes, close seams and rolling are usually enough. On steeper slopes, the installation method changes enough that the plain “lay and water” approach may not hold. In that case, the site may need erosion control fabric or professional grading first.

    Use a utility knife for most trimming. Serrated tools can tear the edges and leave frayed roots. Keep a bucket of scraps for small insets; many yards need a few short pieces to finish borders, and those scraps can fill awkward spots without forcing a bad cut.

    One useful habit is to step back every few rows. A straight edge looks straight when you are standing over it and crooked from 20 feet away. Catching that early saves a lot of rework.

    Why do some sod lawns fail even when the installation looks neat?

    Because neatness is not the same as root contact, water balance, or correct timing. A sod lawn can look perfect at noon and still be set up to fail by sunset if the soil is dry underneath, the edges are curled, or the watering schedule is wrong. Pretty is cheap; rooting is the real bill.

    The most common failure modes are edge drying, seam separation, and shallow rooting. Edge drying happens when a strip sits slightly raised or in a hot, windy exposure and loses moisture faster than the rest. Seam separation happens when pieces were laid with gaps, stretched, or walked on before they knit together. Shallow rooting happens when the sod gets only surface watering; the top stays green while roots never chase deeper moisture.

    Timing matters too. Sod should not sit rolled up in heat. Even a few hours in direct sun can stress the grass, especially on warm days. If delivery is delayed, keep the rolls shaded and dampened lightly if appropriate for the species, but do not soak them into a soggy mass. The goal is to keep them alive until they are down.

    A lot of people water as if they are trying to rinse the surface. That does little. Water has to penetrate to the soil beneath the sod. The first week is about frequent moisture checking, not a fixed calendar. If the top dries and the edges curl, the roots are still too short to survive stress. If the area stays swampy, oxygen drops and roots struggle. Both extremes are bad.

    The standard advice you hear online often misses one practical point: you need to inspect the underside of a lifted corner in the first days. That tells you more than the color of the top blade. Green blades can fool you. Moist soil under the mat tells the truth. The underside tells you whether the sod is actually bonding to the soil beneath it.

    I would rather see a new sod lawn a little thirsty than soaked all day, but never bone-dry. That balance is what most generic guides leave vague. The University of Wisconsin and Penn State both note that watering should support establishment, not drown it.

    When should you stop and use a different approach?

    Stop when the site conditions make basic sod installation the wrong tool. Sod is fast, but it is not magic, and a few situations will beat it before it starts.

    Standing water remains after 24 hours: The soil is not draining well enough for roots to establish — fix grading or drainage first, or the sod will rot and thin out in the wet spots.

    The grade changes by more than about 2 inches across the area: The surface is too uneven for a simple install — regrade the yard before laying sod, because sod thickness will not hide a significant dip or hump.

    The soil is compacted like hardpan or full of строитель debris: Roots cannot penetrate evenly — break up, remove, or replace the problem layer before installing, or expect patchy rooting and dry seams.

    The area is steep enough that a strip slides when you set it down: The slope is beyond a plain lay-and-water job — use erosion control methods or get the grade stabilized first, because loose sod will creep downhill.

    You cannot water within the first hour of installation: The sod will dry out before it can bond — delay delivery or postpone the job, because installation without immediate watering risks rapid failure.

    There is dense shade for most of the day: Many lawn grasses will struggle there even if the sod takes — choose a shade-tolerant turf only if the light level is truly adequate, or use a different groundcover instead.

    The yard has heavy traffic planned in the next 2 weeks: The new roots will be disturbed before they anchor — fence off the area or wait, because repeated traffic opens seams and compacts the soil.

    Those are not theoretical cautions. They are the situations where a conventional sod installation usually disappoints. If you push ahead anyway, you may get a green lawn for a week and a repair project for the next month.

    There is also a budget reality. If you are trying to cover a huge area with expensive sod and have no money left for soil work, irrigation, or delivery timing, the project is underfunded. Better to do half the yard correctly than all of it badly.

    What mistakes do people actually make with sod?

    They usually make the same five mistakes, and each one has a specific cost. The fixes are straightforward, which is why they are easy to skip.

    1. Laying sod over rough soil. The result is a bumpy lawn, hollow spots, and poor root contact. The fix is to grade and rake until the base is smooth before the first piece goes down.

    2. Leaving gaps between pieces. The result is dry seams that show as brown lines and can widen in heat. The fix is to butt the edges tightly and cut pieces to fit rather than stretch them.

    3. Watering too lightly. The result is roots that stay near the surface and grass that wilts fast in hot weather. The fix is to water long enough to wet the soil beneath the sod, then check moisture at a seam or lifted corner.

    4. Watering too much and too often. The result is soggy soil, weak roots, and a higher chance of disease pressure. The fix is to keep the root zone damp, not flooded, and let the surface breathe between waterings as roots begin to take.

    5. Ignoring the first 2 weeks. The result is foot traffic, pet damage, and shifted seams that never quite disappear. The fix is to protect the area and inspect problem spots daily.

    6. Buying sod before the site is ready. The result is a race against heat and time. The fix is to have the soil prepared, the tools ready, and the sprinkler plan set before delivery.

    A less obvious mistake is failing to match the sod type to the climate and light. A cool-season turf installed into heavy summer stress or a shade-sensitive turf under a tree canopy will not perform well, even if installed perfectly. That is not an installation error so much as a mismatch.

    If you want to know whether a problem came from the sod or the setup, look first at the soil line and the seams. Most bad lawns reveal their cause there. For product selection and maintenance basics, the National Turfgrass Evaluation Program is a useful external reference.

    How long does sod installation take, and what should you see afterward?

    A typical small-to-medium yard takes a full day for prep and install, plus 2 to 3 weeks of careful watering and protection while the roots knit in. The lawn should look uniformly flat the same day, stay evenly moist the first week, and resist light lifting at the edges as roots