

Last updated: September 10, 2026
Key Takeaways
- Fresh sod lives or dies in the first 3 to 6 weeks.
- You should water the sod immediately, press out air pockets, and keep foot traffic off it for at least 24 to 48 hours.
- It should soak the sod and the soil underneath until the root zone is wet to a depth of about 3 to 4 inches.
- Stay off it for 24 to 48 hours, and keep pets off longer if possible.
Fresh sod lives or dies in the first 3 to 6 weeks, and this sod aftercare, maintenance, troubleshooting — complete guide is built around that narrow stretch. Too little water, and the seams dry, shrink, and start to pull apart. Too much, and the roots stay shallow while the turf can rot, yellow, or pick up fungus. So the job is simple on paper and fussy in practice: hold the surface evenly moist at first, then coax the roots downward, then move to normal mowing and feeding once the sod is anchored. Straightforward. Not easy.
Who this guide is for — and what it assumes you already have
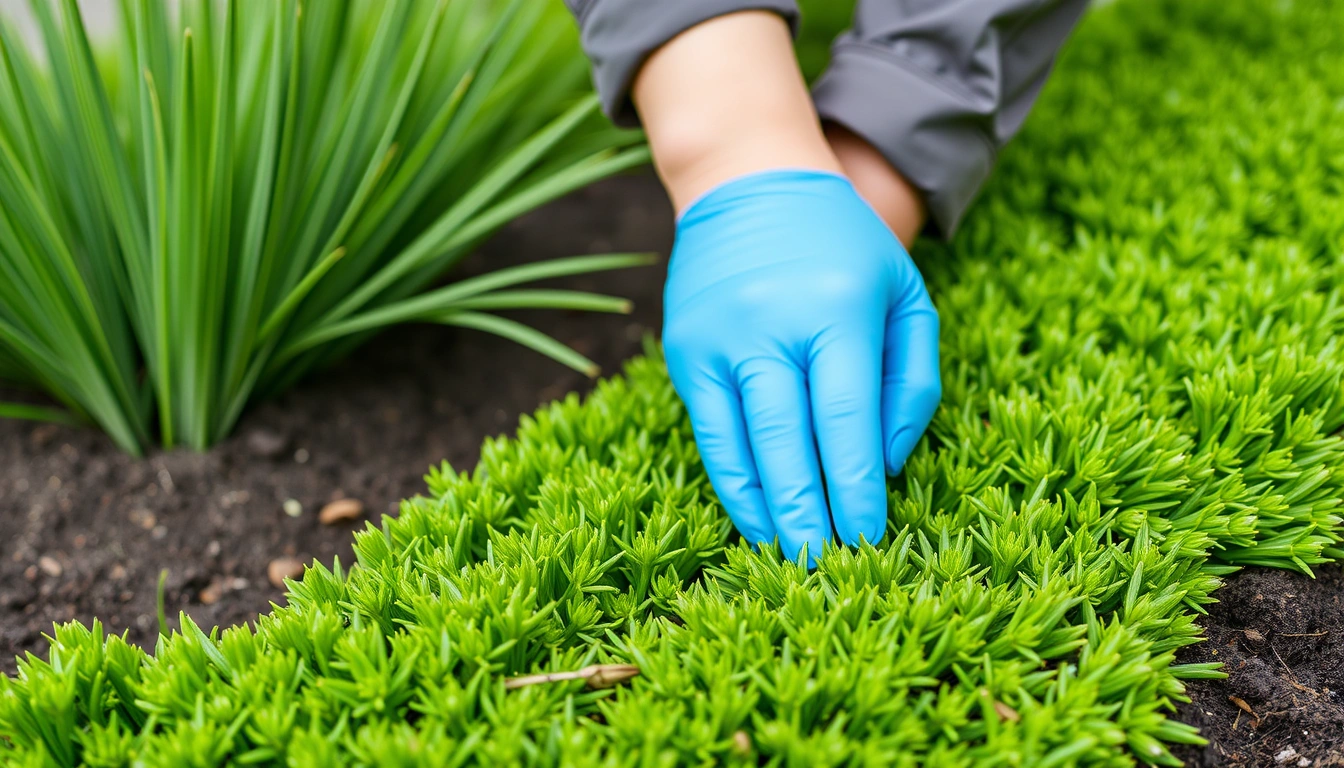
This sod aftercare, maintenance, troubleshooting — complete guide is for a homeowner or property manager who has just laid sod, or is about to, and wants to keep it alive long enough for the roots to knit into the soil. I’m assuming you already have the sod installed on a graded base, the seams are tight, and you know whether your turf is a cool-season grass like Kentucky bluegrass or tall fescue, or a warm-season grass like bermudagrass, zoysia, or St. Augustine. That matters because the pace of rooting, mowing, and watering changes with grass type and season.
I’m also assuming you have a hose, sprinkler, or irrigation timer, a sharp mower, and a way to check soil moisture by hand or with a screwdriver. No fancy meter required. What you do need is consistency, and a little note-taking helps in the first 14 days.
This sod aftercare, maintenance, troubleshooting — complete guide is not the guide for someone trying to salvage sod laid over rubble, compacted clay with no grading, or a yard that stays waterlogged after rain. If the base drains badly, if the sod was installed crooked with air pockets underneath, or if the grass is already dead and crispy across large areas, aftercare alone will not fix the job. In those cases, the problem is installation or site conditions, not maintenance. Harsh, but true.
Treat sod like a living transplant, not like carpet. And if you are unsure about the lawn’s condition, consult a local landscape professional or Cooperative Extension source before making major changes. The first 48 hours matter most, and the first 14 days matter more than any fertilizer or mowing trick. Remember one number: the top 1/2 inch to 1 inch of soil under the sod should stay moist during establishment, not soggy, not dry.
What should I do in the first 48 hours after sod is installed?
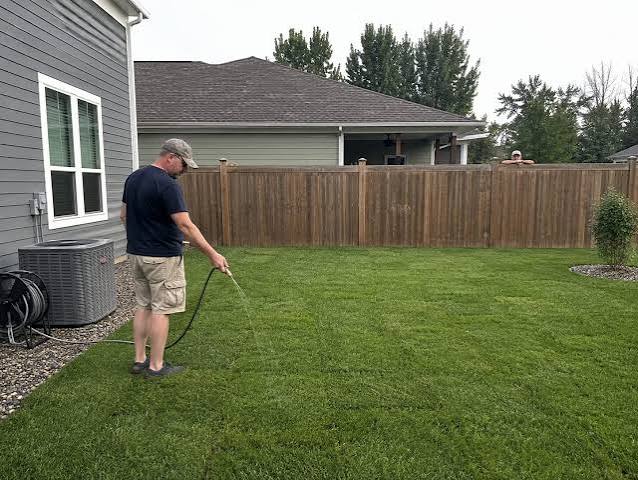
Water it immediately. Press out air pockets. Keep foot traffic off it for at least 24 to 48 hours. The first watering is not a light mist; it should soak the sod and the soil underneath until the root zone is wet to a depth of about 3 to 4 inches. That is deep enough to reach the roots without leaving the base puddled.
Here is the sequence I would follow:
- Water right away after installation. Run sprinklers or a hose-end sprinkler until the sod and the soil beneath it are wet through the root zone, usually 15 to 30 minutes per zone depending on nozzle output. Verify: lift one corner after watering; the soil under it should be damp, and the underside of the sod should not look dry or dusty. Problem sign: if the seam edges curl or the sod feels crunchy within a few hours, the first soak was too light.
- Check for full contact with the soil. Walk the lawn gently or press with a lawn roller only if the installer left one and the soil is firm, not muddy. I would not roll saturated clay. Verify: the sod lies flat with no hollow spots when you step on it. Problem sign: if your foot sinks into soft pockets or the sod bridges over voids, roots will dry out before they touch soil.
- Keep traffic off the lawn. Stay off it for 24 to 48 hours, and keep pets off longer if possible. Verify: seams stay aligned and edges do not shift. Problem sign: footprints that remain after watering mean the sod is too wet or the base is too soft.
- Water again before the surface dries out. In hot, windy weather, that can mean 2 to 4 irrigation cycles the first day. In cool, overcast weather, it may mean one deep soak and a shorter top-up. Verify: the top layer stays damp to the touch, not muddy. Problem sign: gray-green color, curling edges, or a dull, wilted look usually means the sod is losing moisture faster than it is taking up water.
- Look at the seams, not just the top. The gaps between pieces should stay closed. Verify: seams are tight enough that you do not see broad strips of soil. Problem sign: seams opening by more than a finger’s width often mean shrinkage from underwatering or poor cutting.
- Shade and wind change the schedule. South- and west-facing strips, slopes, and windy corners dry faster than shaded areas. Verify: those areas do not brown first. Problem sign: a lawn that looks fine in the middle but pale at the edges can point to uneven coverage, so check sprinklers and runoff before assuming the grass itself is failing.
- Do not fertilize or spray herbicide yet. Wait until the sod has started rooting, usually around 2 to 4 weeks for many lawns, longer in cool weather or on heavier soil. Verify: the turf resists a gentle tug. Problem sign: fertilizer on unrooted sod can push weak top growth before the roots are ready.
If the installer gave you a watering schedule, start there, but do not follow a schedule blindly if the weather changes. A 90°F day with wind strips moisture fast; a cloudy 65°F day does not. The best early check is often to peel back one edge in a hidden corner and feel the soil. If you are unsure what you are seeing, consult a lawn professional or extension agent before changing the watering plan.
How do I water sod without drowning it or letting it dry out?
Start with shorter, repeated cycles, then shift to deeper, less frequent watering as the roots anchor. The classic mistake is thinking “more water” means “more often.” It doesn’t. More often can keep the surface wet while starving roots of oxygen. Early on, the target is steady moisture in the top 1/2 inch to 1 inch; later, you want a deeper soak that pushes roots downward.
For most lawns, the watering pattern looks like this:
- Days 1 to 3: keep the sod evenly moist, often with multiple light-to-moderate cycles per day in hot weather.
- Days 4 to 14: reduce frequency slightly but increase depth; aim for moisture about 1 to 2 inches below the sod surface.
- Weeks 3 to 4: begin watering less often but more deeply, once roots are attaching.
- After rooting: move toward the normal schedule for your grass type and climate, often about 1 inch of water per week from rain and irrigation combined, though local conditions vary.
I’d rather see watering in the early morning and again in the late afternoon than a noon blast when evaporation is high. Midday watering burns off more water and can leave hot, wet patches that invite stress. Funny how fast a “helpful” routine can become a waste.
Watch for these signs as you adjust:
- Too dry: edges curling, a dull bluish cast, footprints staying visible, blades folding.
- Too wet: mushy footing, algae on the surface, a sour smell, yellowing that spreads in low spots.
- Uneven coverage: one section thriving while another dries first, which usually means sprinkler head spacing, pressure, or obstruction is off.
A practical test is the screwdriver test. Push a screwdriver or soil probe into the root zone. In well-watered, loose soil, it should enter with moderate resistance. If it stops hard after an inch or two, the zone is too dry or compacted. If it slides in like soup and water squishes up, you are overwatering or dealing with poor drainage.
If you use an irrigation system, verify throw distance and overlap. Heads should water head-to-head in most spray layouts, and rotor zones should be set to avoid dry arcs. A bad head pattern can make you think the whole lawn needs more water when only one strip does.
When can I mow new sod?
You can mow new sod when the grass has rooted enough that a gentle tug does not lift it, which is often around 2 to 3 weeks for fast-rooting conditions and longer in cool weather. The real trigger is not calendar time; it is anchoring. If the sod still lifts at the seam, mowing too soon will shear the roots and shift the pieces.
Here is the mowing routine I would use:
- Wait for rooting, not just greenness. Try to lift a corner in a hidden area. Verify: resistance is firm and the slab stays put. Problem sign: if the sod peels up easily, it is not ready.
- Set the mower high. Cut no more than one-third of the blade height at a time. For many lawns, that means starting around 3 to 4 inches and removing only the top 1/2 to 1 inch on the first cut. Verify: the lawn still has enough leaf surface to photosynthesize. Problem sign: scalping exposes seams and weakens the plant.
- Use a sharp blade. A dull blade tears fresh turf and leaves tan tips. Verify: the cut looks clean, not shredded. Problem sign: ragged blades after mowing often point to a blade that needs sharpening or replacement.
- Mow when the lawn is dry on top. Early afternoon is often better than morning after dew. Verify: clippings flow through the deck instead of clumping. Problem sign: wet clumps can smother young sod and hide uneven spots.
- Change direction on the second mow. If you mow north-south first, mow east-west next time. Verify: the turf stands back up and does not track into ruts. Problem sign: repeated traffic in one pattern can flatten soft sod and make it root unevenly.
- Do not bag every cut unless the clippings are heavy. Light clippings can return nutrients, but heavy piles should be removed. Verify: no thick mat is left behind. Problem sign: clumps on top of the sod block light and trap moisture.
- Avoid mowing when the soil is soft. If your shoe leaves deep prints, wait. Verify: the mower does not sink. Problem sign: wheel ruts create low spots that dry out or collect water later.
The first mow is where many new lawns get bruised. People wait just long enough for the grass to look “ready,” then cut it too short. That exposes the seams and turns a promising lawn into one that looks patchy for weeks. If the grass is tall, mow it down in two passes over several days instead of one aggressive cut.
For warm-season sod such as bermudagrass or zoysia, rooting and mowing can be faster in warm weather. For cool-season sod, especially in spring or a cool autumn, the schedule can stretch out. Late fall installation on cool soil slows everything, and I would not push mowing just because the calendar says it has been three weeks. If the lawn is still soft underfoot, a landscape contractor or local extension office can help you decide whether it is safe to mow.
What should I feed it, and when?
Feed sod lightly only after it is rooted enough to take up nutrients, and do not assume more fertilizer makes it root faster. That guess causes soft top growth, stress, and sometimes burn. For many lawns, a starter fertilizer with more phosphorus relative to nitrogen is used at installation if a soil test calls for it, but local fertilizer rules vary, and some areas restrict phosphorus unless a test shows need.
I’d handle feeding this way:
- At installation: use fertilizer only if the soil test or local guidance supports it.
- After rooting starts: apply a light feeding if growth is pale or slow.
- After establishment: move to your normal seasonal program based on grass type.
The safe rule is simple: follow a soil test, not a guess. A soil test from a university extension or reputable lab tells you pH and nutrient status. If you do not have one, I would avoid heavy feeding in the first couple of weeks. The grass needs roots more than it needs lush top growth.
Watch the turf for clues:
- Pale, weak color after rooting: may need nitrogen.
- Dark green top growth with poor rooting: often too much nitrogen too soon.
- Brown tips after fertilizing: can be fertilizer burn from uneven spread or application onto dry turf.
- Patchy growth with healthy moisture: can signal a nutrient imbalance, but it can also be sun, shade, or drainage.
If you use a spreader, calibrate it for the product you are using. The label gives the rate in pounds per 1,000 square feet or a comparable measure. Uneven spreader settings are a common source of streaking. I would never broadcast fertilizer on windy days or when rain is likely to wash it into pavement or drains.
For authoritative guidance, I’d point you to your local Cooperative Extension service and the University of Maryland Extension’s turfgrass pages, which explain soil tests, establishment, and nitrogen timing in practical terms. The USDA Natural Resources Conservation Service also has useful guidance on soil and water management. I’m naming those organizations because the source matters more than a blog shortcut.
What are the most common sod mistakes, and what do they cost?
Underwatering, overwatering, mowing too soon, and assuming the lawn is established before it actually is — those are the big ones. Every one of them slows root growth, and root growth is the whole point of the first month.
Here are the errors I see most often and what to do instead:
-
Watering on a fixed timer without checking the soil.
Consequence: the top stays wet while the root zone dries, or the lawn stays soggy in cool weather.
Better move: check moisture by hand, with a screwdriver, or by lifting a corner in a hidden spot. -
Letting edges dry out first.
Consequence: seams pull apart, corners curl, and the lawn starts to look checkerboarded.
Better move: give hot, windy, and sunny zones extra coverage or shorter intervals. -
Cutting too short on the first mow.
Consequence: scalping weakens the turf and exposes bare seams.
Better move: keep the mower high and remove no more than one-third of blade height. -
Dragging hoses, heavy furniture, or foot traffic across soft sod.
Consequence: shifted pieces, compressed soil, and broken new roots.
Better move: keep movement off the turf until it is anchored, usually at least 2 weeks. -
Applying fertilizer too early or too heavily.
Consequence: burn, weak top growth, and wasted product.
Better move: wait for rooting and follow a soil test or product label. -
Ignoring low spots and drainage problems.
Consequence: puddles, fungus pressure, yellowing, and shallow rooting.
Better move: fix grading, runoff, or irrigation overlap before the lawn fully establishes.
A generic article often says “keep it watered” and stops there. That is not enough. A lawn can be watered and still fail if one strip gets half the sprinkler output of the rest, if the sod never touched the soil below, or if the yard has a hardpan layer that blocks roots at 2 inches. The cost of those mistakes is usually not immediate death. It is uneven rooting, which shows up later as thin spots, drought stress, and a lawn that never quite stabilizes.
When should I stop following the standard schedule?
You should stop the standard schedule when the lawn is clearly wet enough to suffocate, dry enough to shrink, or damaged enough that maintenance alone will not fix it. The normal aftercare pattern is for healthy, properly installed sod on decent soil. It is the wrong tool in several specific situations:
The sod lifts easily after 2 to 3 weeks: the roots have not anchored — slow the mowing schedule, keep moisture steady, and check for poor soil contact or a dry base layer.
Water sits on the surface for more than a few hours after irrigation or rain: drainage is failing — reduce watering frequency, stop all extra irrigation, and correct grading or soil compaction before roots suffocate.
Edges curl while the center stays green: coverage is uneven — increase watering to the dry zones, check sprinkler throw, and look for wind exposure or heat from pavement.
Large areas turn yellow or brown in patches, not uniformly: that is often not simple thirst — inspect for irrigation gaps, trapped water, compaction, or disease-like patterns before adding more water.
Footprints stay visible and the turf feels brittle at the same time: the sod is under severe moisture stress — water deeply right away, then shorten the interval and verify actual penetration into the root zone.
The lawn was laid over a bad base, heavy shade, or chronic runoff: aftercare alone will not produce a durable lawn — adjust the site conditions or accept that this grass choice may not be right for the location.
If any of those conditions are