

Last updated: September 10, 2026
Key Takeaways
- The answer is that the first 48 hours matter more than almost anything else.
- Improve the top 4 to 6 inches of soil.
- Begin watering within 30 minutes of laying the first pieces, and certainly before the edges curl.
- Keep traffic off for the first 2 weeks.
Fresh sod gives you an instant lawn. But only if the job is done fast, tight, and on prepared soil. This how install sod correctly — complete guide shows you how to lay it so the seams knit, the roots grab, and you don’t end up with raised edges, dry patches, or a lawn that fails in the first hot week.
Who this guide is for — and what you need before you start
This how install sod correctly — complete guide is for a homeowner or property manager installing sod over bare soil on a yard that already has decent drainage and a reasonable amount of sun, not for a site that needs grading, irrigation design, or erosion control on a slope. I’m assuming you can rent a plate compactor or hand tamper, have a shovel, a rake, a utility knife, a hose with a sprinkler, and can get the sod delivered the same day you plan to install it. I’m also assuming the soil is not frozen, waterlogged, or full of construction debris.
How do you get sod to root instead of just sitting there? Simple: the first 48 hours matter more than almost anything else. Sod should go onto moist, firm, level soil, then get rolled for contact and watered deeply enough to keep the root zone damp without turning it into mud. Sounds easy. It isn’t. A 1-inch gap, a 2-inch lip, or a 24-hour delay in watering can be enough to leave a visible seam or a dead strip.
Not every yard deserves sod. If your site needs more than about 2 inches of grade correction, if water pools after rain, if the area is shaded so heavily that grass struggles anyway, or if you are trying to stabilize a steep bank, this is the wrong fix for the real problem. Sod will not hide bad drainage, and it will not forgive a lumpy base. Brutal, but true.
If you want a reference standard, the work lines up with basic turf establishment guidance from university extension programs and with common industry practice around soil contact, watering, and root establishment. The details vary by grass type, but the setup does not: prep, lay, press, water. For an overview of turf establishment, see the University of California Agriculture and Natural Resources and Penn State Extension guidance on lawn installation and watering.
How do you install sod step by step?
Prepare a smooth, firm base. Then lay the pieces in a staggered pattern, keep every seam tight, and water before the grass dries out. The order matters; try to “make it neat later,” and you usually end up with gaps and uneven edges. Messy on day one becomes expensive by day three.
- Clear the area completely. Remove old turf, weeds, rocks larger than 1 inch, sticks, строитель rubble, and any roots that will keep the sod from lying flat. A sod cutter makes this faster on larger yards; a shovel works for small patches. Verify that the surface is bare soil, not a mat of dead grass. If you still feel spongy thatch or hit hidden high spots with a rake, the base is not ready.
- Fix the rough grade before the sod arrives. Aim for a finished surface that falls away from the house at roughly 1/8 to 1/4 inch per foot for drainage. Fill low spots and shave high spots now; do not rely on sod thickness to hide them. Verify the slope with a long straight board and a level, or by eye if you are experienced. If water would sit in a shallow bowl after a rain, that is a problem that will show through the lawn.
- Improve the top 4 to 6 inches of soil. Loosen compacted soil and mix in compost if the soil is thin, sandy, or poor, but avoid burying the site in a thick layer of loose material. A light incorporation is enough; the goal is rootable soil, not a fluffy seedbed. Verify that the topsoil can be raked smooth without clods bigger than a golf ball. If the surface turns to paste when wet or dust when dry, stop and correct the soil condition first.
- Set the final grade and firm it lightly. Rake the soil smooth, then water it enough to settle dust and reveal soft spots. Let it dry to damp, not muddy, and then walk or tamp it until footprints are shallow. If you can sink more than about 1/2 inch with a normal step, it is too loose. Good sod needs contact with firm soil so roots can bridge into the ground.
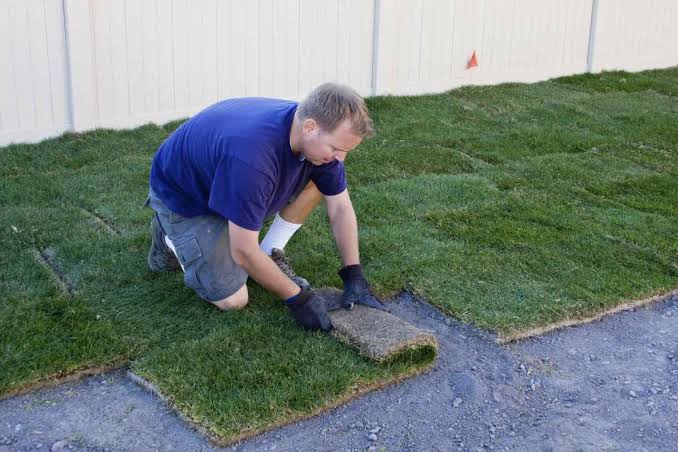
- Start along a straight edge. Lay the first row against a driveway, sidewalk, patio, or other straight boundary. Unroll each piece so the long edges are tight and the ends butted, with no overlap and no visible gaps wider than about 1/4 inch. Stagger the end joints in the next row like bricks. Verify that seams do not line up across rows, because aligned joints create long weak lines that dry out and separate.
- Trim for curves, trees, and fixtures with a sharp knife. Cut from the back side of the sod so the blade bites cleanly. Leave a neat edge around sprinkler heads, drains, and tree trunks without wrapping sod against bark. Verify that no sod piece is draped over a fixture or forced to buckle. Buckling means the piece is too large for the space and will dry badly at the raised edge.
- Press the sod into the soil. After laying several pieces, use a lawn roller one-third full of water or a hand tamper on small areas. The purpose is not to crush the grass; it is to force soil-to-root contact. Verify that the sod does not rock underfoot and that the corners lie flat. If a corner lifts or the seam springs open after rolling, the base beneath it is uneven.
- Water immediately and deeply enough to wet the root zone. Begin watering within 30 minutes of laying the first pieces, and certainly before the edges curl. Soak the sod until the water reaches the soil under it; on a new installation, that usually means the top few inches stay evenly damp. Verify by lifting a corner of a spare piece or checking the edge of a seam: the soil underneath should be moist, not powdery. If runoff starts before the soil wets, shut off the water, let it soak in, and continue in cycles.
- Keep traffic off for the first 2 weeks. Limit walking to maintenance only. A single shortcut across fresh sod can shift seams and create depressions that collect heat and dry faster. Verify that pets, kids, and hoses are not dragging across the new lawn. If a seam opens, press it back immediately and water that area again.
The details shift a bit by grass type. Warm-season sod such as bermudagrass, zoysia, or St. Augustine usually roots fastest in warm weather and wants consistent moisture without staying soggy. Cool-season sod such as Kentucky bluegrass or tall fescue can be installed in cooler periods and still needs the same soil contact and watering discipline. Same steps. Different pace.
One thing people get wrong is thinking the sod itself solves grading. It does not. Sod is only about 1/2 inch to 1 inch thick, depending on the product and moisture content. If the base is lumpy, the lawn will be lumpy.
What should the soil look and feel like before the first piece goes down?
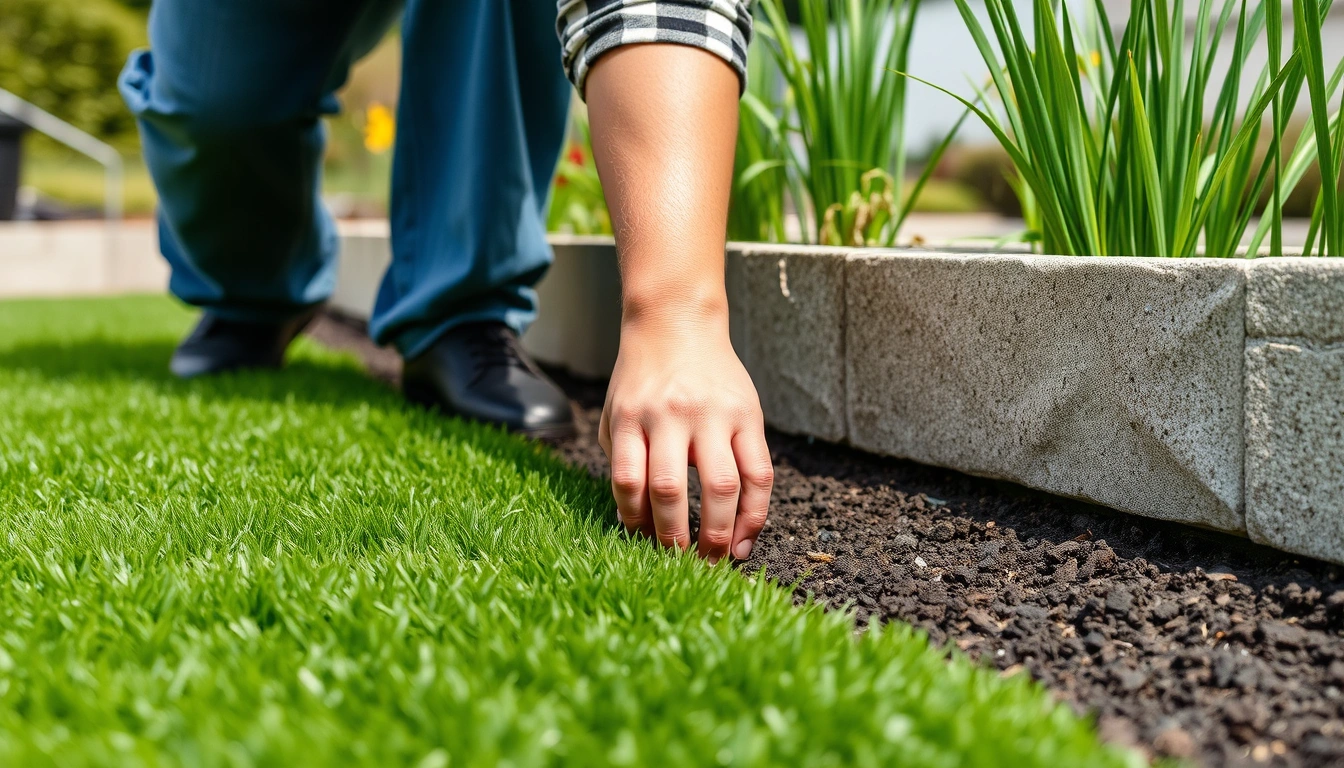
Smooth, slightly damp, and firm enough that a footprint is shallow — that is the target. Not soft enough to squish. That is the point where roots can make contact without the sod sinking unevenly. A common mistake is installing on loose fill or on hard-compacted dirt with no topsoil work at all. Both cause trouble, just in different ways.
Three layers, really. First, remove what does not belong: rocks, sticks, construction debris, old turf, and roots. Second, shape the grade so water moves away from structures and does not pond. Third, set the firmness so the sod sits on the ground instead of floating over it.
A simple check uses a 6-foot board and a level. Place the board on the ground and look for rocking. If it rocks, you have a high spot. If it bridges over a hollow, you have a low spot. Another practical check is with your shoe heel. If you leave deep impressions, the soil is too loose. If the soil is brick-hard, you need to roughen the surface and usually add a thin layer of workable topsoil rather than laying sod directly on that crust. Otherwise, the lawn is basically starting on concrete.
The best time to correct soil problems is before delivery day, or at least before the sod is on site. Once the sod is on site, the clock starts. Many sod jobs fail not because the grass was bad, but because the soil underneath had no chance to support it. Extension guidance from land-grant universities consistently emphasizes soil preparation and moisture management as the main determinants of establishment. That is not fancy. It is just the part people rush. For more on soil prep and establishment, see Iowa State Extension and the University of Florida IFAS guidance.
If you are dealing with imported topsoil, keep the layer modest. A deep loose layer can settle unevenly later and create a wavy lawn. If you are adding compost, blend it into the top 4 to 6 inches rather than leaving it as a separate blanket. That gives roots a consistent path downward.
Honestly, I would skip sod on a yard with standing water after a normal rain until drainage is corrected. That is not a preference; it is a failure mode waiting to happen.
How do you lay the pieces so they root evenly?
Lay sod like masonry: stagger the joints, keep the edges tight, and avoid stretching the pieces. The first row sets the whole job. If that row wanders, every row after it inherits the mistake. No amount of fiddling later fixes a crooked start.
Begin at the longest straight edge you have, such as a driveway or patio, and work across the yard. Lay each strip in a brick pattern so end seams do not line up with the seams in the row above or below. Push pieces snugly together without overlapping. A 1/4-inch gap may not look like much on day one, but it dries into a visible seam later. Do not stretch sod to make it fit. If a piece is too long, cut it cleanly with a sharp knife. Stretched sod shrinks back.
Around curves, use smaller pieces and cut them to fit exactly. Around sprinkler heads, leave enough clearance that the head can rise and spray freely. A buried or crowded head creates dry rings and weak zones. Around trees, do not pile sod against the trunk flare. Leave the root flare visible; burying it invites rot and poor gas exchange at the base.
If you are installing on a slope, work across the slope, not straight up and down it, and use stakes or sod staples only where the pieces tend to slip before rooting. On gentle slopes, close seams and rolling are usually enough. On steeper slopes, the installation method changes enough that the plain “lay and water” approach may not hold. In that case, the site may need erosion control fabric or professional grading first.
Use a utility knife for most trimming. Serrated tools can tear the edges and leave frayed roots. Keep a bucket of scraps for small insets; many yards need a few short pieces to finish borders, and those scraps can fill awkward spots without forcing a bad cut.
One useful habit is to step back every few rows. A straight edge looks straight when you are standing over it and crooked from 20 feet away. Catching that early saves a lot of rework.
Why do some sod lawns fail even when the installation looks neat?
Because neatness is not the same as root contact, water balance, or correct timing. A sod lawn can look perfect at noon and still be set up to fail by sunset if the soil is dry underneath, the edges are curled, or the watering schedule is wrong. Pretty is cheap; rooting is the real bill.
The most common failure modes are edge drying, seam separation, and shallow rooting. Edge drying happens when a strip sits slightly raised or in a hot, windy exposure and loses moisture faster than the rest. Seam separation happens when pieces were laid with gaps, stretched, or walked on before they knit together. Shallow rooting happens when the sod gets only surface watering; the top stays green while roots never chase deeper moisture.
Timing matters too. Sod should not sit rolled up in heat. Even a few hours in direct sun can stress the grass, especially on warm days. If delivery is delayed, keep the rolls shaded and dampened lightly if appropriate for the species, but do not soak them into a soggy mass. The goal is to keep them alive until they are down.
A lot of people water as if they are trying to rinse the surface. That does little. Water has to penetrate to the soil beneath the sod. The first week is about frequent moisture checking, not a fixed calendar. If the top dries and the edges curl, the roots are still too short to survive stress. If the area stays swampy, oxygen drops and roots struggle. Both extremes are bad.
The standard advice you hear online often misses one practical point: you need to inspect the underside of a lifted corner in the first days. That tells you more than the color of the top blade. Green blades can fool you. Moist soil under the mat tells the truth. The underside tells you whether the sod is actually bonding to the soil beneath it.
I would rather see a new sod lawn a little thirsty than soaked all day, but never bone-dry. That balance is what most generic guides leave vague. The University of Wisconsin and Penn State both note that watering should support establishment, not drown it.
When should you stop and use a different approach?
Stop when the site conditions make basic sod installation the wrong tool. Sod is fast, but it is not magic, and a few situations will beat it before it starts.
Standing water remains after 24 hours: The soil is not draining well enough for roots to establish — fix grading or drainage first, or the sod will rot and thin out in the wet spots.
The grade changes by more than about 2 inches across the area: The surface is too uneven for a simple install — regrade the yard before laying sod, because sod thickness will not hide a significant dip or hump.
The soil is compacted like hardpan or full of строитель debris: Roots cannot penetrate evenly — break up, remove, or replace the problem layer before installing, or expect patchy rooting and dry seams.
The area is steep enough that a strip slides when you set it down: The slope is beyond a plain lay-and-water job — use erosion control methods or get the grade stabilized first, because loose sod will creep downhill.
You cannot water within the first hour of installation: The sod will dry out before it can bond — delay delivery or postpone the job, because installation without immediate watering risks rapid failure.
There is dense shade for most of the day: Many lawn grasses will struggle there even if the sod takes — choose a shade-tolerant turf only if the light level is truly adequate, or use a different groundcover instead.
The yard has heavy traffic planned in the next 2 weeks: The new roots will be disturbed before they anchor — fence off the area or wait, because repeated traffic opens seams and compacts the soil.
Those are not theoretical cautions. They are the situations where a conventional sod installation usually disappoints. If you push ahead anyway, you may get a green lawn for a week and a repair project for the next month.
There is also a budget reality. If you are trying to cover a huge area with expensive sod and have no money left for soil work, irrigation, or delivery timing, the project is underfunded. Better to do half the yard correctly than all of it badly.
What mistakes do people actually make with sod?
They usually make the same five mistakes, and each one has a specific cost. The fixes are straightforward, which is why they are easy to skip.
-
Laying sod over rough soil. The result is a bumpy lawn, hollow spots, and poor root contact. The fix is to grade and rake until the base is smooth before the first piece goes down.
-
Leaving gaps between pieces. The result is dry seams that show as brown lines and can widen in heat. The fix is to butt the edges tightly and cut pieces to fit rather than stretch them.
-
Watering too lightly. The result is roots that stay near the surface and grass that wilts fast in hot weather. The fix is to water long enough to wet the soil beneath the sod, then check moisture at a seam or lifted corner.
-
Watering too much and too often. The result is soggy soil, weak roots, and a higher chance of disease pressure. The fix is to keep the root zone damp, not flooded, and let the surface breathe between waterings as roots begin to take.
-
Ignoring the first 2 weeks. The result is foot traffic, pet damage, and shifted seams that never quite disappear. The fix is to protect the area and inspect problem spots daily.
-
Buying sod before the site is ready. The result is a race against heat and time. The fix is to have the soil prepared, the tools ready, and the sprinkler plan set before delivery.
A less obvious mistake is failing to match the sod type to the climate and light. A cool-season turf installed into heavy summer stress or a shade-sensitive turf under a tree canopy will not perform well, even if installed perfectly. That is not an installation error so much as a mismatch.
If you want to know whether a problem came from the sod or the setup, look first at the soil line and the seams. Most bad lawns reveal their cause there. For product selection and maintenance basics, the National Turfgrass Evaluation Program is a useful external reference.
How long does sod installation take, and what should you see afterward?
A typical small-to-medium yard takes a full day for prep and install, plus 2 to 3 weeks of careful watering and protection while the roots knit in. The lawn should look uniformly flat the same day, stay evenly moist the first week, and resist light lifting at the edges as roots